Distribution, Exports & Sharing
Learn how to distribute schedules to your project team, export to PDF, and share via links and QR codes.
Creating your distribution list
Creating a distribution list of your external design team means your schedules can be in the hands of your architects, contractors, consultants and wider project team with just one click. All design team members from your company that are assigned to the project are automatically included on the distribution list. To learn how to add members of your company to a project, click here.
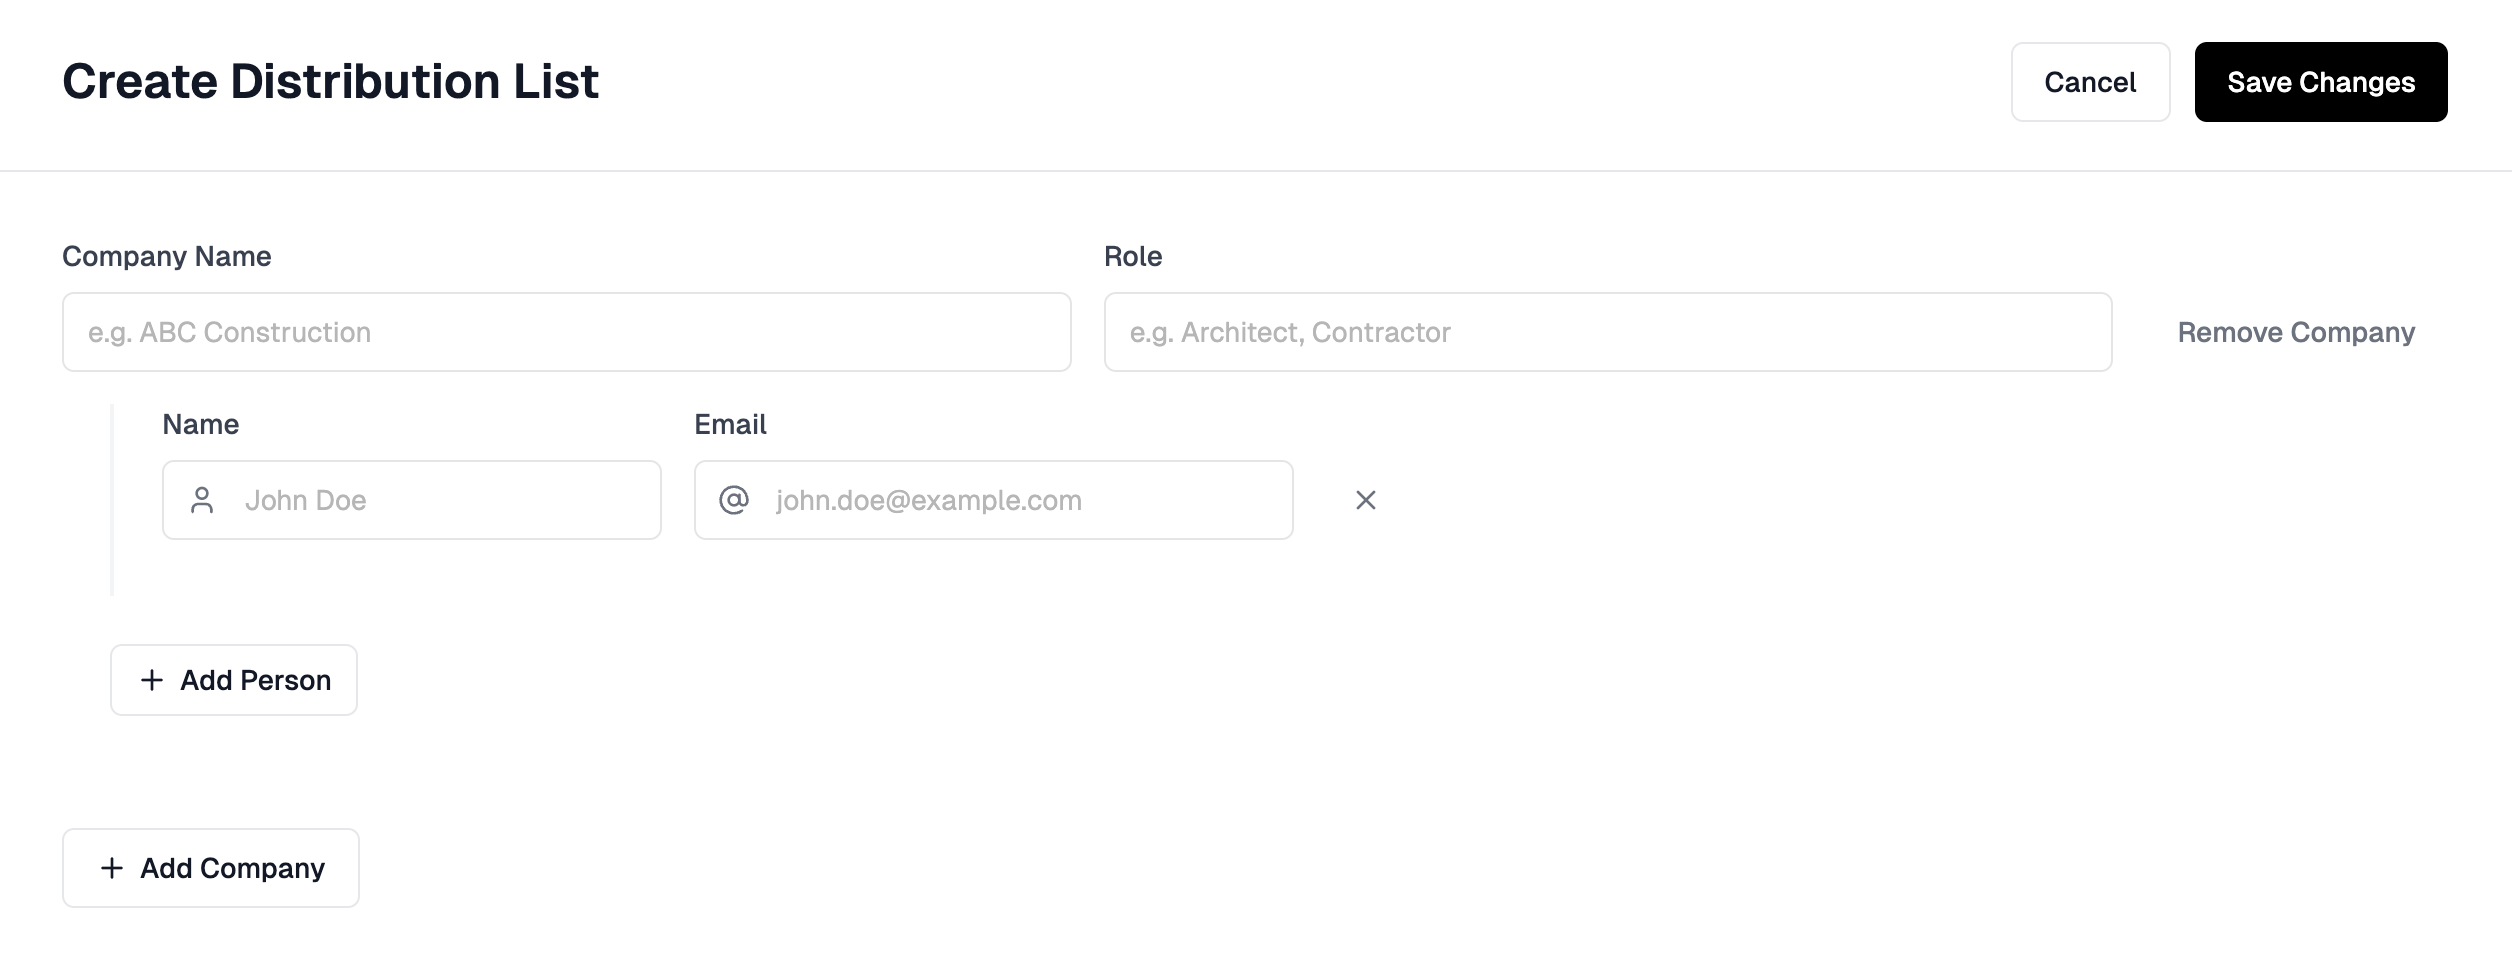
- Open the Issue Report tab — On the Issue Report tab, click the create distribution list button in the middle of the page.
- Add stakeholder information — Enter the company information for the first stakeholder and relevant team members. For example, the architects may have assigned 2 team members to this project, so you can add both of their names and emails to your distribution list.
- Add additional contacts — Continue to add as many companies/people to your list. Remember you can control which schedules are shared with people on your distribution list.
- Save your list — Click Save Changes on the right when you are finished adding people to your list.
- Edit your list — To make changes or additions to your distribution list at any time, click Edit.
Issuing your first schedule to your distribution list
If you have one or more schedules you have completed and wish to share with the external project team, and you have created a distribution list, then you can do so on the Issue Report tab.
- Ensure schedules are locked — Ensure you have locked any schedules that have Revision Control enabled you want to share.
- Navigate to Issue Report — Go to the Issue Report tab for the project with the schedules you want to issue.
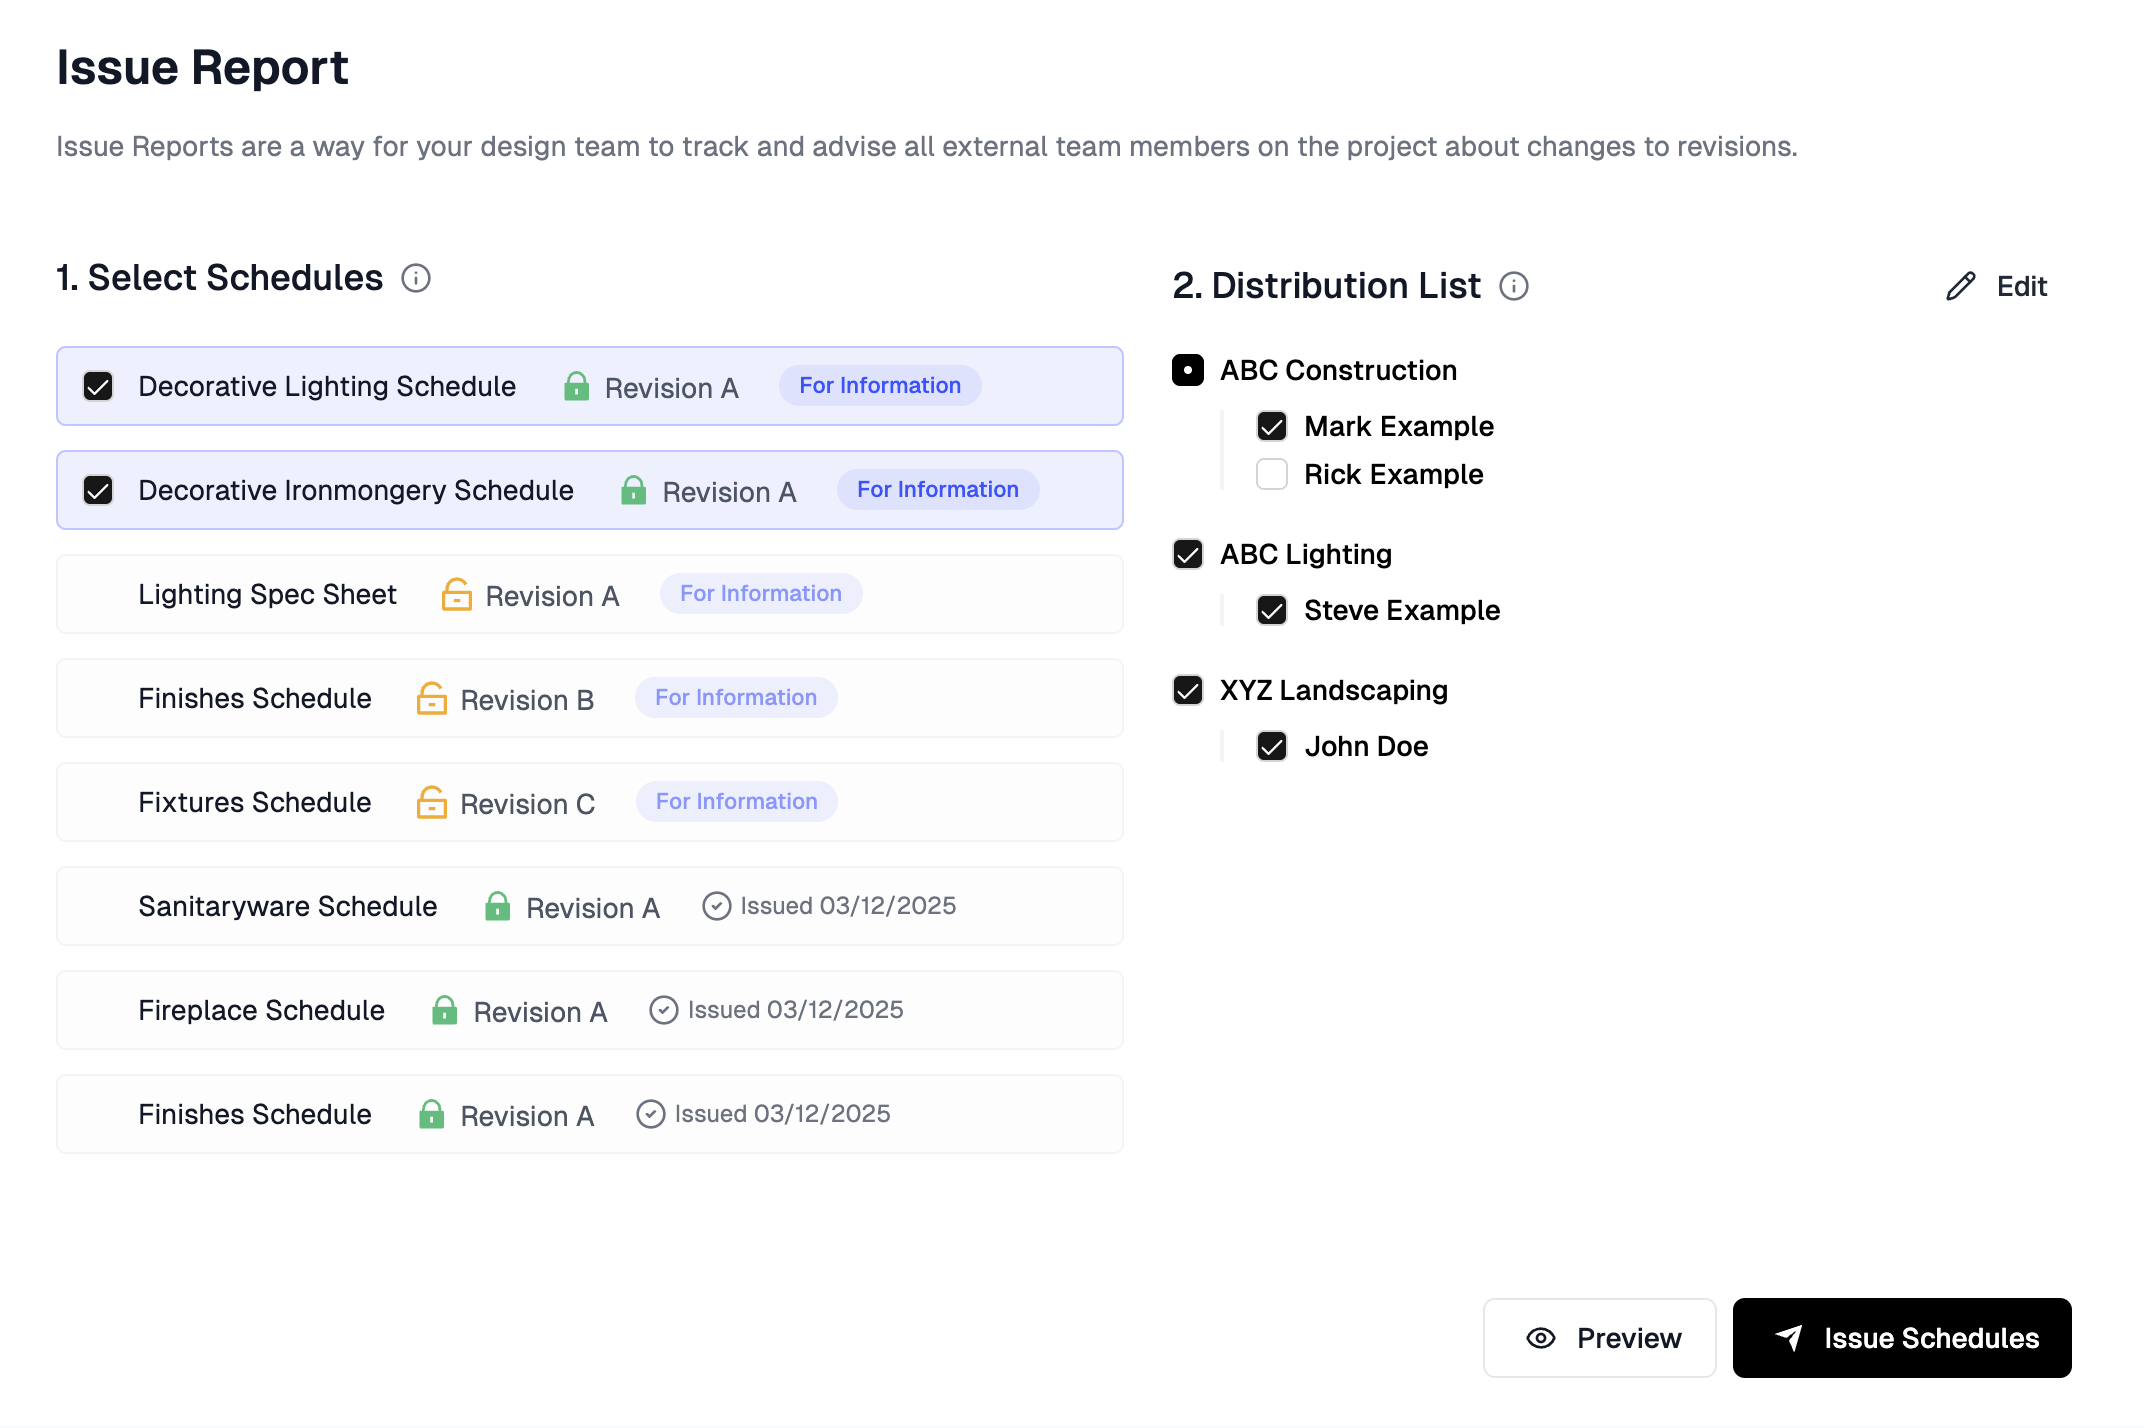
- Select schedules — Select the schedules from the list that are ready to be issued. Note that schedules which are not locked, will not be available to select. Learn more about locking schedules.
- Select recipients — Select the companies or specific team members from your distribution list who you would like to share the schedules with.
- Preview your Issue Report — You can preview your Issue Report sheet by clicking the preview button in the bottom right corner of your screen. Issue Report sheets advise the date, the status and revision of each schedule that will be sent out.
- Issue the schedules — When you are ready to send those schedules out to the selected stakeholders, click Issue Schedules. Inspec will automatically generate PDF exports of the schedules you have selected which will be attached to the distribution email, along with a copy of the Issue Report sheet.
Internal distribution of schedules
The project design team is automatically included on the distribution list for all issued documents. When a design team member issues a set of schedules, all team members will receive an email containing those schedules and the accompanying issue report.
Learn more about adding company users to the project design team.
Distributing schedules with revision control disabled
When first creating a schedule, you are given the option to toggle on or off Revision Control. If you selected to turn this feature off, it is not possible to then distribute the schedule through Issue Report.
Besides Issue Report, there are three alternative options designers often use to share their schedules:
- Send your trades, consultants or clients the schedule using a Shareable Link.
- Export the schedule as a PDF and manually distribute this.
- Generate a QR code for direct access to all schedules from site.
Revision Control enabled schedules can also be shared with a link or by exporting as a PDF.
Shareable Links
Shareable links allow you to distribute each schedule in a secure, view-only format to anyone with access to the link. When Revision Control is enabled, shareable links will automatically display the most recently locked revision. Links do not expire once they are sent.
If you disable Revision Control on your schedule and then share a link, the schedule will be a live view. To view any updates made, the person with the link will need to simply refresh the page. You do not need a new link each time you make changes.
Creating a shareable link for individual schedules
To create a shareable link for an individual schedule:
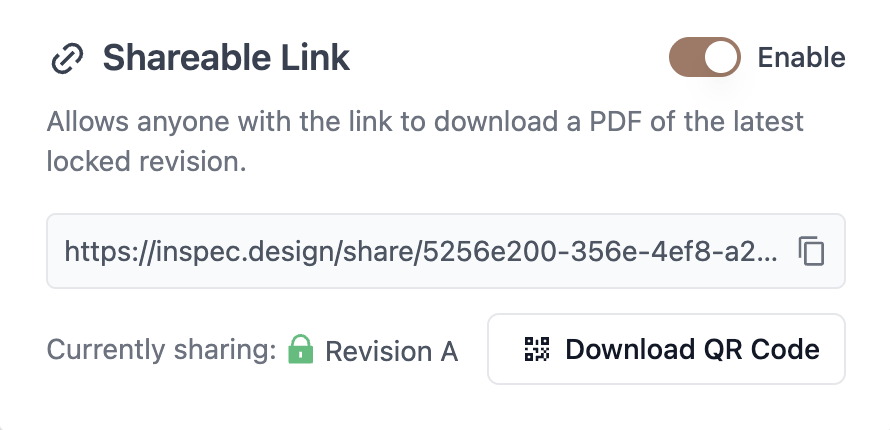
- Open the Share menu - On the schedule page, click on the black Share button in the top right corner of your screen.
- Enable the shareable link - Toggle on the Enable button for the shareable link (toggle off will disable the link for anyone who has it).
- Copy the link - Click on the Copy icon at the end of the link.
Creating a shareable link for an entire project's schedules
If your project has multiple schedules, you may find it easier to generate one single link which includes every active schedule for the project in a combined PDF format.
To generate a shareable link for your project:
- Open Project Settings - On the project page, click on the Settings button in the top right corner of your screen.
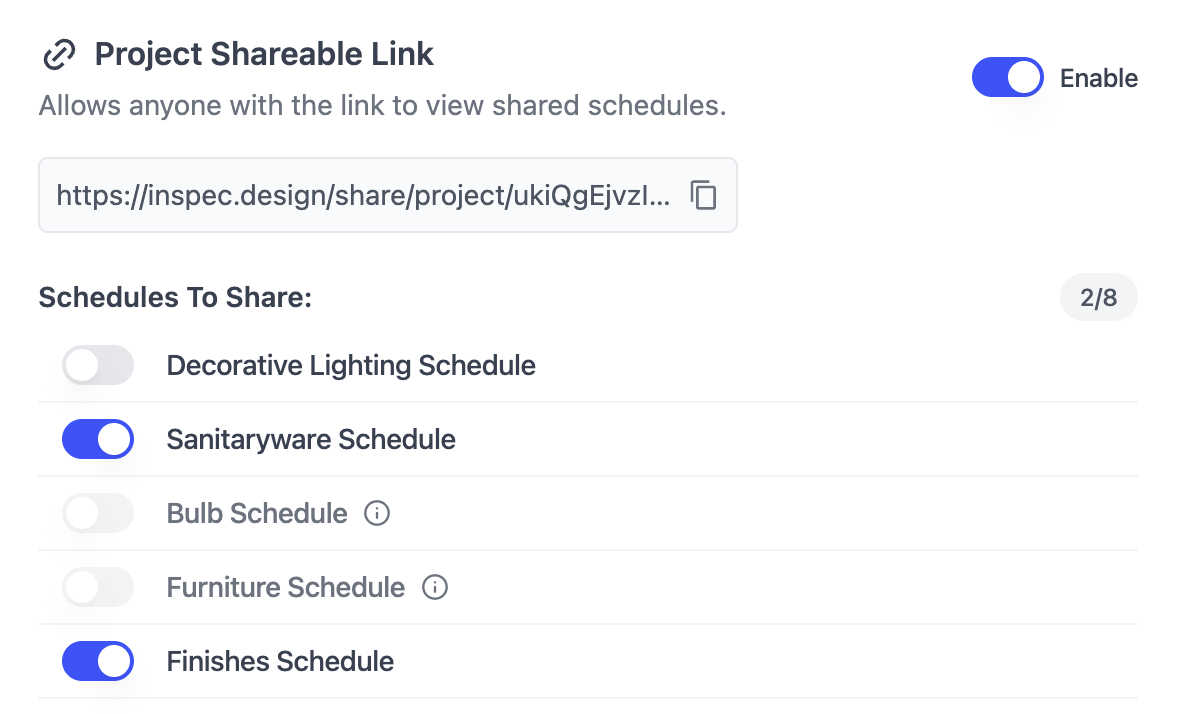
- Select Exports tab - Click on the Exports tab and toggle on to enable Project Shareable Link.
- Enable Schedules to Share - The toggle on indicates which schedules will be included within the link (schedules will be toggled on automatically if you have shared a link to that individual schedule previously). If you use Revision Control, your schedule must be locked before it will be visible. Learn more about Revision Control.
- Copy the Link - Click on the Copy icon at the end of the link.
Exporting a PDF
PDF export functionality enables designers to share draft schedules with external design teams, print hard copies, or archive documents to local servers. Schedules can be exported in any state and are automatically formatted to A4 page size. To update your default page size, go to Company Settings.
Exporting a schedule to PDF will not automatically issue your schedule to your distribution list. Issuing a schedule to the external design team through Inspec must be done with Issue Report. Learn more about Issue Report.
To export your schedule or spec sheet to PDF:
- Open the Share menu — Click on the black Share button in the top right corner of your screen.
- Download the PDF — Under the Export PDF heading, click on the black Download PDF button. The schedule will then save to your downloads automatically.
Overview of schedule page layout
All schedules produced on Inspec will export with our sleek layout and your company branding, including a title page, header and footer with company, project and schedule details, and the schedule disclaimer (if one has been included in the template). By default, all fields, hyperlinks and attachments are visible on schedule PDF exports, but you can customise the information shown on your schedule title page, as well as the section images, and visible fields throughout the schedule.
To control the image size in your sections or the visibility of particular fields in your schedule, click on the Settings button in the top right corner of the screen and scroll to Export Settings. Changes made to the default settings will only apply to that schedule. You will need to adjust any other schedules within that project to be the same.
To learn more about schedule export settings, click here.
To learn more about customising the schedule cover page, click here.
Resizing your field widths
You have full control over the width of each field in your schedules. Depending on how many fields you have, you may need to scroll horizontally while editing to see all your columns.
When a PDF is exported, the field widths are automatically adjusted to ensure all the fields fit across the width of an A4 page. The field widths are calculated relative to the width they appear in the schedule page, so if you want a field to be wider or narrower in the exported PDF, simply adjust the width in the schedule page.
Dimension field types will always display vertically stacked in exports — one measurement below the other — regardless of the column width you've set while editing.
Generating a schedule QR code
Inspec has introduced a printable QR code as part of the shareable link feature. This provides a convenient method for trades and consultants to access schedule information directly from site via mobile devices.
The page was designed to be printed and pinned up onsite for quick access.
To download a printable QR code:
- Open the Share menu — Click on the Share button in the top right corner of your screen.
- Enable the shareable link — Ensure that shareable link is enabled. See Creating a shareable link for more information.
- Download the QR code — Click on the Download QR Code button. This will automatically save a copy of the printable QR page to your downloads, ready to be printed or sent to the team onsite.