Intro to Suppliers
Learn how to create, manage and use suppliers across your projects.
What is a Supplier Database
The Supplier Database is your centralised hub for managing all supplier contact details and information in one place. Everything you need to know about your suppliers can now be stored directly in Inspec, from email addresses and websites to trade discounts and custom notes.
The Supplier Database also works hand-in-hand with your Product Catalogue and Schedules. When you add a product that includes a supplier name, Inspec automatically links them together, making it easy to view all products from a specific supplier and streamline your procurement process. Similarly, if you have a Supplier Field Type in your schedule, you can pull supplier information into your schedule directly from your database. To learn more about the Supplier field type, click here.
Navigating the Suppliers page
To access your Supplier Database, go to the side bar on the left side of your screen and click on the Suppliers tab.
You can create a new supplier by clicking on the + Create Supplier button in the top right corner of the page.
You can edit/delete categorisation tags by clicking on the Manage Tags button in the top right corner of the page.
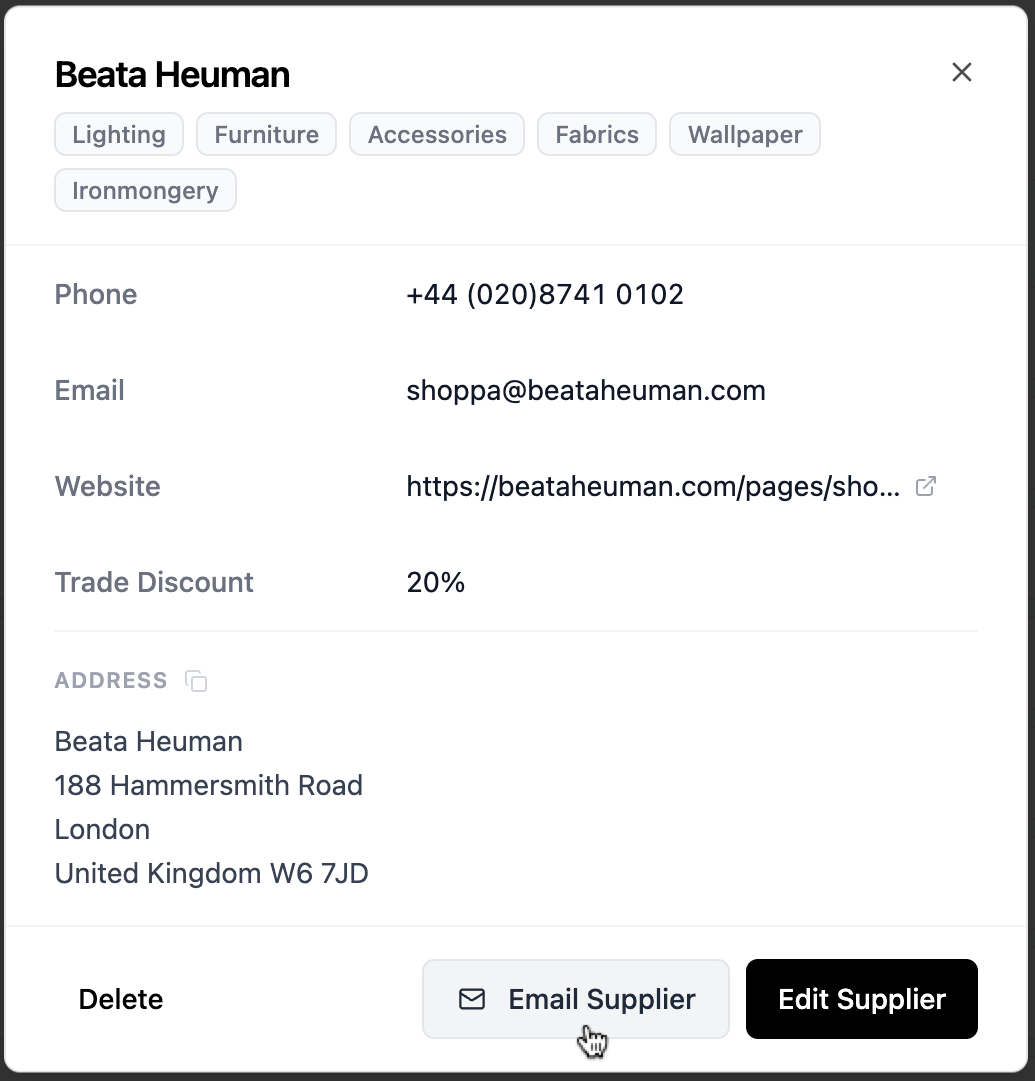
You can contact a supplier directly from Inspec without needing to leave the platform. Simply select the supplier in your database that you wish to contact, and click the Email Supplier button on the pop-up.
To the right side of the page, you will see a search bar, a filter icon and a sort by dropdown menu. You can filter your suppliers by trade discount or by the custom tags you assign when creating a supplier. To learn more about adding categorisation tags, click here.
Creating a new Supplier
There are three ways to add a new supplier to your database:
- Create directly from the Supplier tab - Manually add a supplier with all their details in one go.
- Add automatically through Products - When you add a product to your catalogue, you can create a new supplier directly from the product creation process.
- Add automatically through a Supplier Field Type in schedules - When you enter a supplier name in a Supplier field, Inspec will check your database for a match. If the supplier doesn't already exist, it will prompt you to create it in your Supplier Database. There's no need to navigate away, everything can be done right where you're working.
Adding multiple contacts under one supplier
Some suppliers have multiple people you might need to reach. If you have account managers, sales representatives, or specific people at a company that you often liaise with, then instead of keeping separate records for each person, you can add them all as contacts within a single supplier entry.
To add a contact to a supplier:
- Find the supplier entry you want to add a contact to and click the three dots icon on the far right of the tile. Choose Edit Supplier.
- Click + Add Contact on the bottom left of the pop-up screen.
- Enter their name and email address.
- You can add as many contacts as you like.
- When you have finished making your updates, click Save in the bottom right corner.
Benefits of adding tags for categorisation
The bigger your Supplier Database grows, the easier it will be to filter through your suppliers by custom tags. Tags help you organise and categorise suppliers in ways that make sense for how your company actually works.
For example, you might tag suppliers by the type of products they offer, such as "Lighting," "Fabrics," "Furniture," or "Hardware."
Some may tag suppliers by location if they prefer to specify products locally made, others tag based on what the supplier offers: "Stocked Items," "Express Shipping," or "Made to Order."
When you're starting a new project and need to source lighting fixtures, simply filter by your "Lighting" tag to see all relevant suppliers at once. Need to prioritise suppliers with the best trade discounts? Combine tag filters with discount sorting to make strategic procurement decisions quickly.
Contacting a supplier
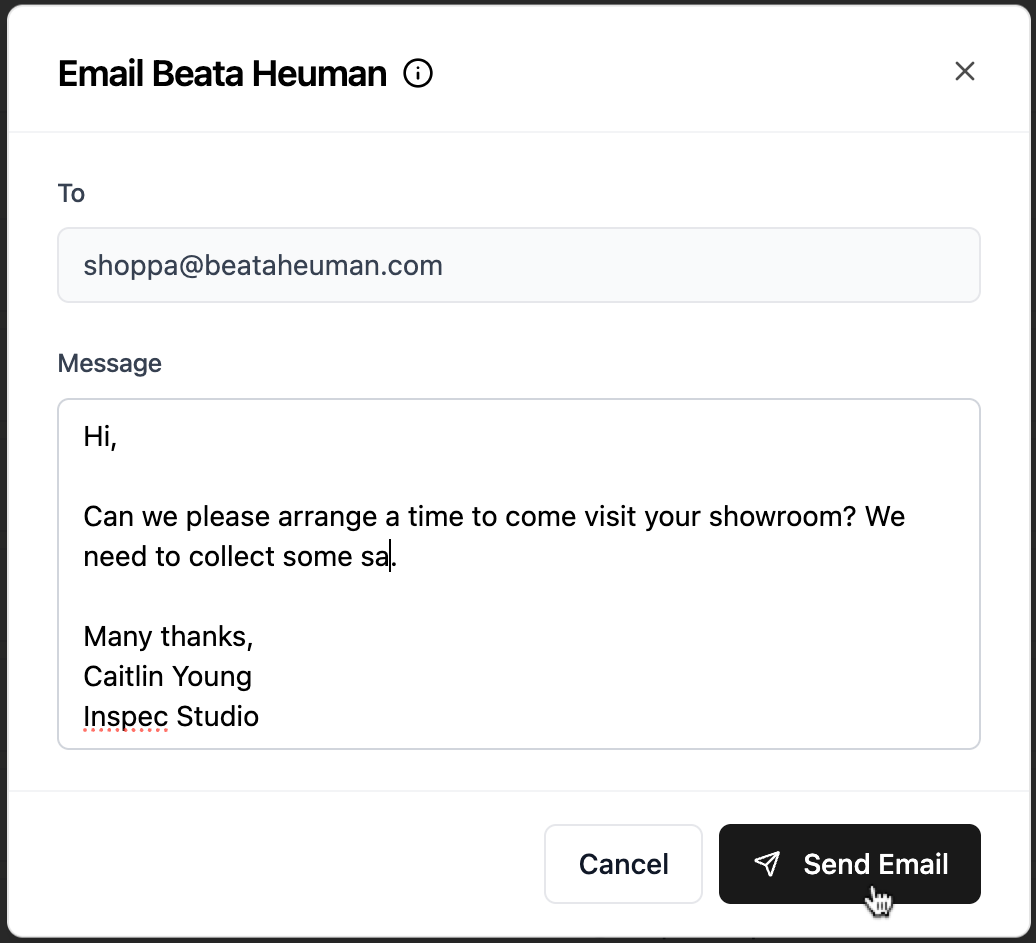
You can now contact a supplier directly through Inspec by selecting the Email Supplier button at the the bottom of the pop-up.
When you hit send, the supplier will receive this message as if it has been sent directly from your email address. When they reply, you will receive this in your regular inbox, that way you can continue the conversation if required.
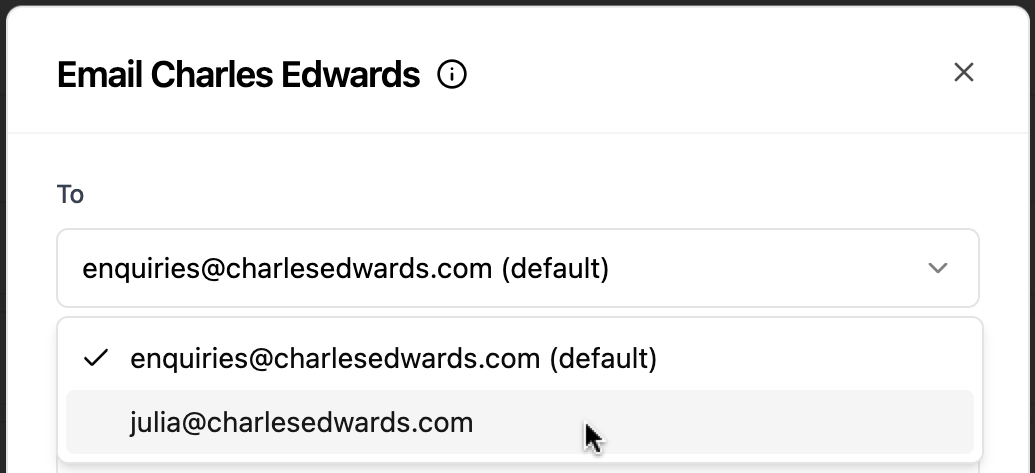
If you have multiple contacts for the one supplier, you can select the contact you'd like to email from the dropdown list.
Editing/deleting a supplier from your database
If at any point your supplier's contact details or information changes, you can edit this easily, as well as delete the supplier entirely if it's no longer required in your database.
Editing a Supplier
- Find the supplier entry you want to edit and click the row to open up a view modal. Choose Edit Supplier. Alternatively you can click Delete.
- Begin editing any of the fields and when finished, click Save Changes on the bottom right of the pop-up screen.
- Any products or schedules with reference to the supplier you have edited will be updated accordingly.
Deleting Suppliers
Effect on Products - Deleting a supplier will also delete all products linked to it. To preserve products, update their supplier information before deleting. To learn more about editing a product, click here.
Effect on Schedules - Deleting a supplier will remove that supplier's information from any schedules where it's been used in a Supplier field type.