Managing Company Preferences
Learn how to manage your company settings, subscription, team members, and user permissions in Inspec.
Assigning roles to team members
There are two possible roles for team members on Inspec, either Admin or User.
Upon company registration with Inspec, the account creator will be automatically designated a company admin role. Admin roles are typically assigned to an individual who has authority to manage company settings and handle billing & licences. Admin can change the roles of other team members at any time on the Team Members tab in Settings.
Team members assigned the role of User have all the same functions within the app as Admin roles, with the exception of access to company settings and billing.
Managing your trial & subscription
A trial period lasts 14 days from when you initially create your account.
Log into your account as usual when your trial period is over and a notification will appear asking if you would like to continue using the software. Follow the prompts to set up your company subscription.
How is pricing calculated?
Inspec is a subscription-based service with simple and transparent pricing. We charge a monthly (or annual) fee based on the number of members in your studio.
Difference between monthly and annual subscriptions
The distinction between these options is pricing. Annual subscriptions provide a 20% cost savings per user compared to monthly billing. All features and functionality remain identical across both subscription plans.
Updating payment information
To update your payment information, navigate to the Billing & Licences tab in settings.
- Click on Manage Plan — Click on the Manage Plan button where you can see information regarding your current plan, you will be redirected to our payment provider, Stripe.
- View billing overview — You will see an overview of your account billing information, including your preferred payment method.
- Update payment method — You can add a new payment method, delete a payment method, or make a method your default here.
- Return to Inspec — Once you've made the changes to your payment method, click on the ← Return to Inspec button on the left side of the screen.
If you experience any issues with updating this information, please contact Inspec Support.
Cancelling your subscription
To cancel your subscription, navigate to the Billing & Licences tab in settings when you click on your name.
- Open Stripe portal — Click on the Manage Plan button where you can see information regarding your current plan, you will be redirected to our payment provider, Stripe.
- Cancel subscription — You will see an overview of your account billing information, and in the top right corner of the screen will be a white button Cancel Subscription.
Your subscription will be active until the end of the billing period.
Adding/Removing team members from subscription
Each user on Inspec requires their own licence to use the software. Company admin users are able to increase the number of licences in their company by clicking on the Billing & Licences tab option in Settings. To get to settings in the sidebar, click on your name in the bottom left corner.
Increasing the number of licences
- Navigate to billing — Go to the Billing & Licences tab in settings.
- Increase licences — Increase the quantity using the + button to the desired number of licences required.
- Confirm changes — See the updated subscription details appear below. When you are happy to confirm the new adjustment, click Update Licences.
Decreasing the number of licences
To reduce the number of subscriptions your company has, please contact Inspec Support.
Inviting or removing team members
Making adjustments to the users is done on the Team Members tab in settings.
Removing a team member who has left the company will only open up that seat to be replaced with a new user, it will not remove the licence entirely.
User permissions & management
By default, all users within your company have equivalent access to all features, with the exception of controlling company settings & billing.
If you're concerned about maintaining consistency across your schedules and exports, company administrators can restrict certain actions related to PDF exports. These permissions can be managed in Company Settings under Permissions.
- User ability to create & edit templates
- User ability to edit disclaimers on templates and schedules
- User ability to customise schedule export settings
- User ability to customise schedule cover pages
Company administrators cannot currently restrict viewing or editing permissions for individual users on projects, schedules, time tracking, products, or suppliers. All users have equal access to these areas. If you'd like to discuss custom user permissions for your company, please contact support.
Regardless of permission settings, we always recommend assigning individual users to project design teams. Any team member in the company can assign design teams to projects, regardless of their role. To learn more about the benefits of design teams, click here.
Design teams
Assigning a design team and keeping that team up to date is important and increases the overall effectiveness of the real-time collaboration feature. It ensures that users are included in any project related notifications (for example, schedule issue reports and comments) and is great for general project management.
Each user's home dashboard will be personalised based on the projects they are working on specifically. To learn more about setting your design team, click here.
Configuring your tax rates
Before applying tax to any project or using Inspec's Procurement, Product Pricing or Price Field Type features, you will need to set your desired tax rate(s) in advance. You can do this under the Procurement & Financials tab in your settings.
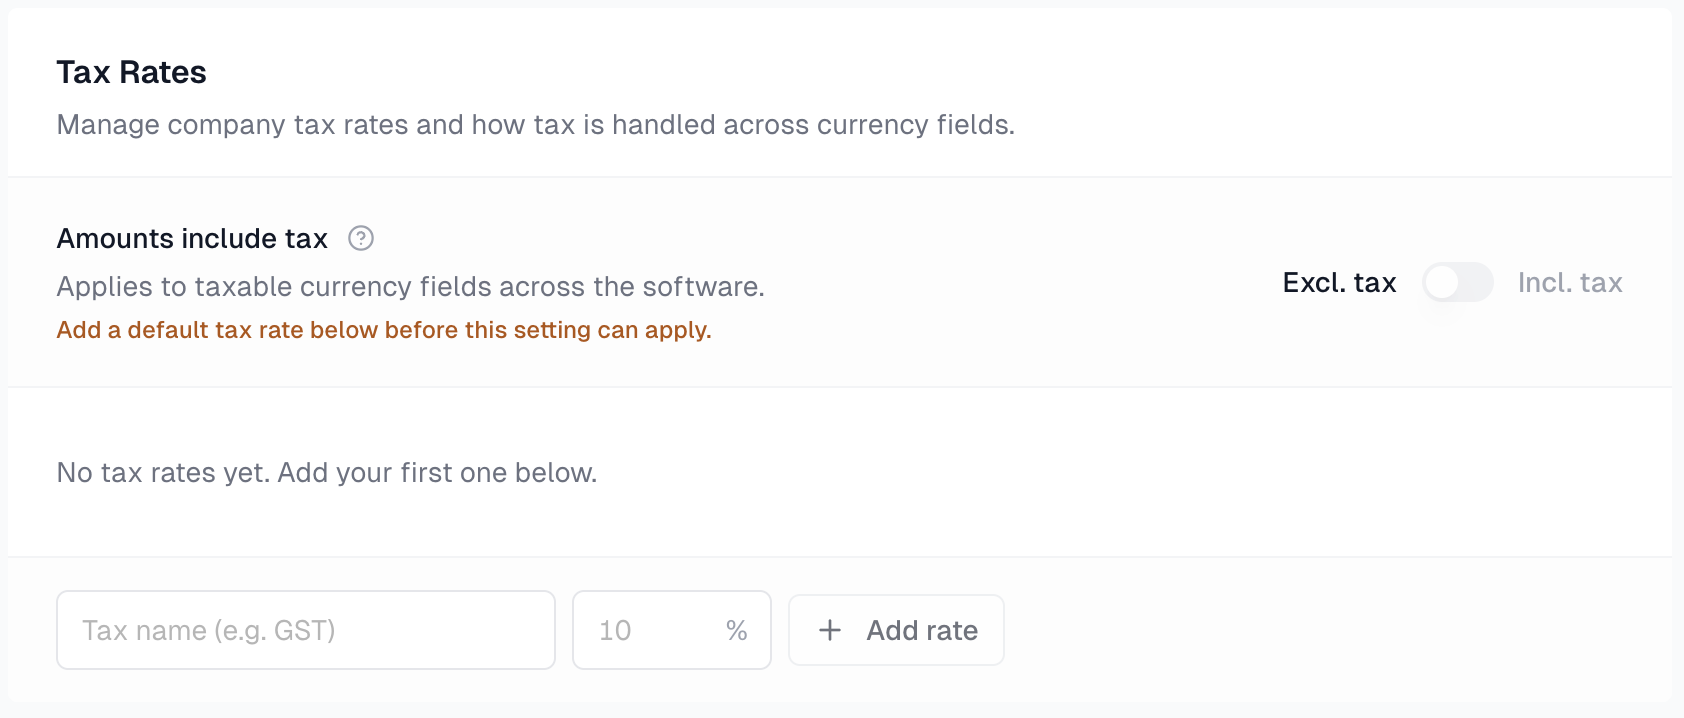
It's important you make a decision whether you'd like to record pricing across the platform exclusive or inclusive of your default tax rate. This way as you move through the flow from spec to purchase, all prices are accurately calculated. You must be a company admin to make changes in the Procurement & Financials tab in settings.
Creating an individual tax rate
An individual tax rate is a single default percentage for a particular country or region, for example, VAT in the United Kingdom or GST in Australia and Canada.

Creating a combination tax rate
Combination tax rates are made up of multiple rates for a country or region, for example you might combine both the state and local tax rates in the USA.
Example: Los Angeles, California
- California State Tax - 7.25%
- Local/County Tax - 2.25%
- Combined Tax Rate = 9.5%

Setting a default tax rate
When a tax rate is set as your company default, it will automatically apply to any new project you create. This can be changed at any time in the Procurement & Financials tab in settings.
The default tax rate then applies to any recorded prices in Products, on Schedules or in Estimates/Purchase Orders/Invoices.
It is possible to assign a custom tax rate to a row in your Estimate if required. To learn more about setting custom tax rates in Estimates, click here.
Archiving a tax rate
It is not possible to edit or delete existing tax rates. If you no longer want to use a specific tax rate, you can easily archive it.
Any archived tax rates previously applied to projects will remain on those projects, but they won't be available for future projects.
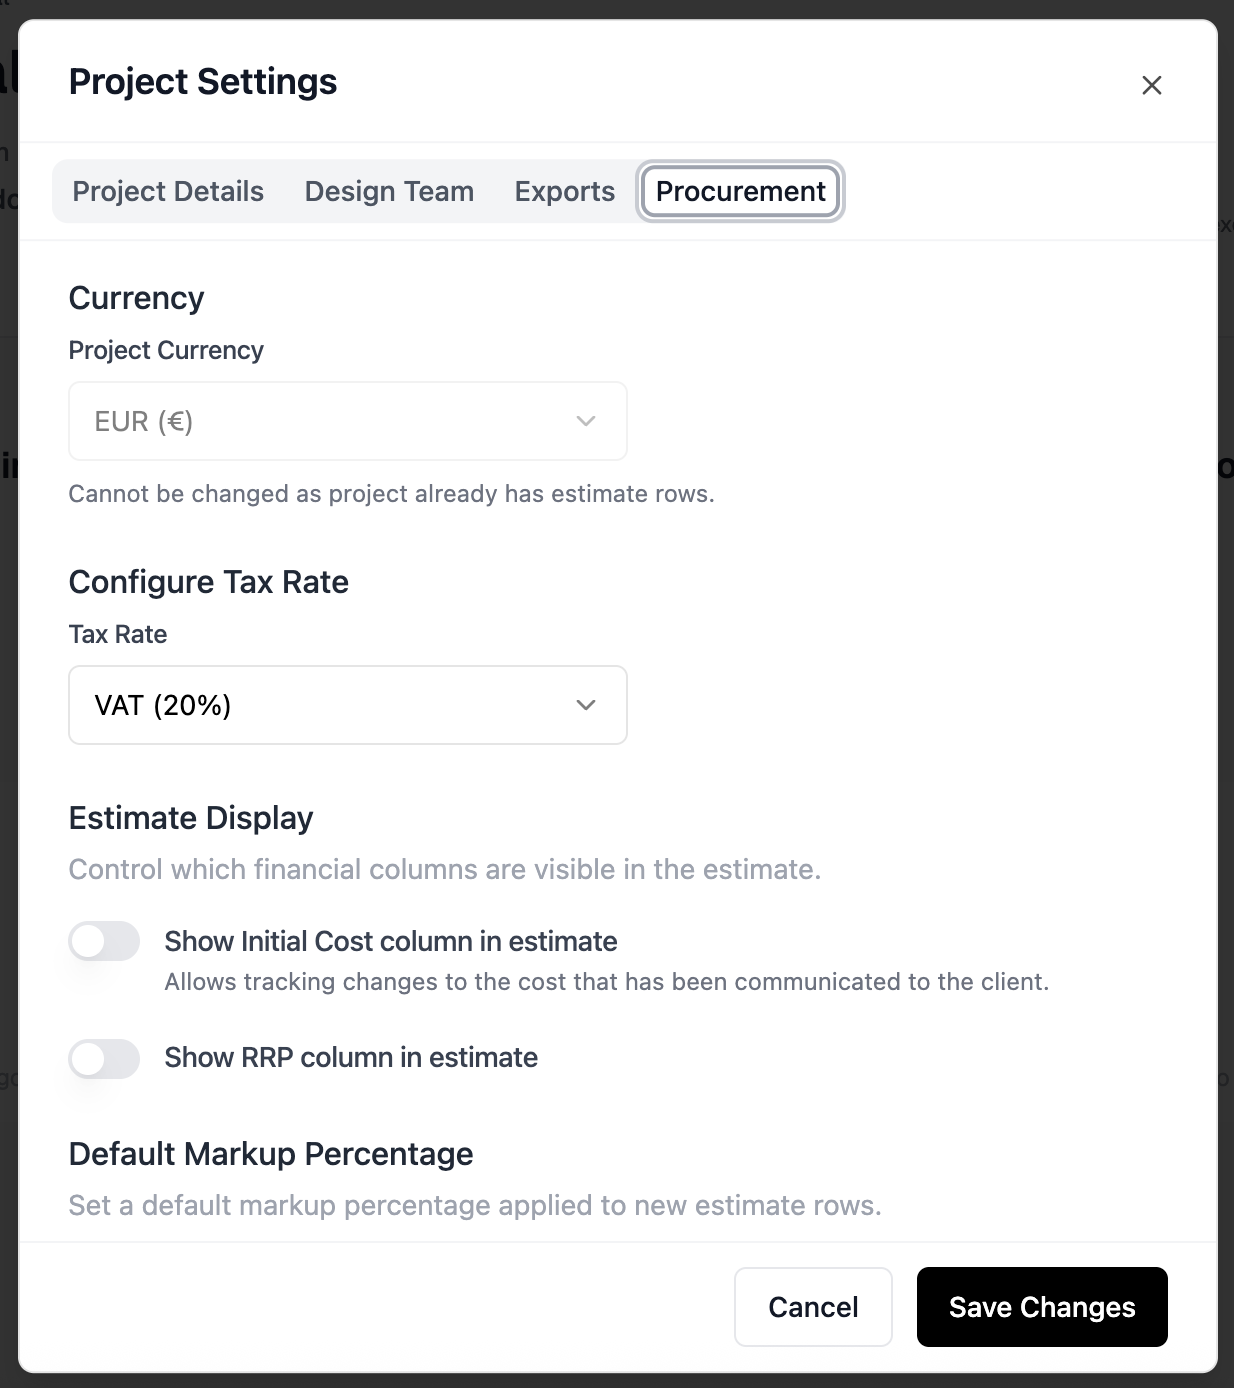
Applying tax rates to projects
Your default tax rate will automatically be applied to any new project you create. You can see the assigned project tax rate in the heading of the project page, alongside the project details and design team.

To change the tax rate at a project level:
- Click the Settings button in the top right corner of your project page
- Go to the Procurement tab and see Configure Tax Rate
- Select from the dropdown menu your desired rate for this specific project.
- If the rate you want is not already saved in that list, then an admin user will need to add this in Procurement & Financial settings. To learn about setting a tax rate, click here.
Note: Project Tax Rates
Once an Estimate has been created for a project, the project tax rate cannot be changed. You can still apply custom tax rates to individual lines on your estimate if required. To learn more about Estimates, click here.
How Inspec calculates tax
When you configure your default tax rate, it is applied to your projects, products and schedules. The exclusive or inclusive setting determines how your pricing is displayed from the beginning. You cannot add any pricing in Inspec without having first set a tax rate.
-
Exclusive - Tax is calculated on top of the product cost
-
Inclusive - The product cost already includes the tax component.
Setting a custom tax rate for a product in an estimate
You can set a custom rate for a product once it has been added to an estimate, for example, your default rate might be 20% but you may be purchasing something from a different state or region where the rate is 15%, or perhaps there is no tax applied on that specific product, so you would set the custom rate to 0%.