Time Tracking
Learn how to monitor hours spent working across projects within Inspec using manual or automatic time tracking.
Difference between manual and automatic time tracking
Time tracking enables users to monitor hours spent working across projects within Inspec.
The way you track your time is based on individual preference. Your setting will default to Automatic Time Tracking but you can change to a manual tracking method if this is better suited to your workflow. To update your preference go to Account Settings.
Manual Time Tracking - Users need to manually add time blocks when working on projects. This approach provides precise control over time entries, but relies on users remembering how long they have worked on each project.
Automatic Time Tracking (Beta) - Timers automatically start when you open a project and stop when you navigate away. This eliminates the need to manually track time.
Automatic tracking includes a 15-minute allowance for switching between tabs. This is designed for the typical workflow of sourcing products from supplier websites while working on a schedule. If you switch to another tab and return within 15 minutes, that time is included in your session. If you're away for longer than 15 minutes, the timer stops and a new session begins when you return.
Example: You work on a project for 5 minutes, then spend 10 minutes browsing a supplier website, then return to Inspec for another 5 minutes. Your recorded time would be approximately 20 minutes (the full session). However, if you had been away for 20 minutes instead, only the 10 minutes of active work would be recorded (two separate 5-minute sessions).
Automatic time-tracking is not always perfect. We always recommend double checking the data before charging your clients based on these time entries. Entries can be manually adjusted — see editing a time entry below.
Navigating the time tracking page
Access your personal time tracking overview by selecting the Time Tracking tab from the sidebar. All users, including company administrators, can only view their own time entries.
Understanding your dashboard
You can manually add time entries, regardless of whether you are using automatic or manual time tracking, by clicking the Add Time Entry button in the top right corner of the screen.
Weekly Overview - The first tile displays a business day breakdown of the current working week. Each project is automatically assigned a unique colour for easy visual identification of time allocation across projects. You can use the left and right arrow buttons to view data from previous weeks.
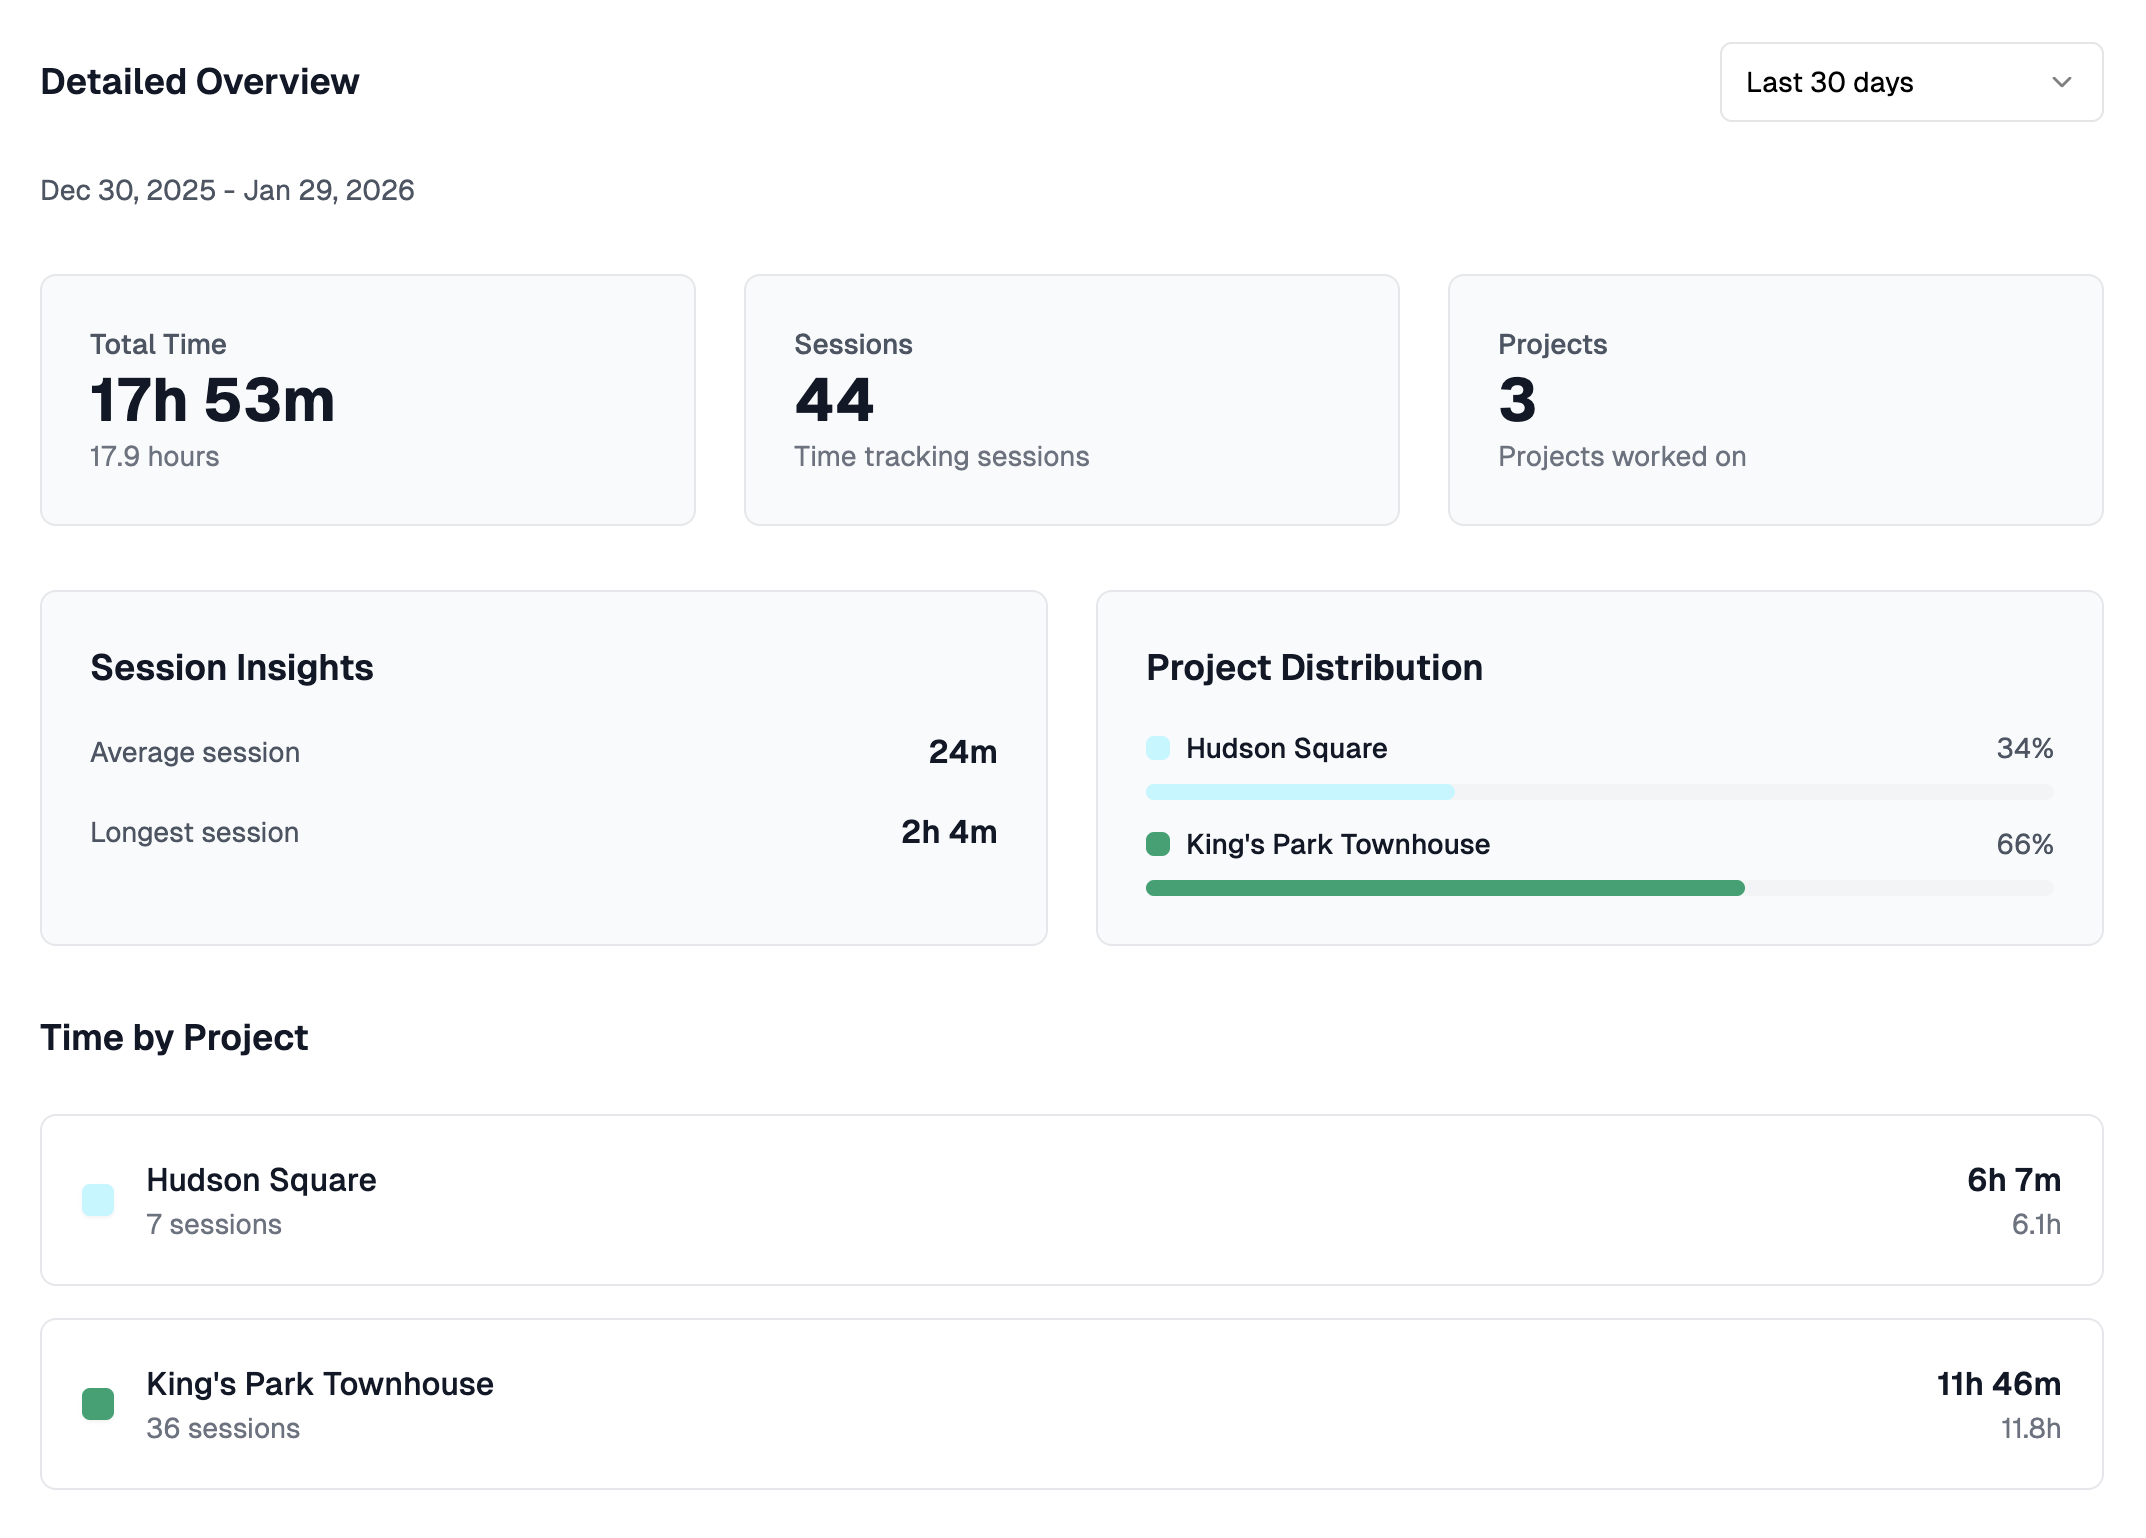
Detailed Overview - The second tile provides a comprehensive view of your time entries. Customise the displayed time period by selecting your preferred date range from the dropdown menu on the right side of the tile.
Editing a time entry
Time entries can be easily adjusted if the duration is incorrectly recorded.
- Go to the Time Tracking tab on your sidebar.
- On the Weekly Overview, you'll see various coloured time blocks of your existing entries per project.
- Click on the time block you would like to edit so a pop-up appears.
- Update the information on the pop-up and click Update.
To delete a time entry, follow steps 1–3 above, and click Delete.