Field Types
Learn about the different field types available and how to apply them to your templates and schedules.
Overview
When building a template, every field you create is assigned a field type. Field types control what kind of information can be entered into that column, keeping your schedules consistent and accurate.
Note that once a field type has been set on a field, it cannot be changed. If you need a different field type, you will need to create a new field and move the data across.
The available field types are:
- Text — Cells contain information in text format only.
- Image — Cells support image uploading and image captions only.
- Dimension — A structured data field for numerical dimensions, based on your company's default unit of measurement. To learn about changing the unit of measurement for a project, click here.
- Select — Cells offer a dropdown of options, of which only one can be applied.
- Multi-Select — Cells offer a dropdown of options, of which multiple can be applied.
- Property — Cells contain multiple key/value pairs, allowing you to group related information within a single cell. Learn more about Property fields below.
- Supplier — Cells contain supplier details linked directly to your Supplier Database. Learn more about Supplier fields below.
- Price — Cells contain two inputs, quantity and unit cost, with the total calculated automatically. Learn more about Price fields below.
- Status - Cells contain a dropdown of status options that are dynamic and link directly to your Client Portal. Learn more about Status fields below.
Using Select and Multi-Select fields
Select and Multi-Select fields are a great way to indicate statuses, tags, or labels within your schedules. The difference between the two is simple: Select allows only one option to be chosen per cell, while Multi-Select allows multiple.
You can create Select and Multi-Select fields in your custom templates, and several of Inspec's pre-built templates include them too. While working in an individual schedule, it's also possible to add new options to a Select dropdown on the fly — just note that these additions won't carry back to the saved template unless the changes are made in template edit mode.
Setting up Select and Multi-Select fields in templates
-
Create a new field — Add a new field and give it a name, for example "Status".
-
Choose the field type — Select either Select or Multi-Select from the field type dropdown.
-
Add options — Type an option and click the + button to confirm. Inspec will automatically assign a colour, which can be customised. Add as many options as you need.
-
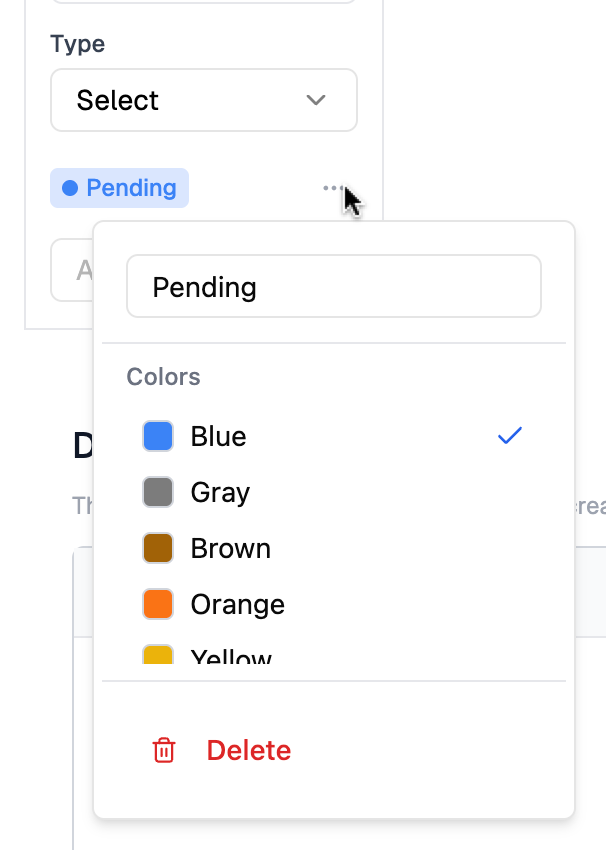
Customise colours — Click the three dots to the right of any confirmed option to choose a custom colour, remove the colour, or delete the option entirely.
-
Continue or get started — Once your options are set, continue editing the template or head to your project to start scheduling.
-
Edit anytime — You can return to template edit mode at any time to add or remove options.
Using Property fields in your schedules
Property fields let you group related information together within a single cell using key/value pairs. Instead of creating separate columns for each detail, you can consolidate multiple pieces of information into one organised field — keeping your schedules cleaner and easier to read.
For example, in a finishes schedule, rather than creating four separate text columns for Quantity, Finish, Brand, and Description, you could combine all of that into a single Property field called "Product Details."
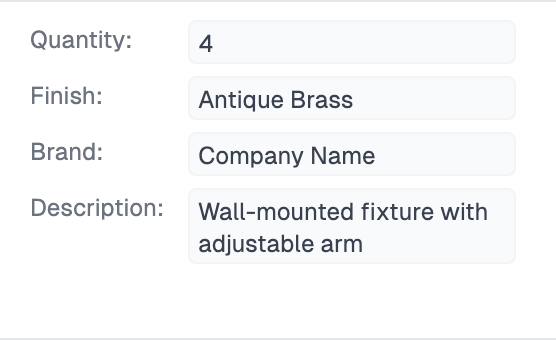
Properties without values are automatically hidden in your schedule and won't appear on exports — they only become visible when you're actively editing that cell. This keeps your schedules free of unnecessary noise.
Setting up Property fields in templates
- Click + Add Field while creating or editing a template in edit mode.
- Name your field and select Property from the field type dropdown.
- Add as many properties as you need, for example Finish, Quantity, or Price.
- To remove a property, click the x to the right of the option.
- To reorder properties, drag the grip icon to the left of the option.
Using Supplier fields in your schedules
The Supplier field type links directly to your centralised Supplier Database, pulling through accurate supplier information automatically. This reduces manual entry, minimises errors, and keeps supplier details consistent across all your projects.
Setting up Supplier fields in templates
When you create a Supplier field in your template, you control exactly what information is displayed in the schedule cell beyond the supplier name.
- Click + Add Field while creating or editing a template.
- Name your field (e.g. Supplier, Vendor, or Manufacturer) and select Supplier from the field type dropdown.
- Toggle on the additional details you'd like to display in your schedules. Note that the supplier name will always be shown.
You can adjust which details are shown at any time while working in an individual schedule — click the field heading and toggle details on or off. Changes apply to the entire column automatically.
Keep in mind that Supplier field settings apply column-wide; it's not possible to customise which details appear on a row-by-row basis. If a supplier is missing certain information in your database, those fields will simply be left blank and won't appear on exports.
To learn more about adding suppliers directly from within a schedule, click here.
Using Price fields in your schedules
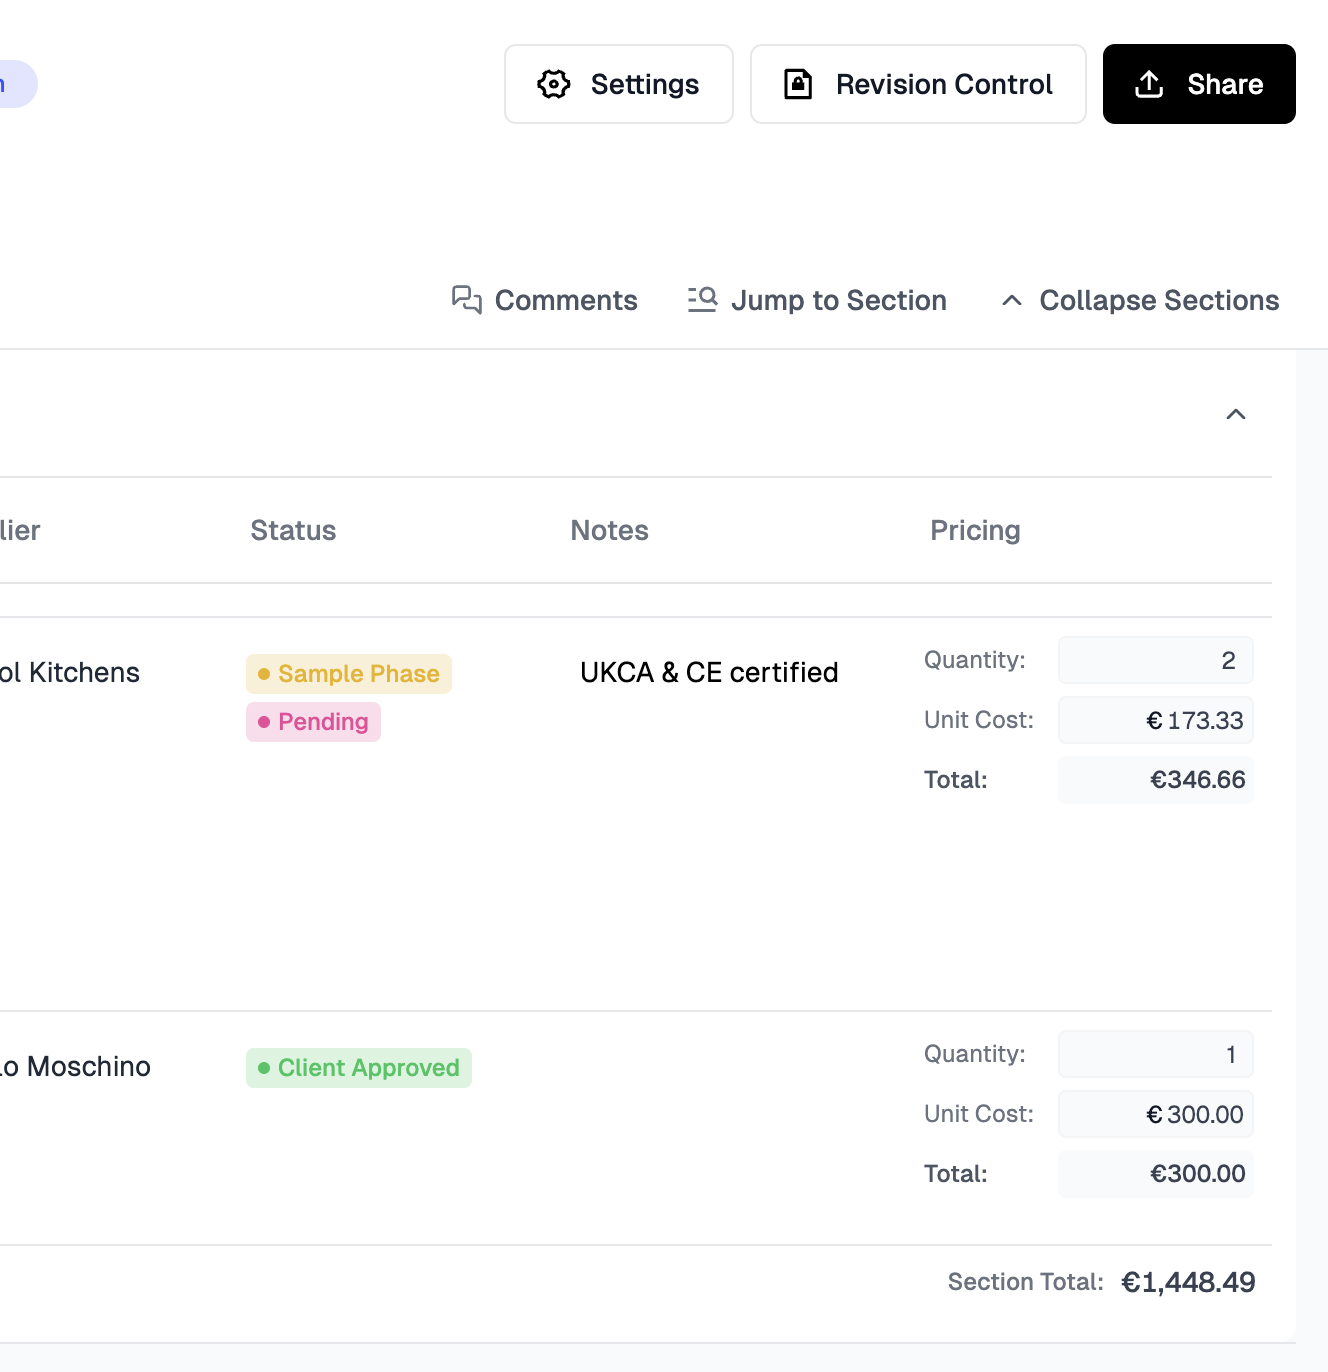
Adding a Price field to your template automatically generates a Totals Bar at the bottom of each section, giving you a total cost for all rows within that section. If you add multiple Price fields, each will have its own designated total at the bottom of the section, keeping your costs clearly separated.
If you want to provide your clients with a more detailed breakdown of pricing, then we recommend using the Estimate feature. To learn more about starting a project estimate, click here.
Within a Price field cell, enter a Quantity and Unit Cost and the total will be calculated automatically. Make sure prices are entered consistently either inclusive or exclusive of tax to keep your totals accurate. Typically, your unit cost would be your company's trade price.
To learn more about recording pricing against your saved products, click here.
Using Status fields in your schedules
Adding a Status field to your templates lets you submit specifications from your schedules to the Client Portal and request approvals directly from your clients.
As decisions are made, the status of each item updates automatically in your schedule, so you always have an accurate, up-to-date picture of where each proposal stands without any manual input required. To learn more about the Client Portal, click here.
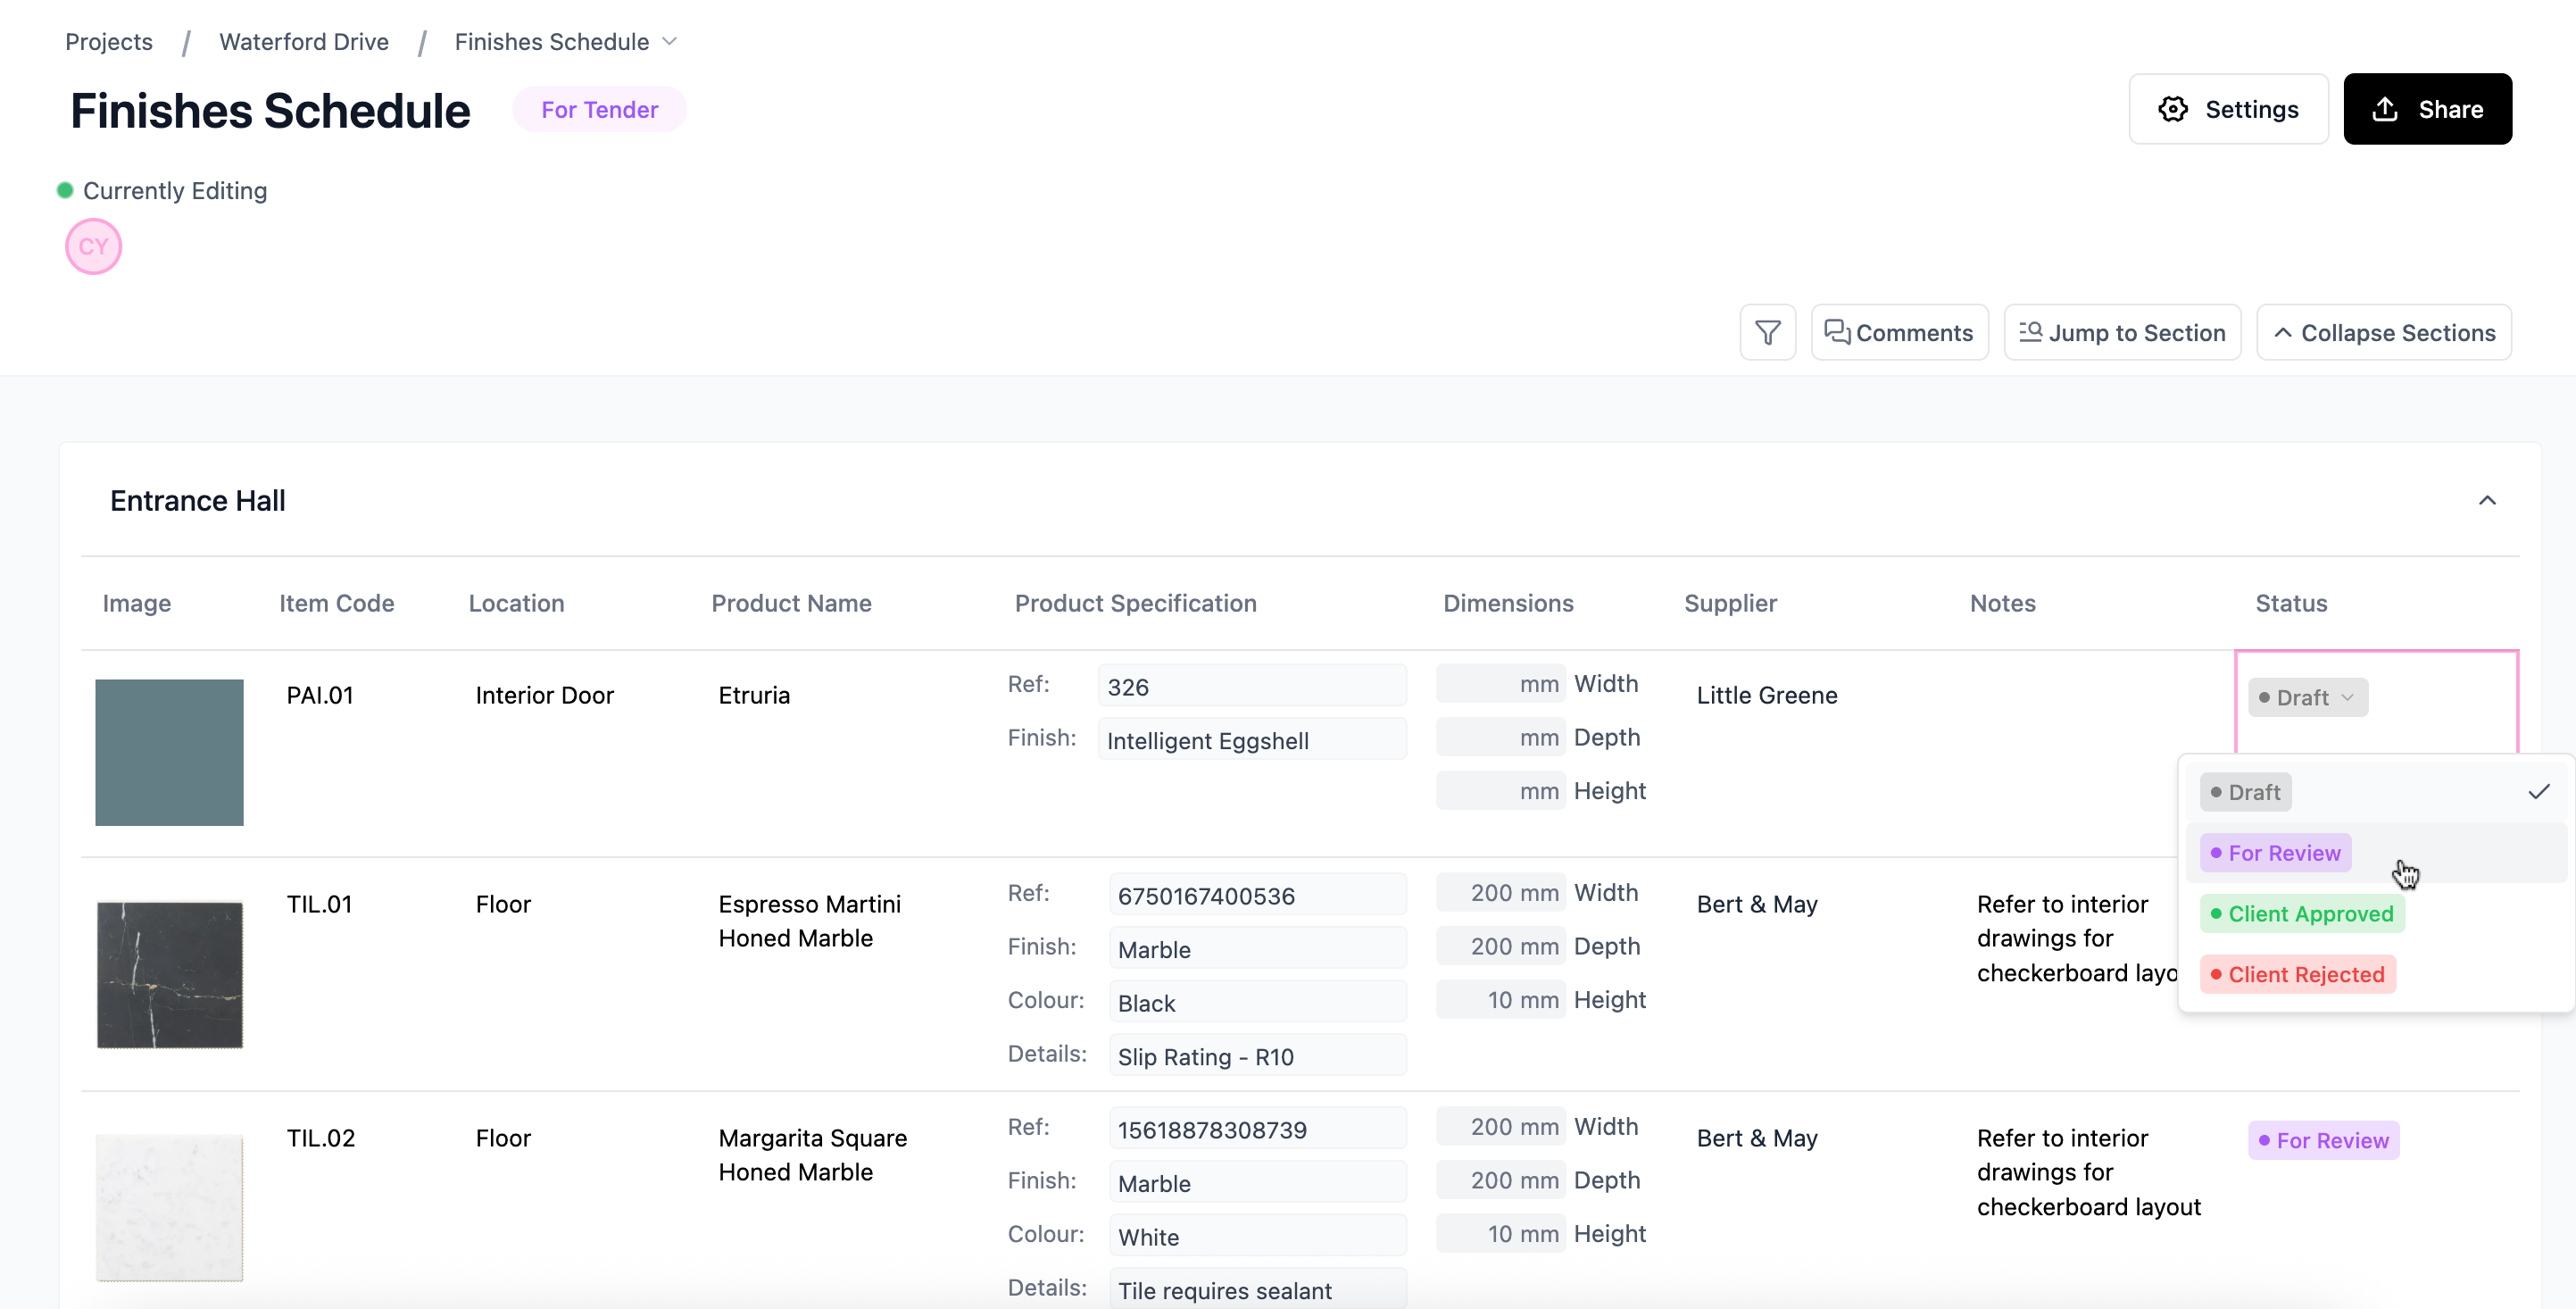
When specifications in your schedules are then added to your client Estimate, the status of those rows will automatically apply to the line item in your Estimate.