Purchasing
Learn how to create, manage, and track your orders on purchasing in Inspec.
Getting started with purchase orders
A purchase order is a formal document sent to a supplier to confirm what you'd like to order.
To generate one from your estimate, each line item needs a supplier, quantity, and unit cost as a minimum - without these three fields completed, a purchase order cannot be produced for that item. You can add multiple line items from the same supplier - across one or more segments - to a single purchase order, keeping your orders consolidated and easy to manage.
To get started, you'll need at least one completed line item in your Estimate tab. To learn more about estimates, click here.
Reminder: Set your custom PO start number
Inspec lets you set a custom start from number for your purchase orders and invoices. We encourage doing this before you start your first estimate. To learn more about configuring your settings, click here.
Note: Supplier Database
Purchase orders require all supplier information be saved in your Supplier Database. To learn about how to set up your Supplier Database, click here.
Understanding the purchasing tab
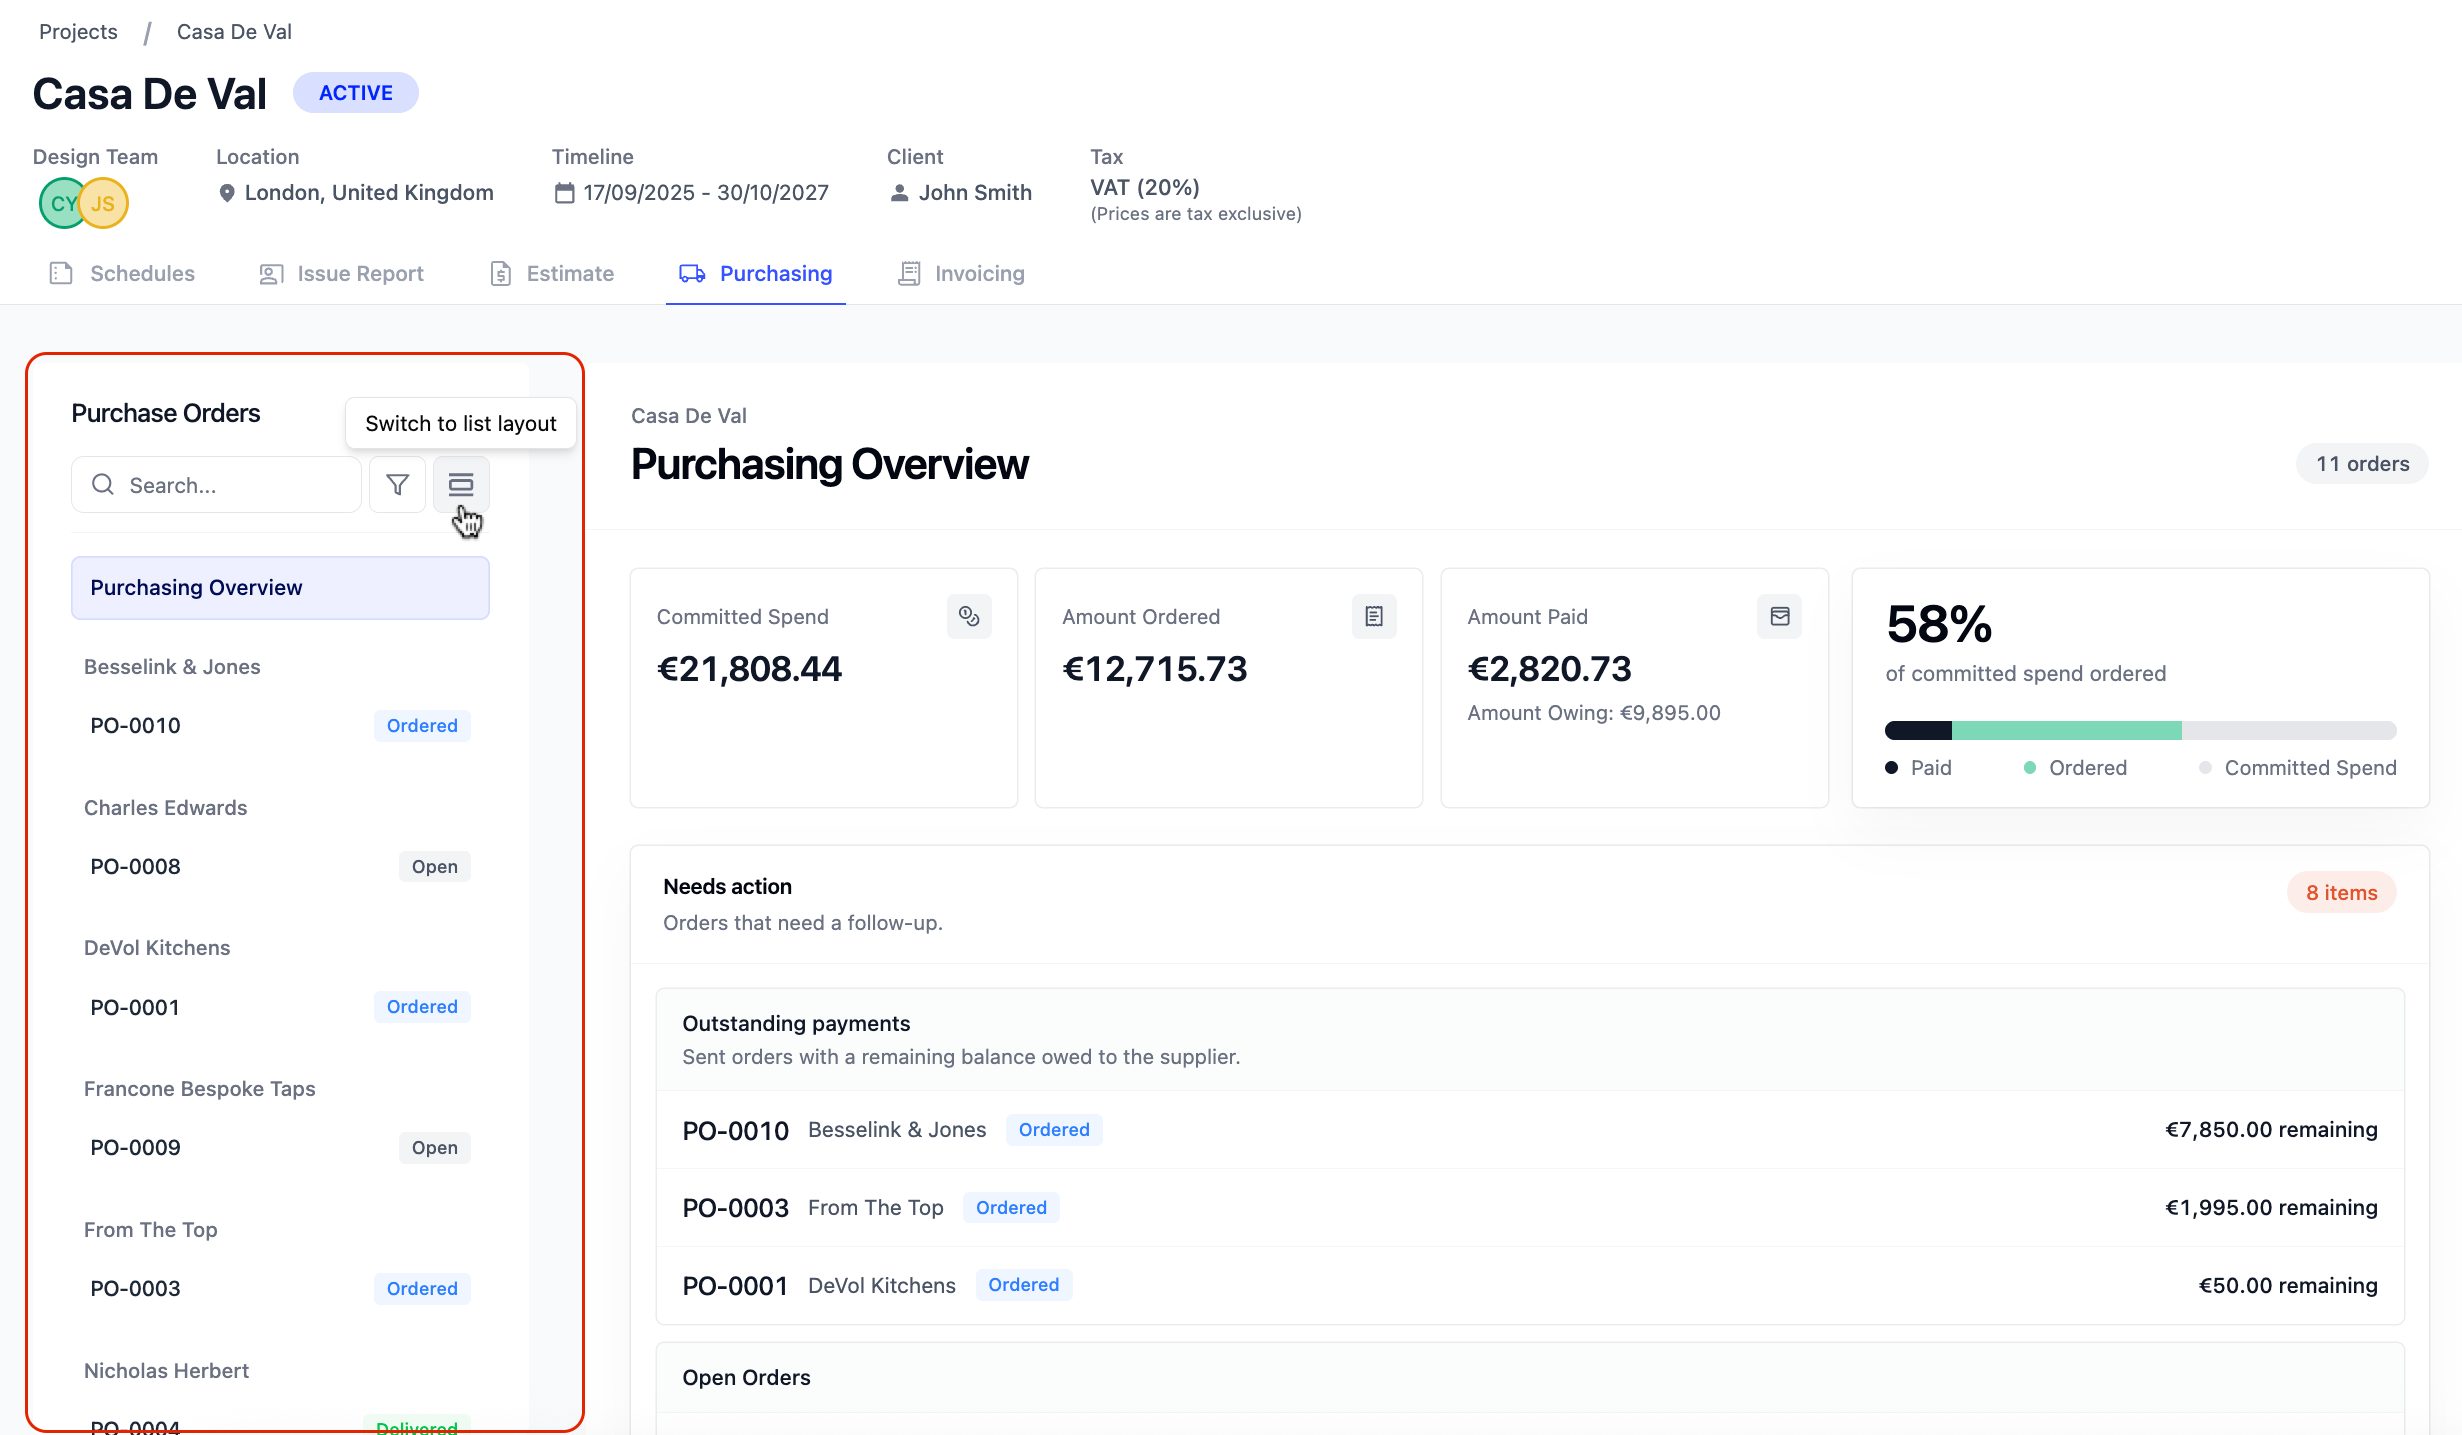
The Purchasing tab opens with a summary of all purchase order activity for the project, giving you a clear picture of your predicted spend, how much has been ordered, and what's still left to pay.
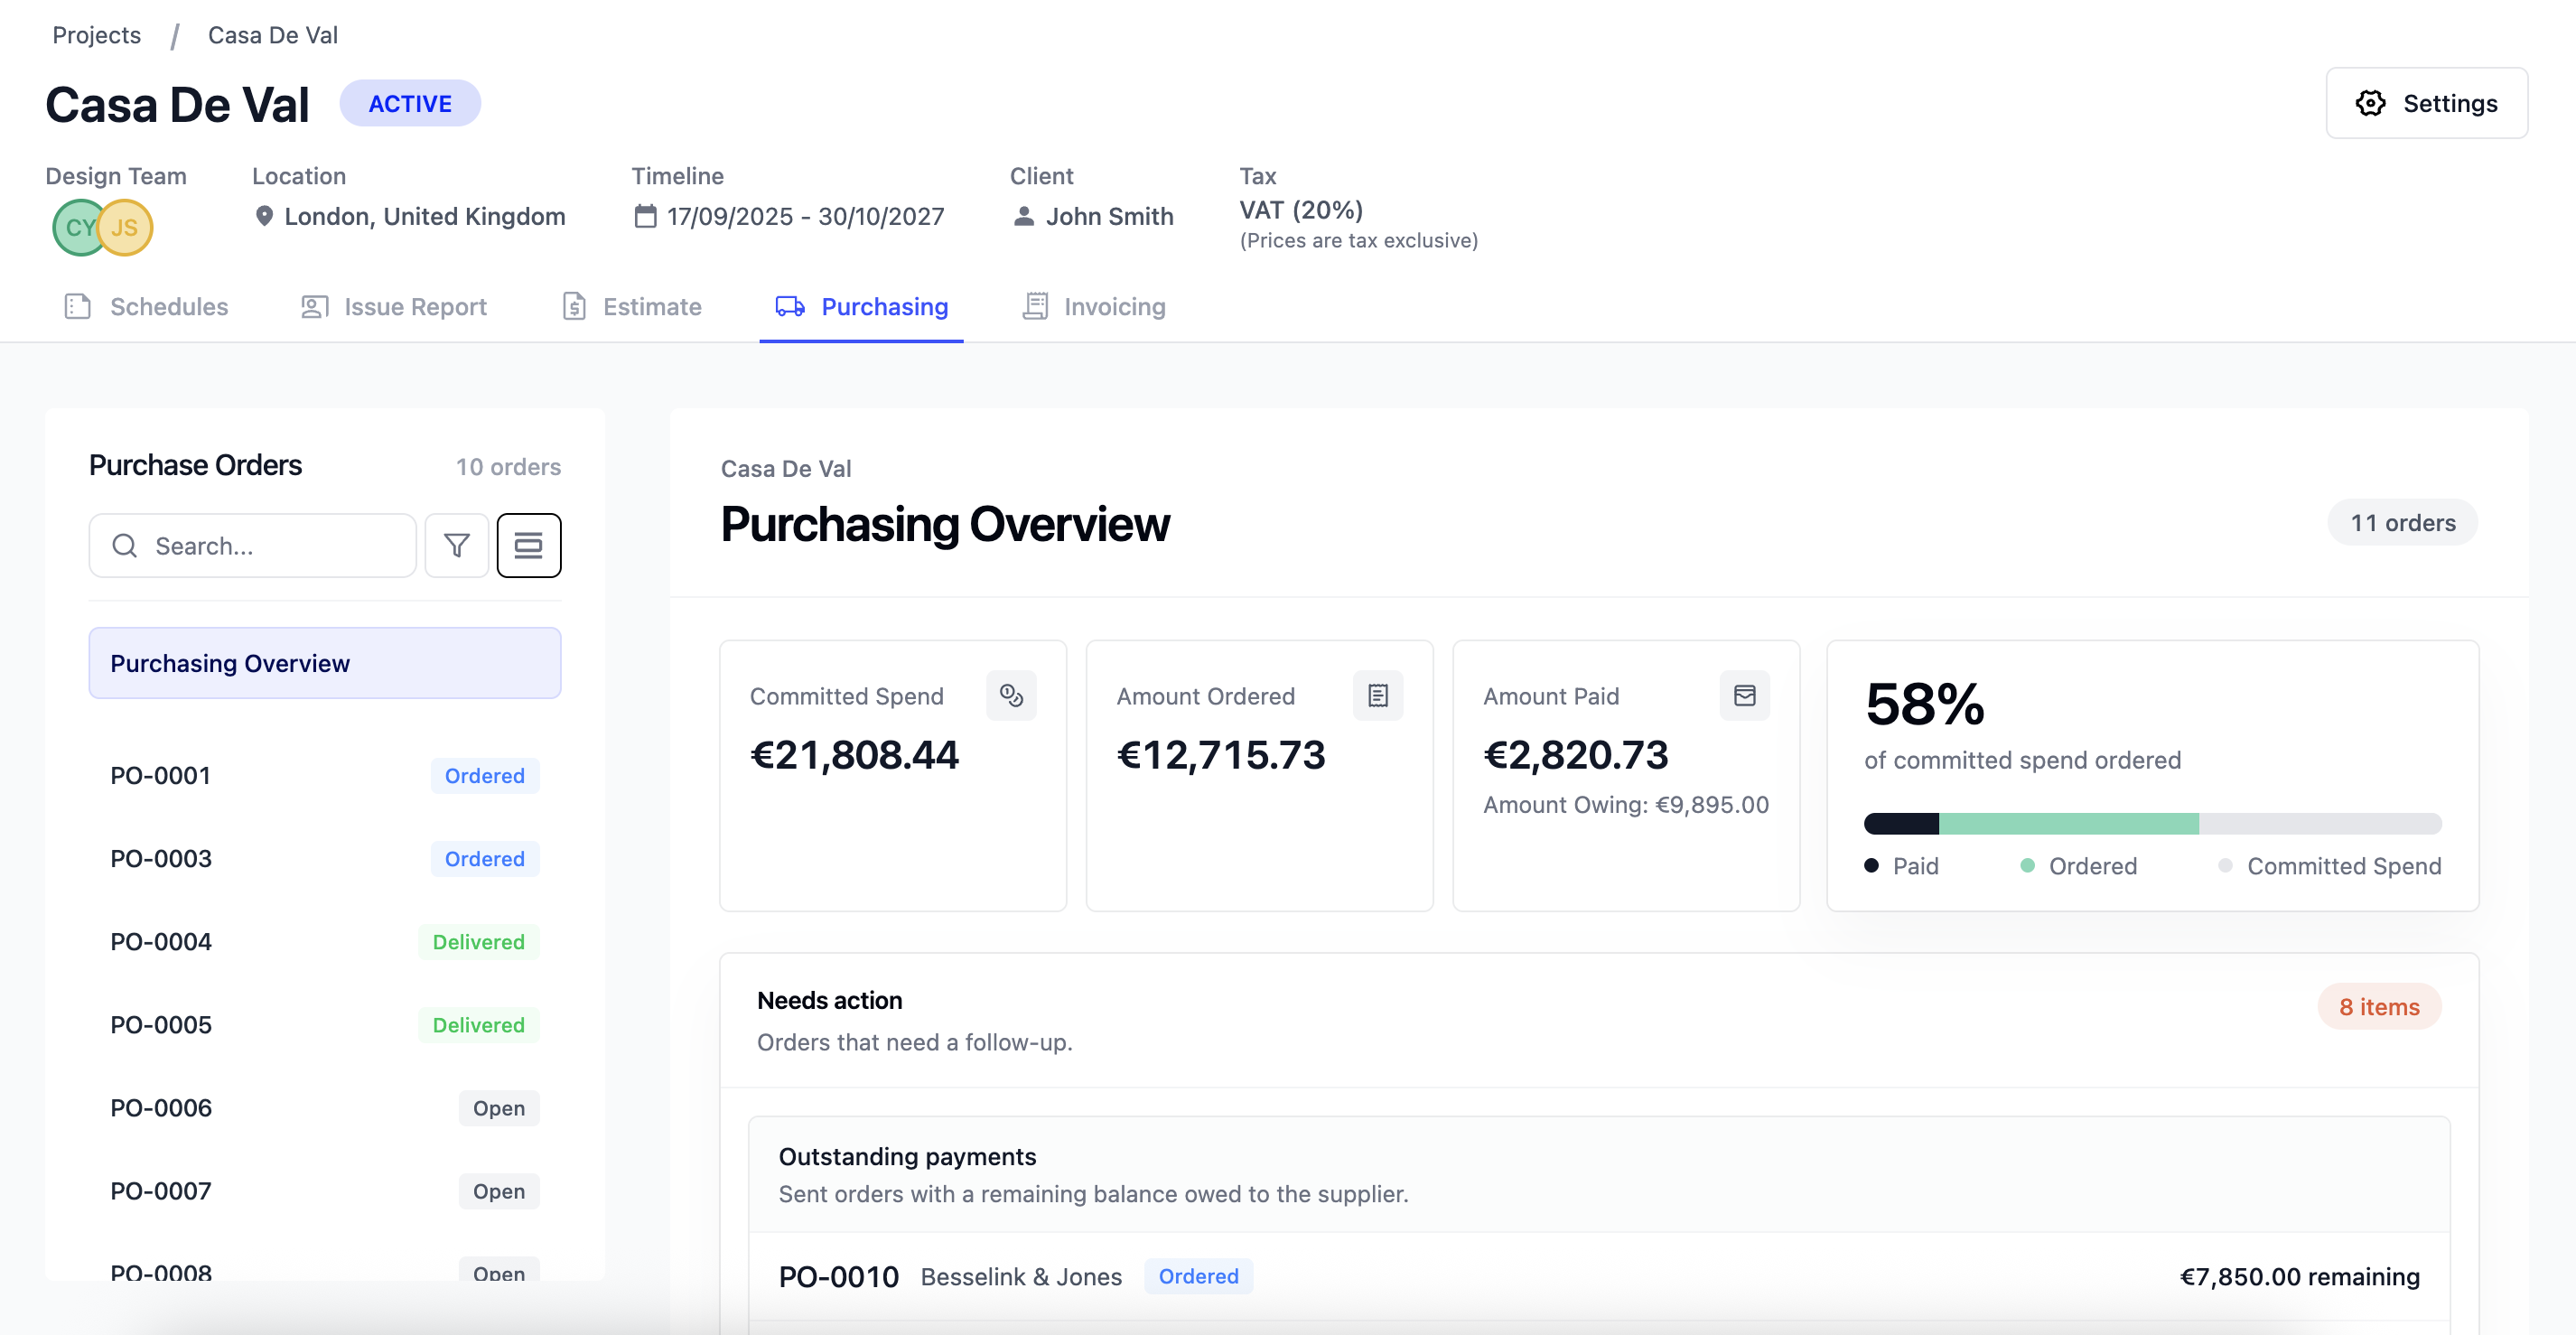
- Committed Spend - The total cost of purchases your studio is responsible for making, exclusive of tax.
- Amount Ordered - The sum of all orders that have been placed with suppliers.
- Amount Paid - The sum of all orders that have been paid for, either partially or in full.
- Progress Bar - A visual overview of what percentage of the client estimate has been ordered and paid for.
Below the summary, you'll find a list of actionable items to help you stay on top of your purchases — including open orders that haven't yet been placed, orders with outstanding payments, and any orders where the expected delivery date has passed.
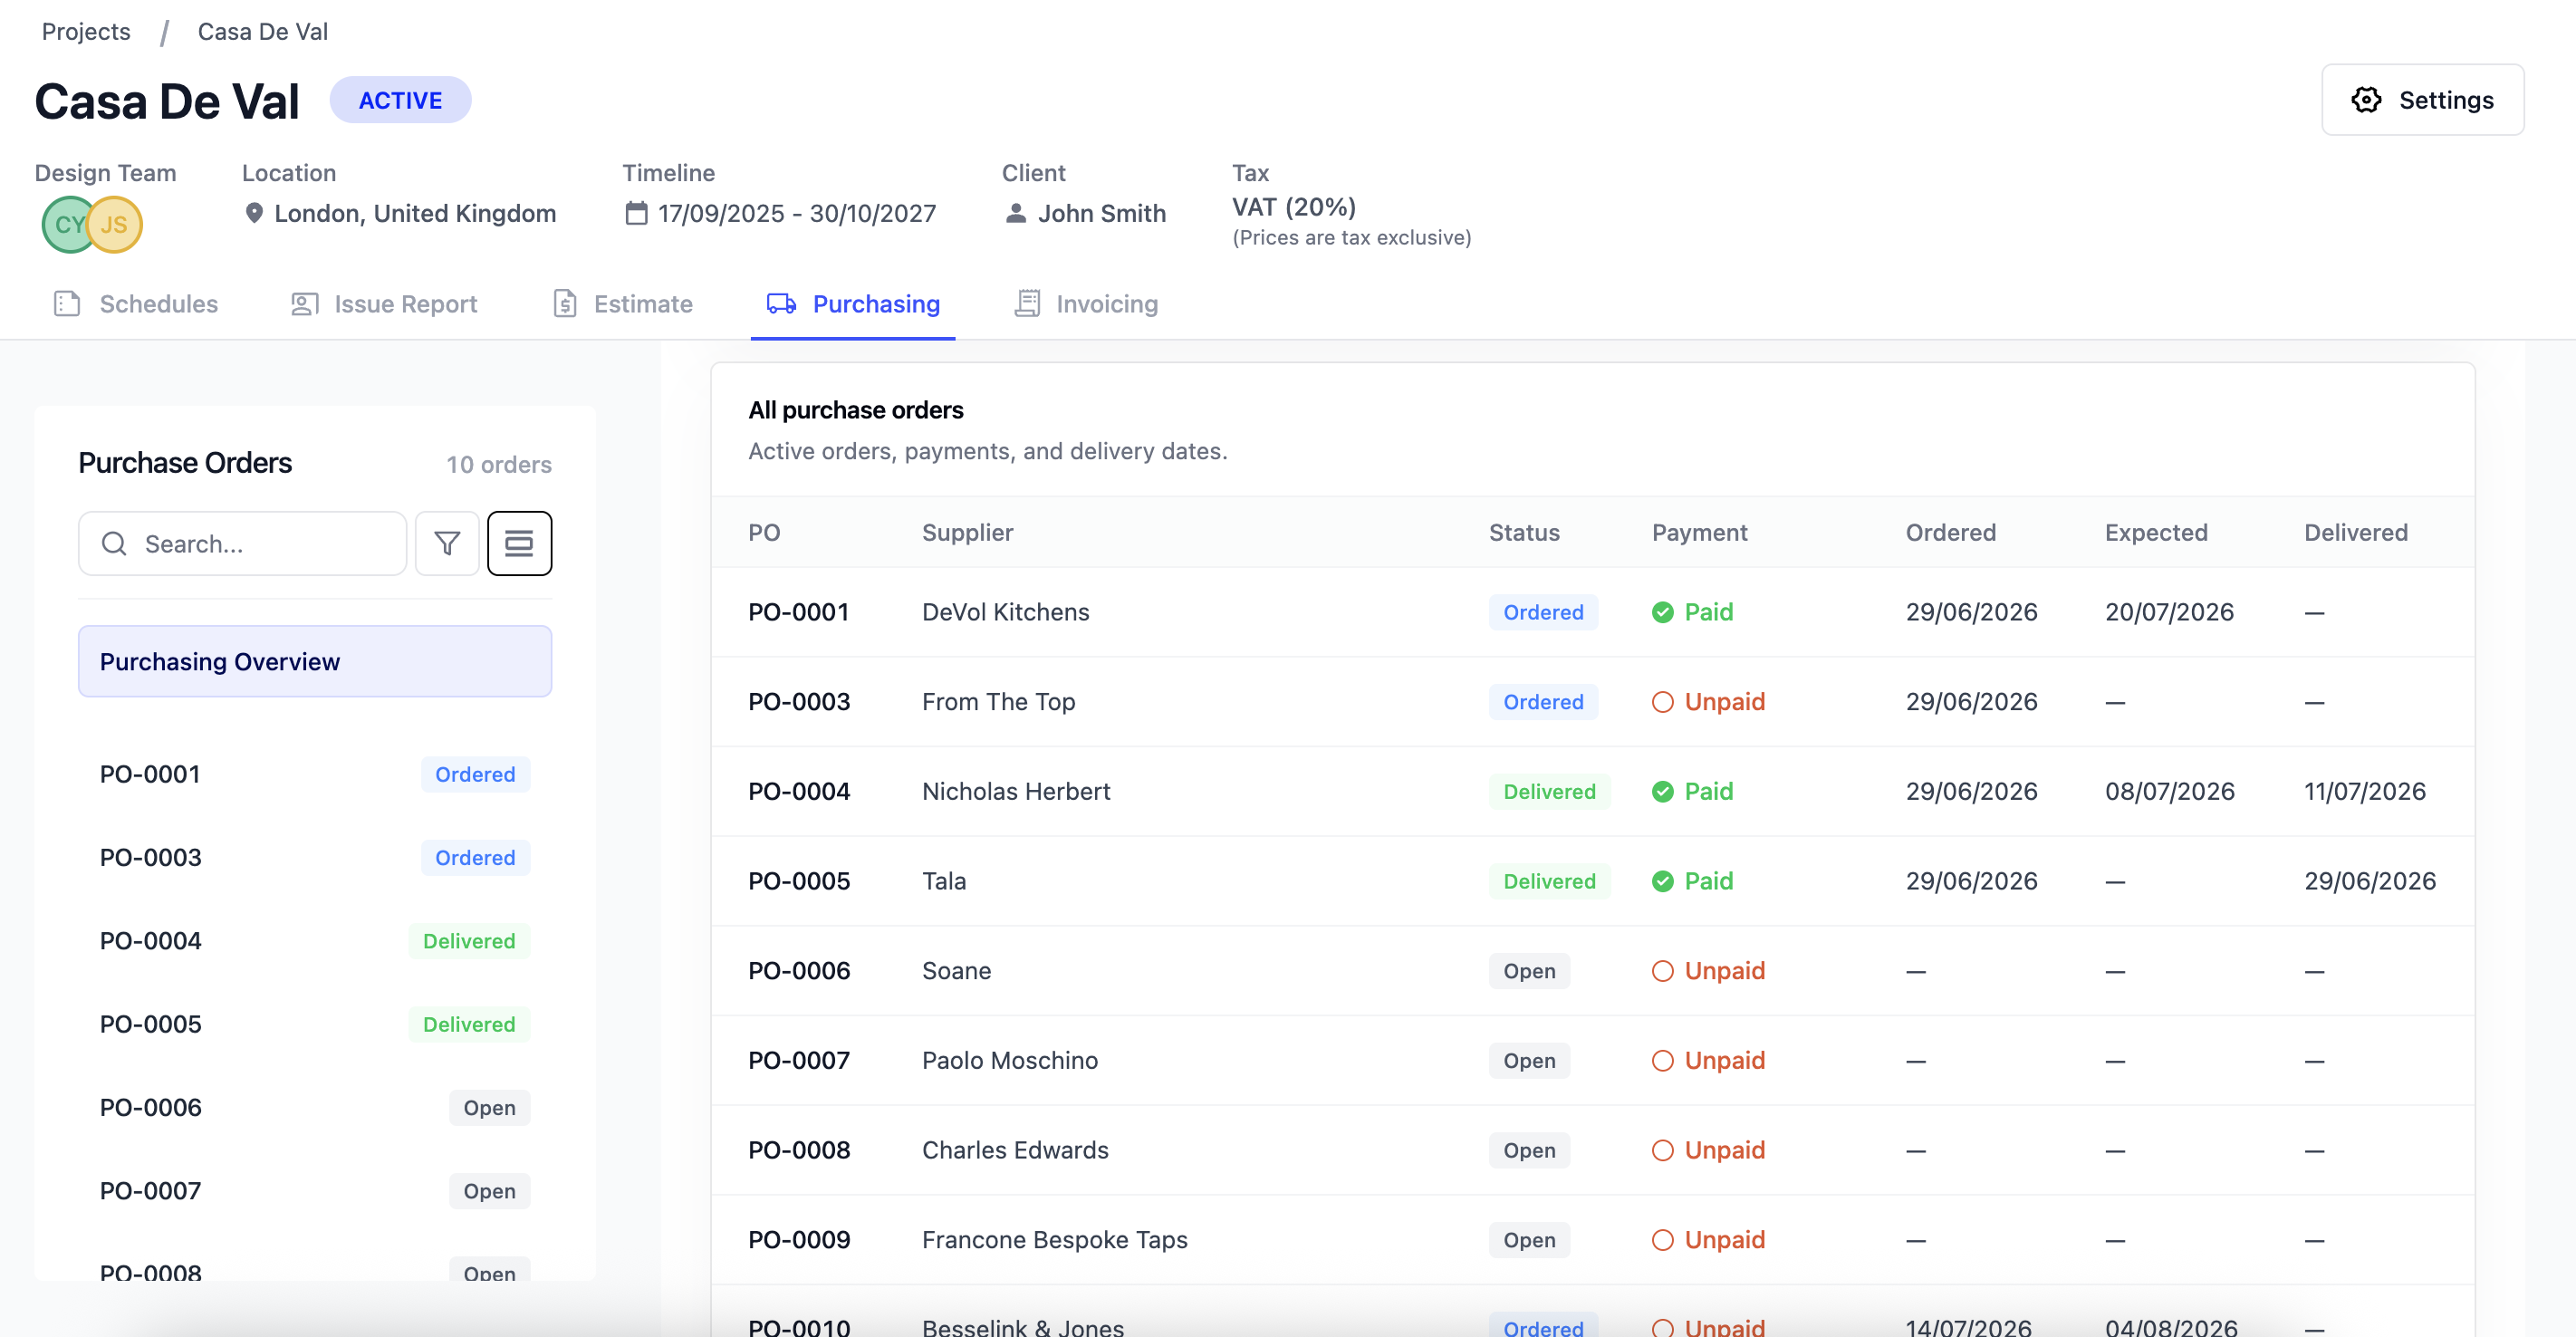
Further down the Purchasing Overview page, you'll see a table with all active purchase orders for that project, where at a glance, you can review statuses and key dates associated with each.
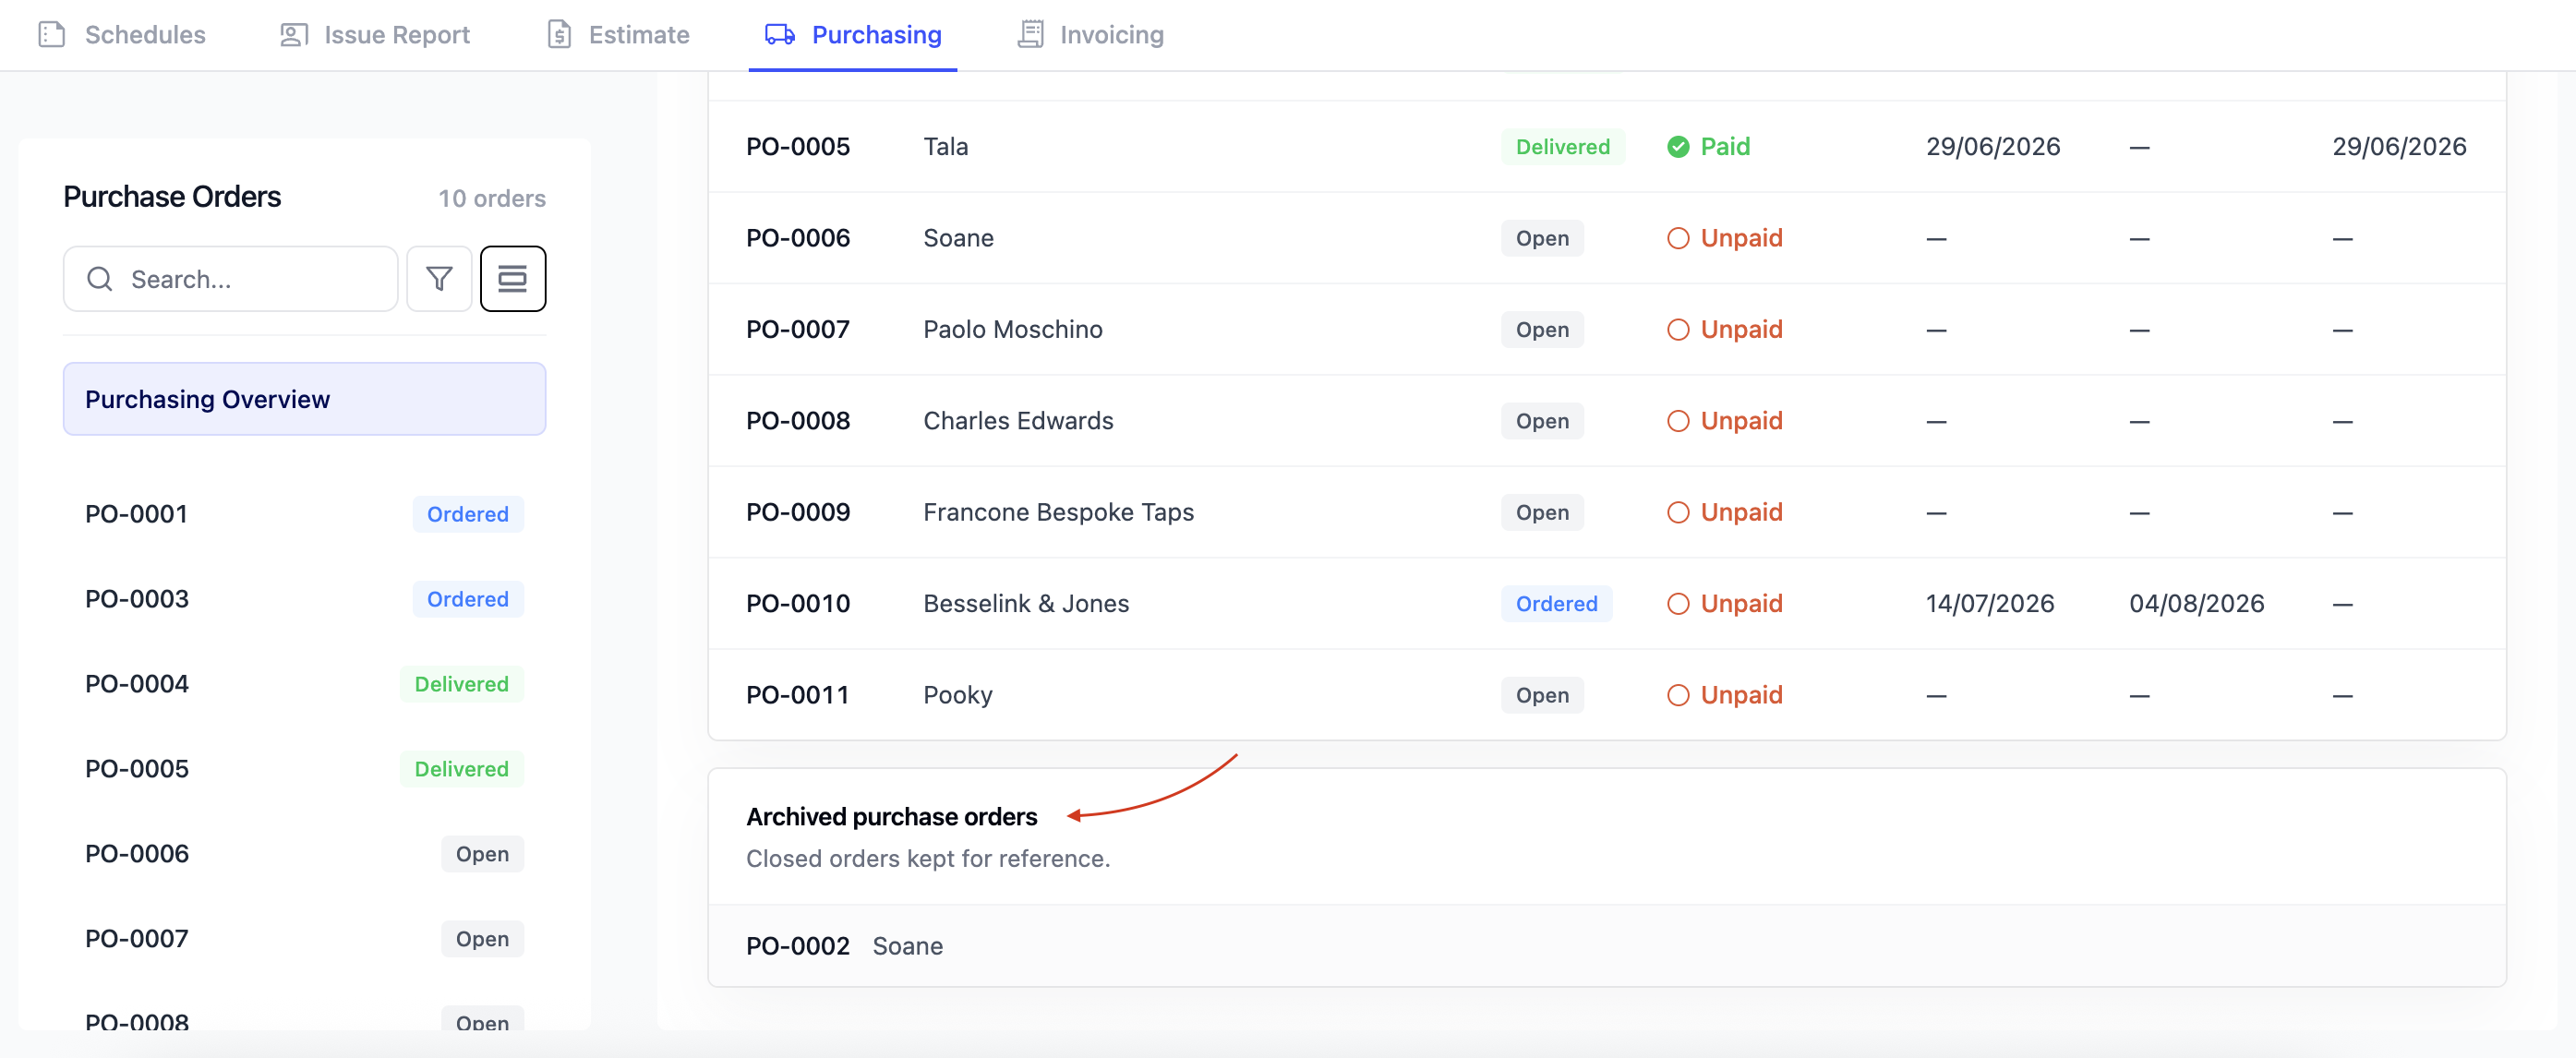
If you have any archived purchase orders, these will also be visible below. To learn more about archiving POs, click here.
Purchase order side bar
The sidebar on the left of your Purchasing tab lists all your purchase orders grouped by supplier, making it easy to find and manage orders at a glance. Click into any purchase order to manage items to supply, track payment activity, and add general notes.
If you'd prefer to browse by order number rather than supplier, click the layout button in the top right of the sidebar to switch views.
Creating a purchase order
Once your line item has been approved by your client, you'll want to go ahead and create a purchase order for your supplier.
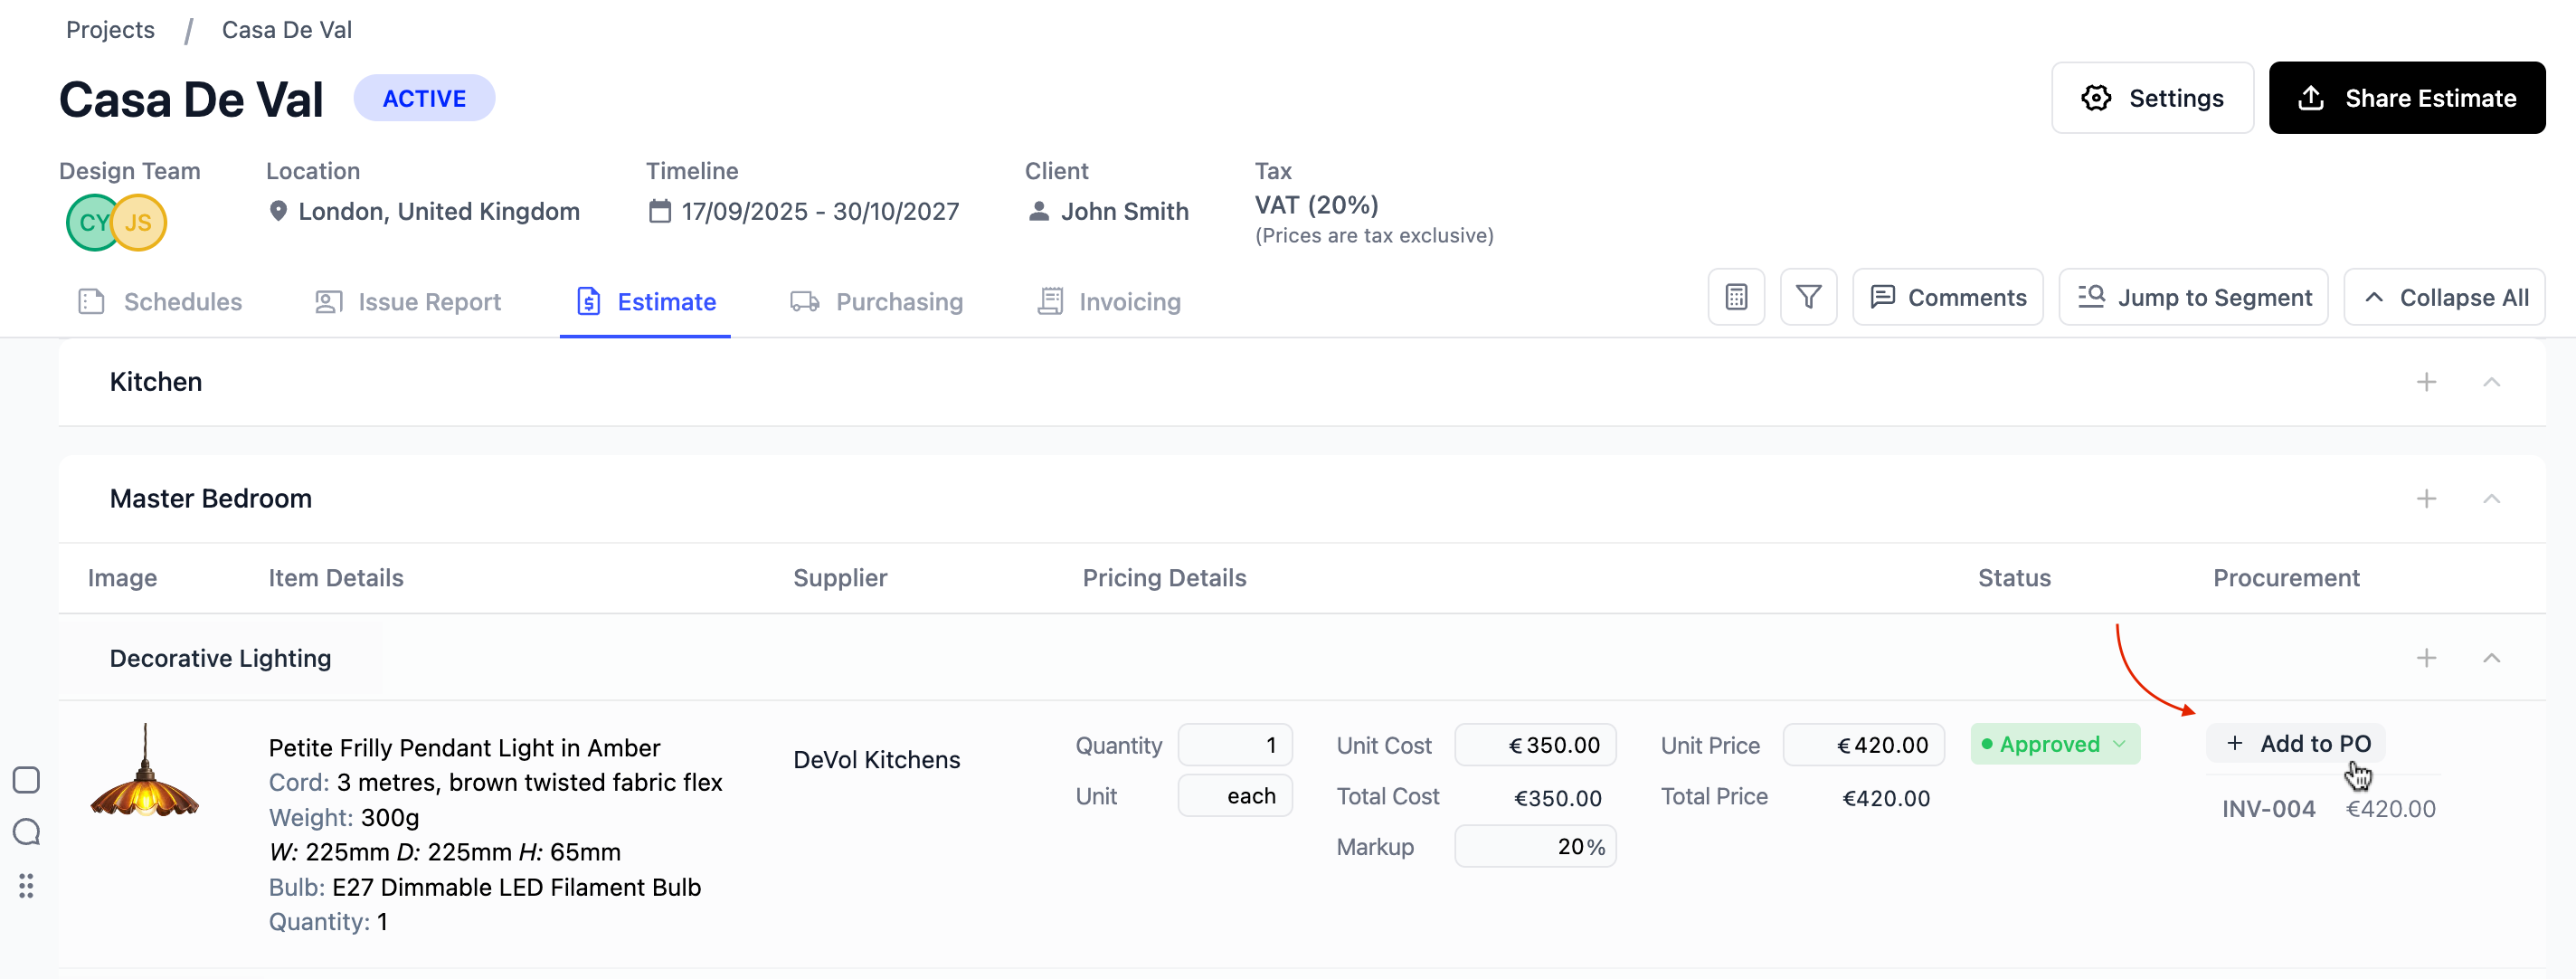
- Generate purchase order - click on the + Add to PO button in the Procurement column of your estimate.
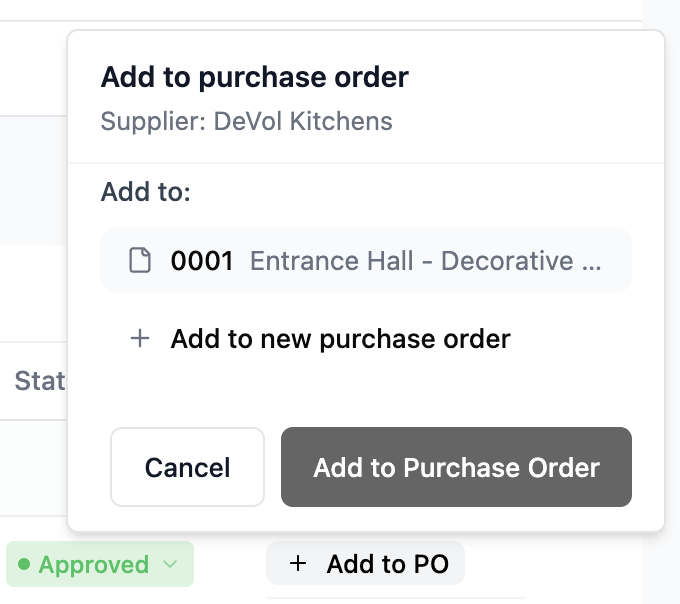
- Select Order - You can add your item to any existing open purchase orders to the same supplier, or you can generate an entirely new PO.
- Finalise Order - Finish selecting any line items by the same supplier and adding to your order, then use the quick nav link to jump to that PO. Learn more about Procurement Quick Navigation here.
- Complete order details - Fill out the required fields and provide any additional information for your supplier to know about your order. To learn more about the Address Book click here.
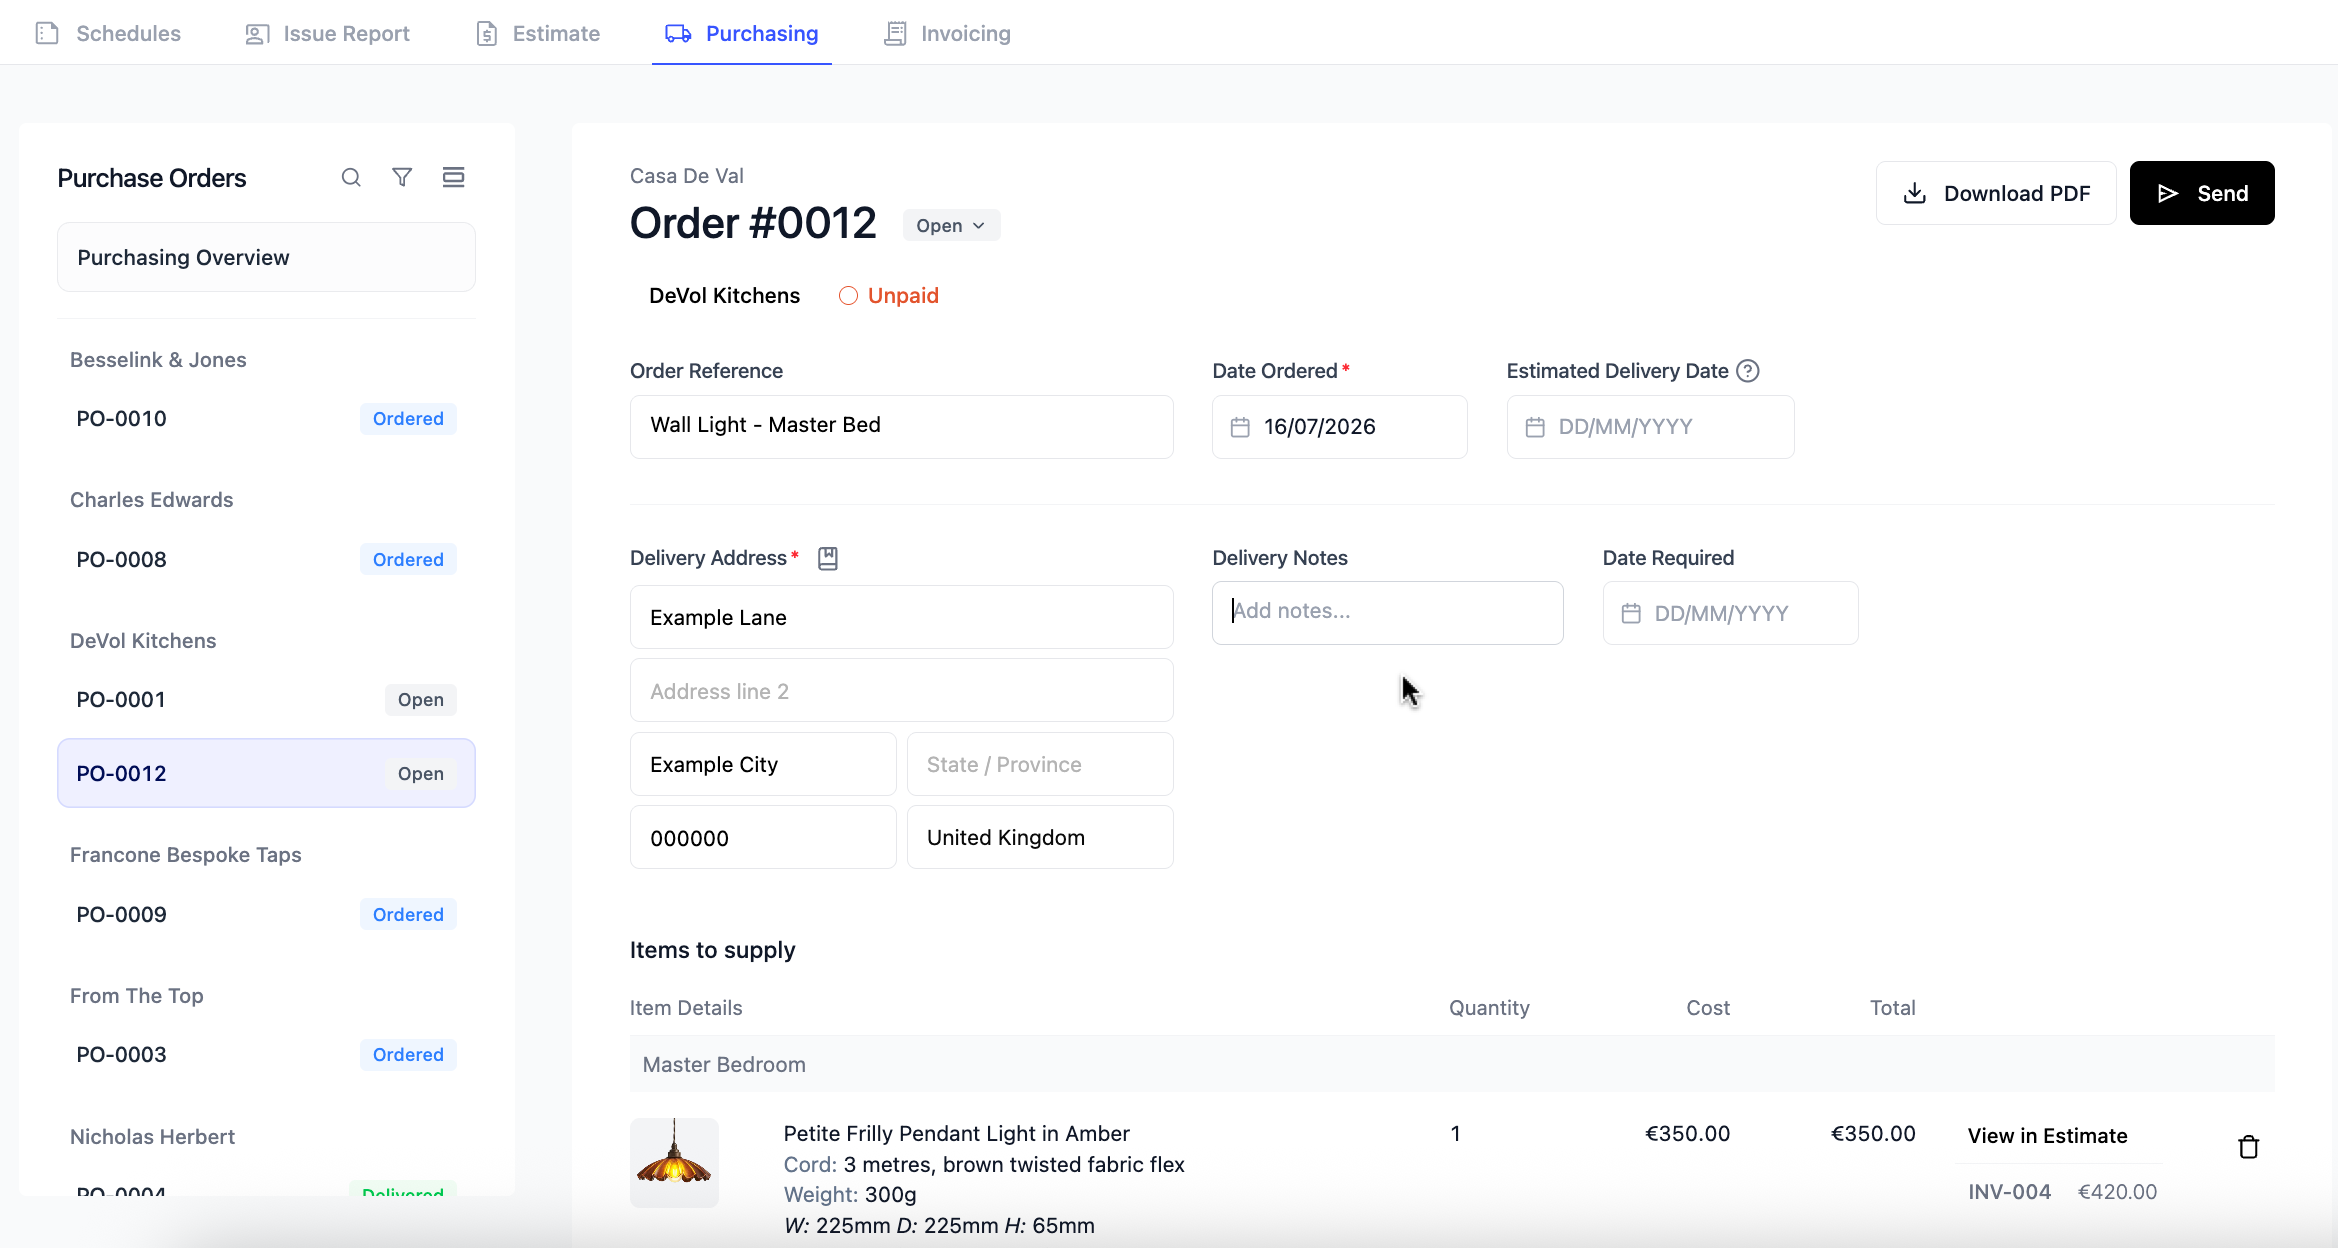
- Preview & Send - When you're happy with your order, click Send, review your email, copy in your design team, personalise your message to the supplier and send it off.
If you need to update your supplier's contact details or address, you will need to do this in your Supplier Database prior to sending your purchase order.
Helpful Tip: Ordering from the same supplier with different delivery locations?
If two items from the same supplier need to be delivered to different locations, we recommend splitting them across separate purchase orders. Since each purchase order can only have one delivery address, keeping them separate avoids any confusion for your supplier and ensures each delivery ends up exactly where it needs to be.
Bulk add to PO
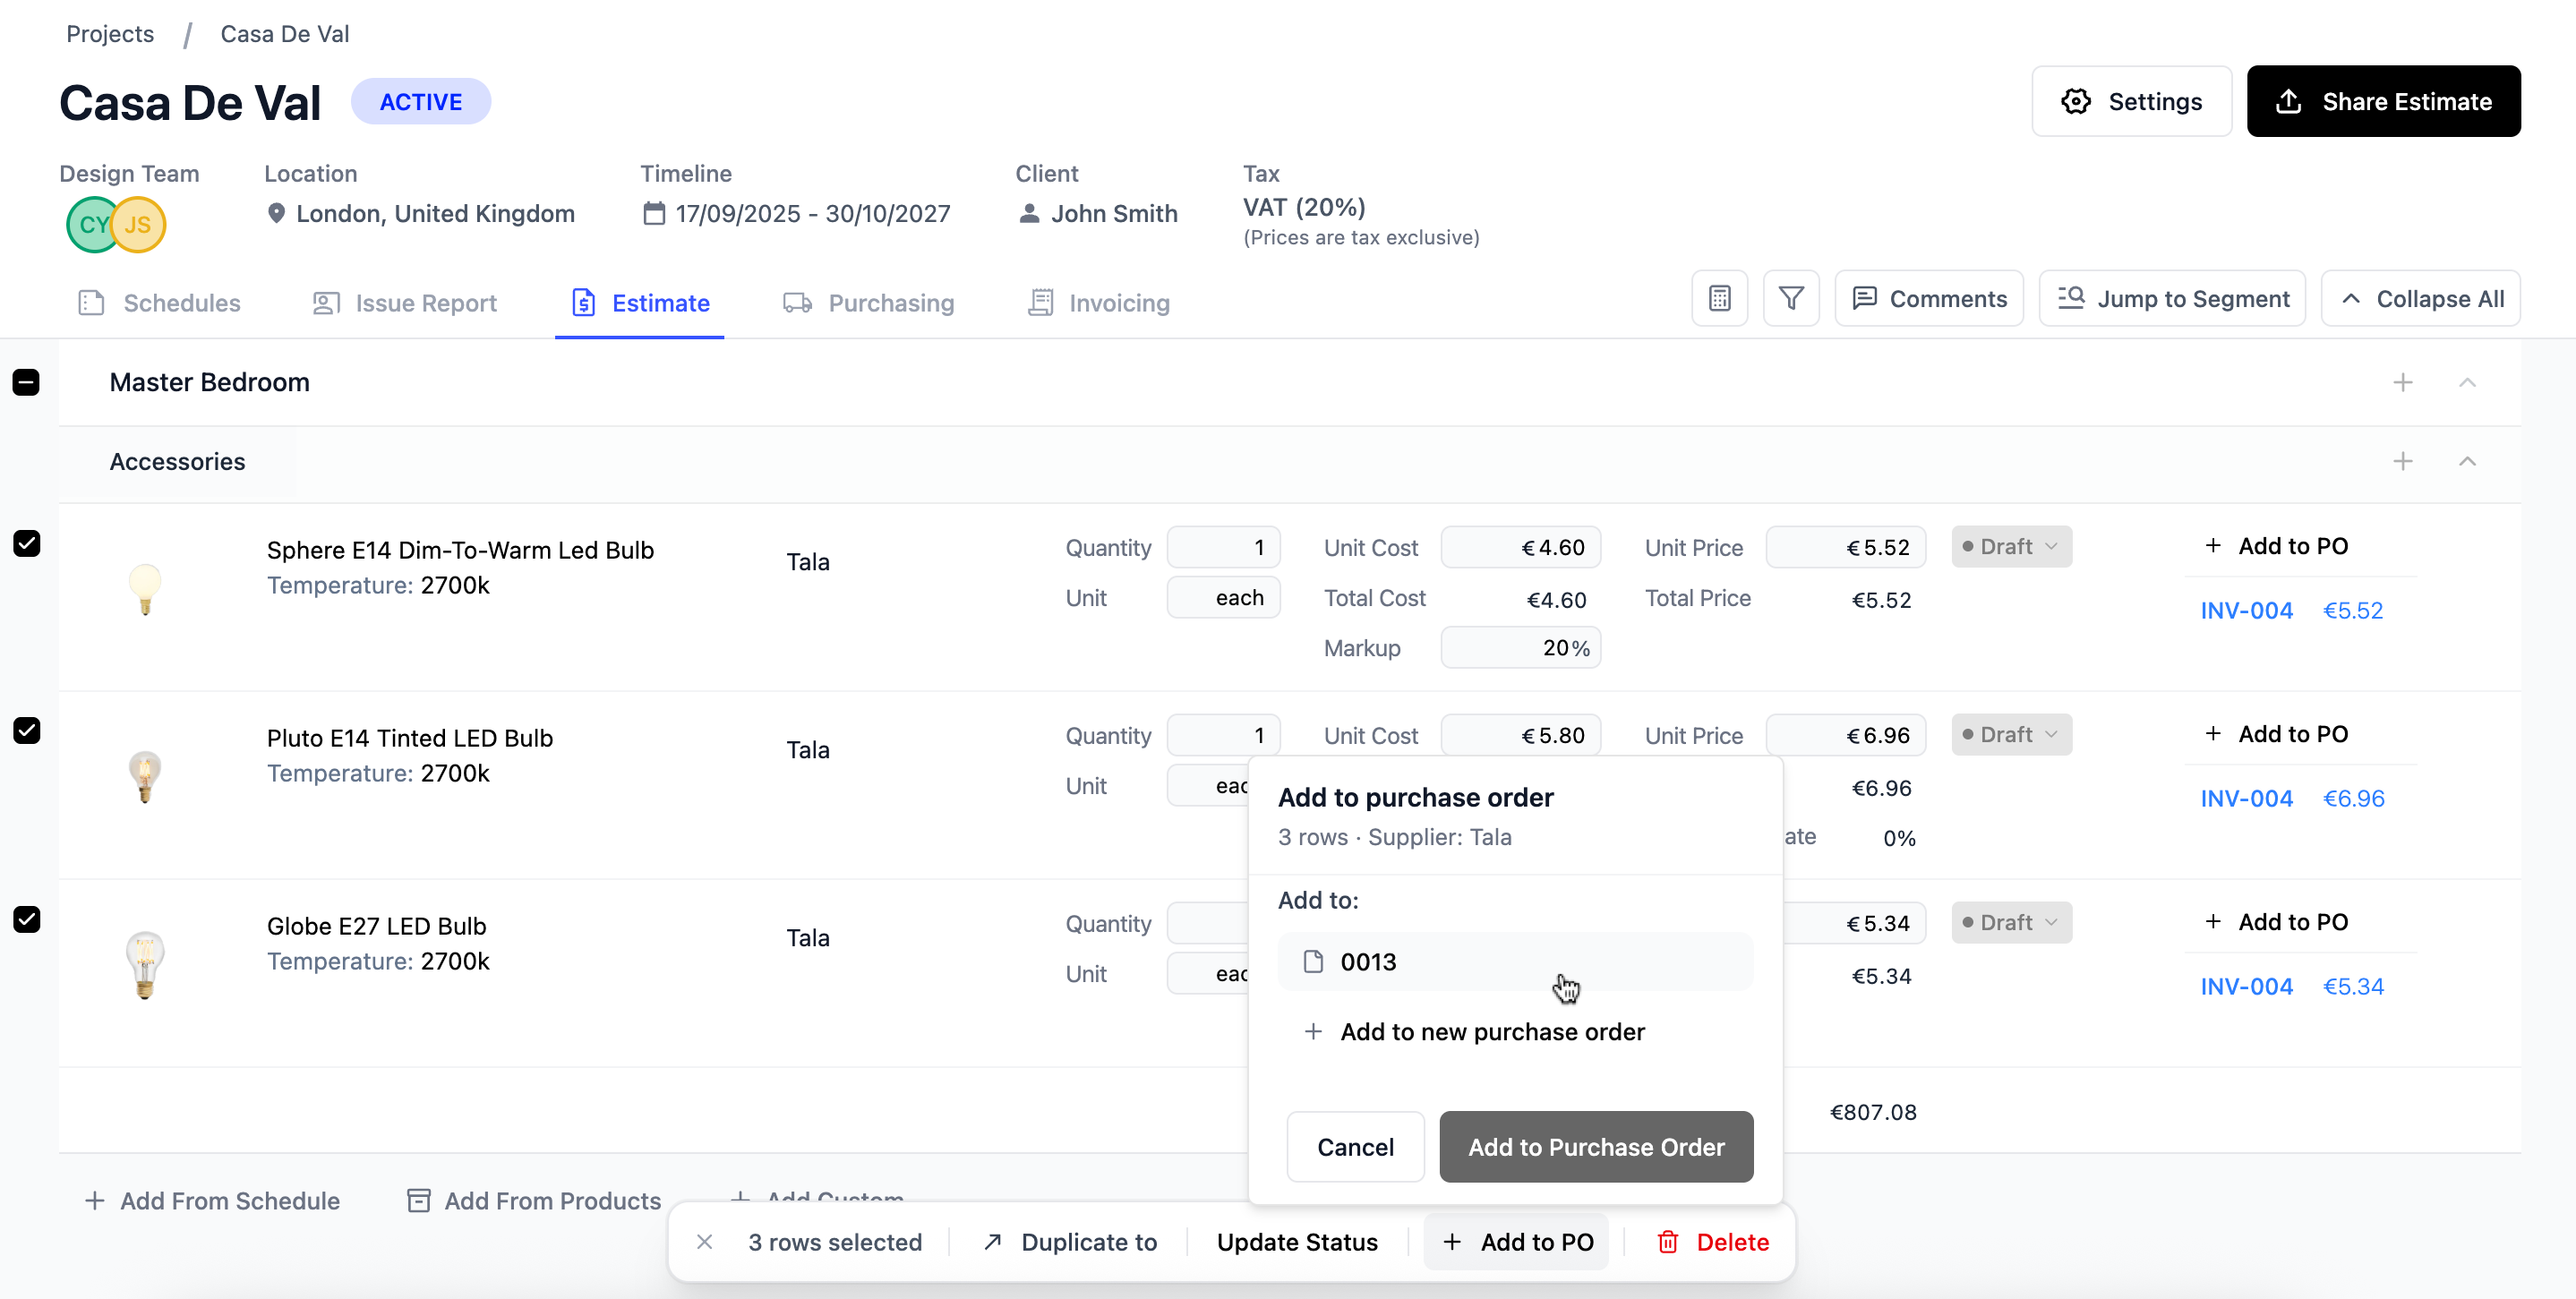
If you are ready to order multiple items from the same supplier, and all items are to be delivered to the same address, then you can bulk add these line items to a single purchase order at once.
- Select line items - choose the line items you want to order by using the checkbox
- Add to PO - select + Add to PO from the action bar at the bottom of your screen
- Choose existing or new PO - generate a new purchase order for that supplier, or add to an existing open order.
Information to include on a Purchase Order
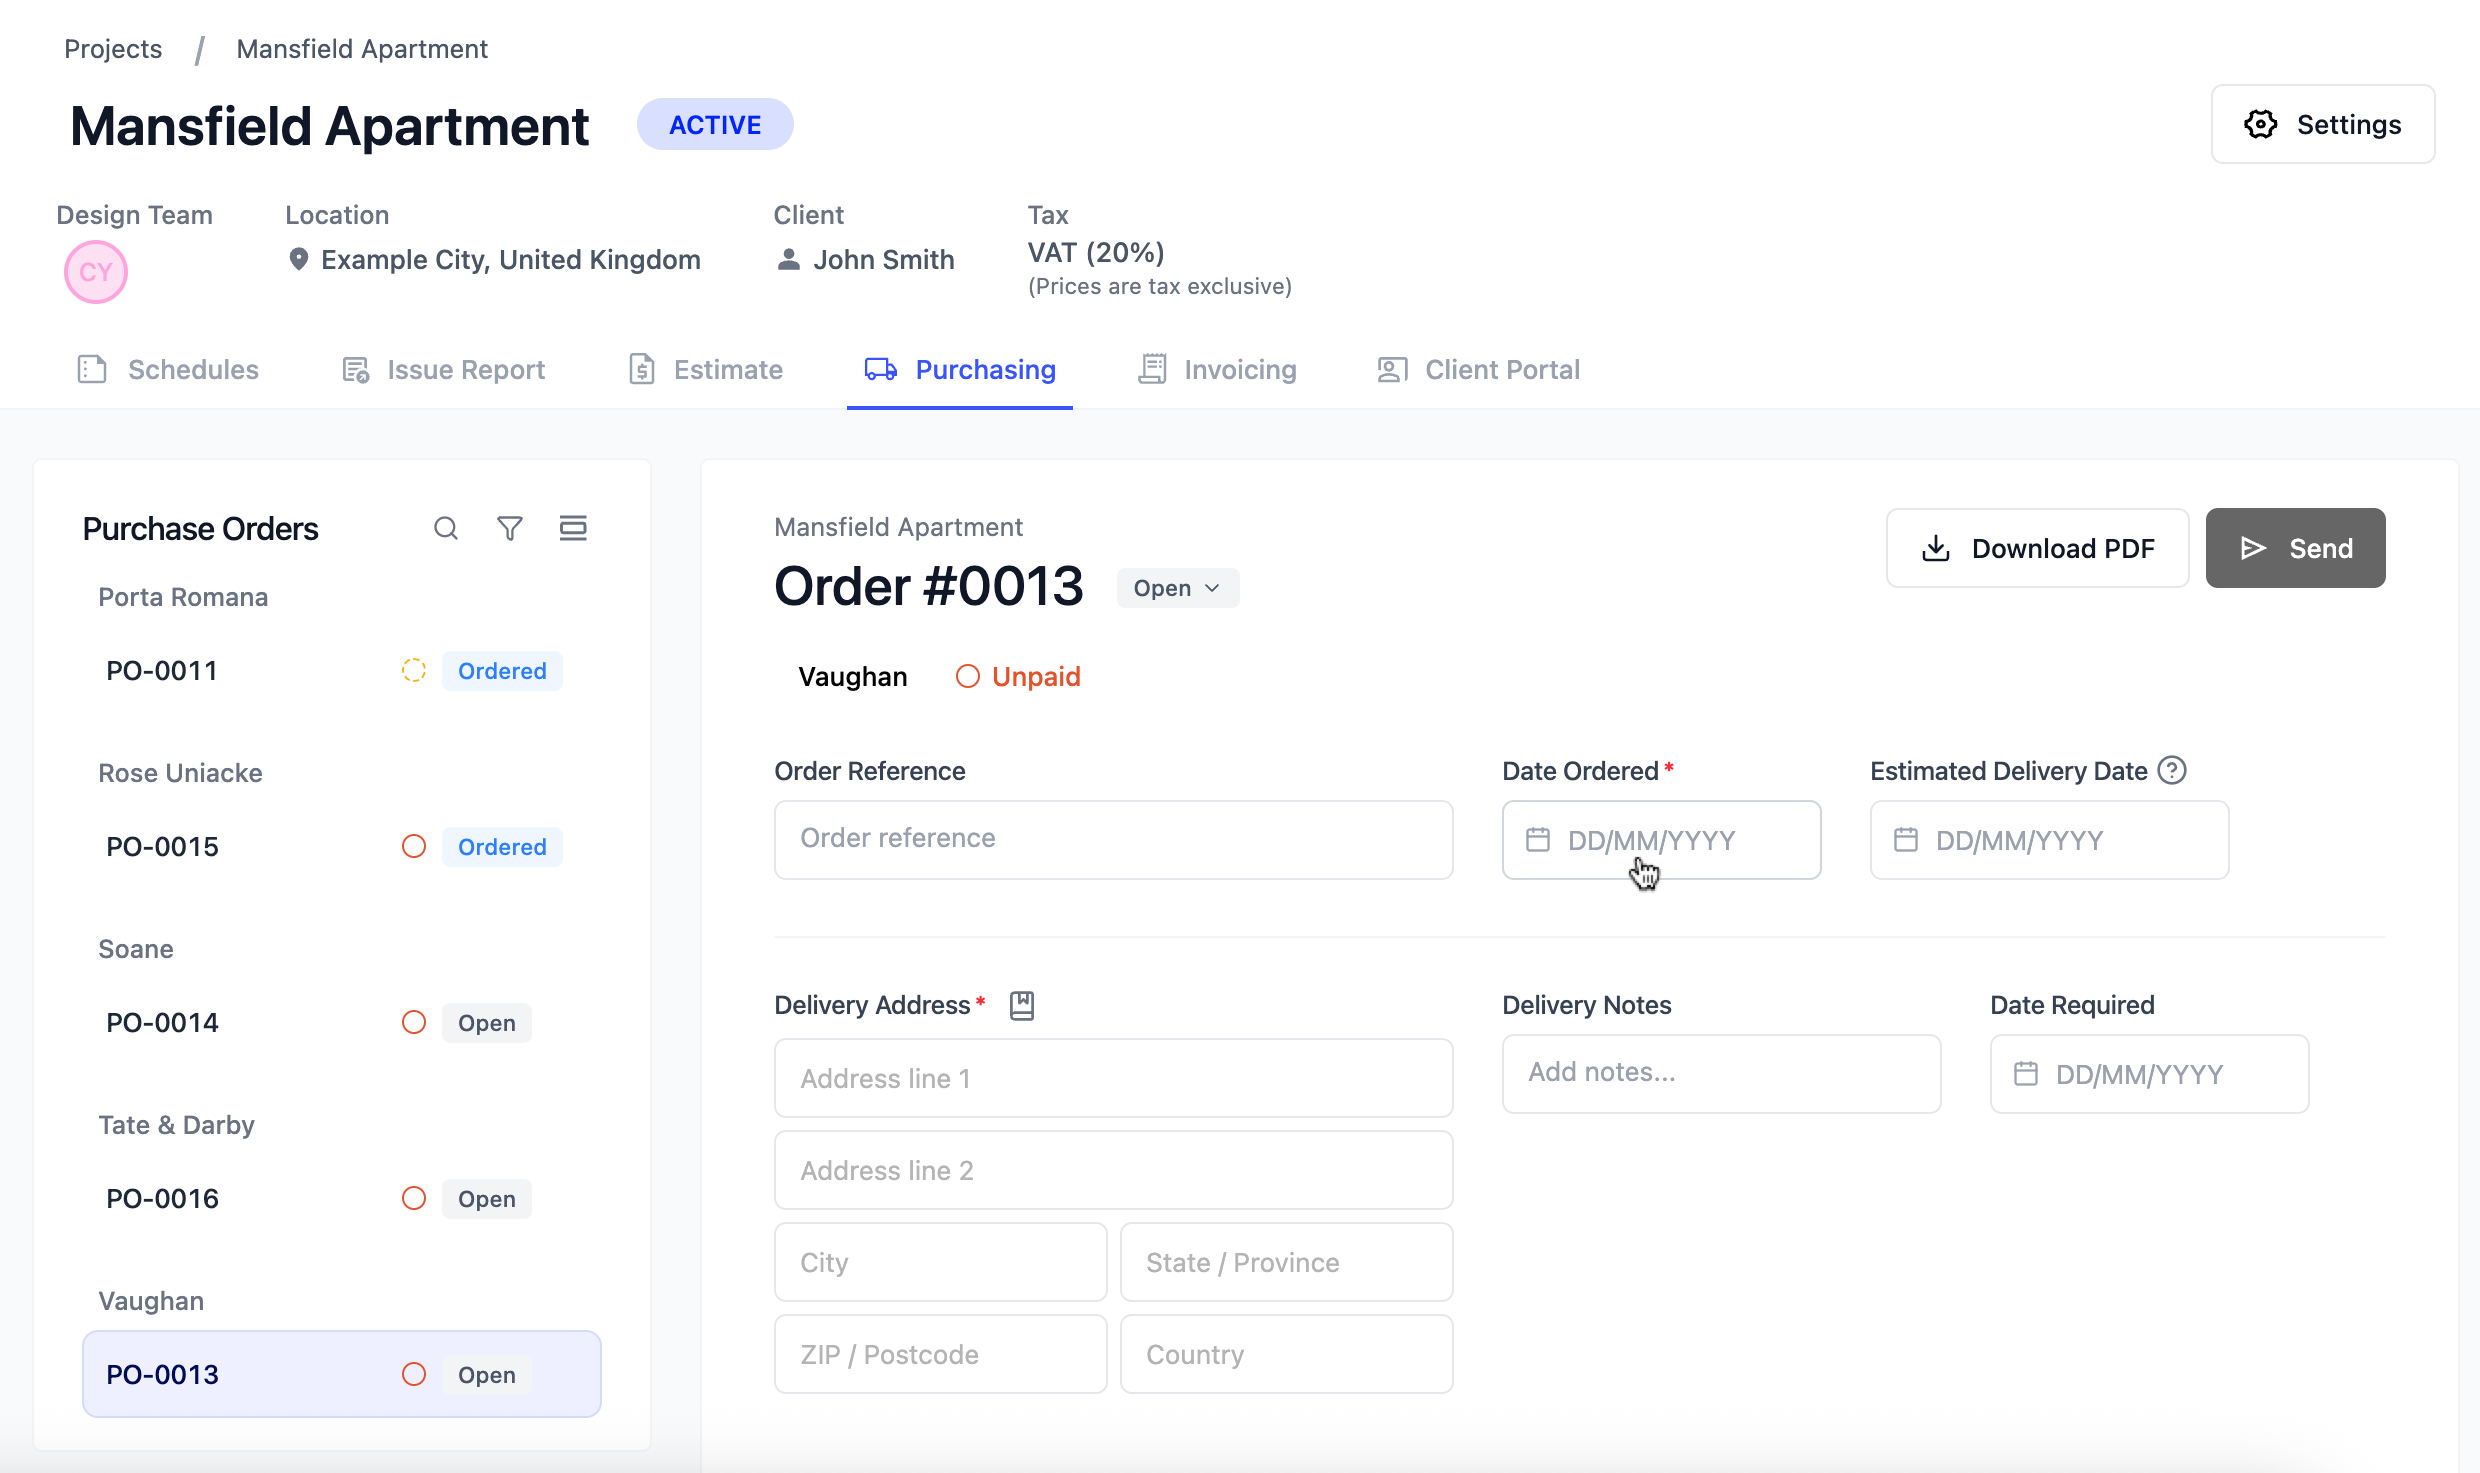
Before a purchase order can be sent to a supplier through Inspec, you'll need to set an Order Date - the date the order is being placed - and a Delivery Address for where the items should be delivered. Without these, the purchase order cannot be either automatically or manually set to Ordered status.
To learn more about using the Address Book for your deliveries, click here.
Recording an order lead time
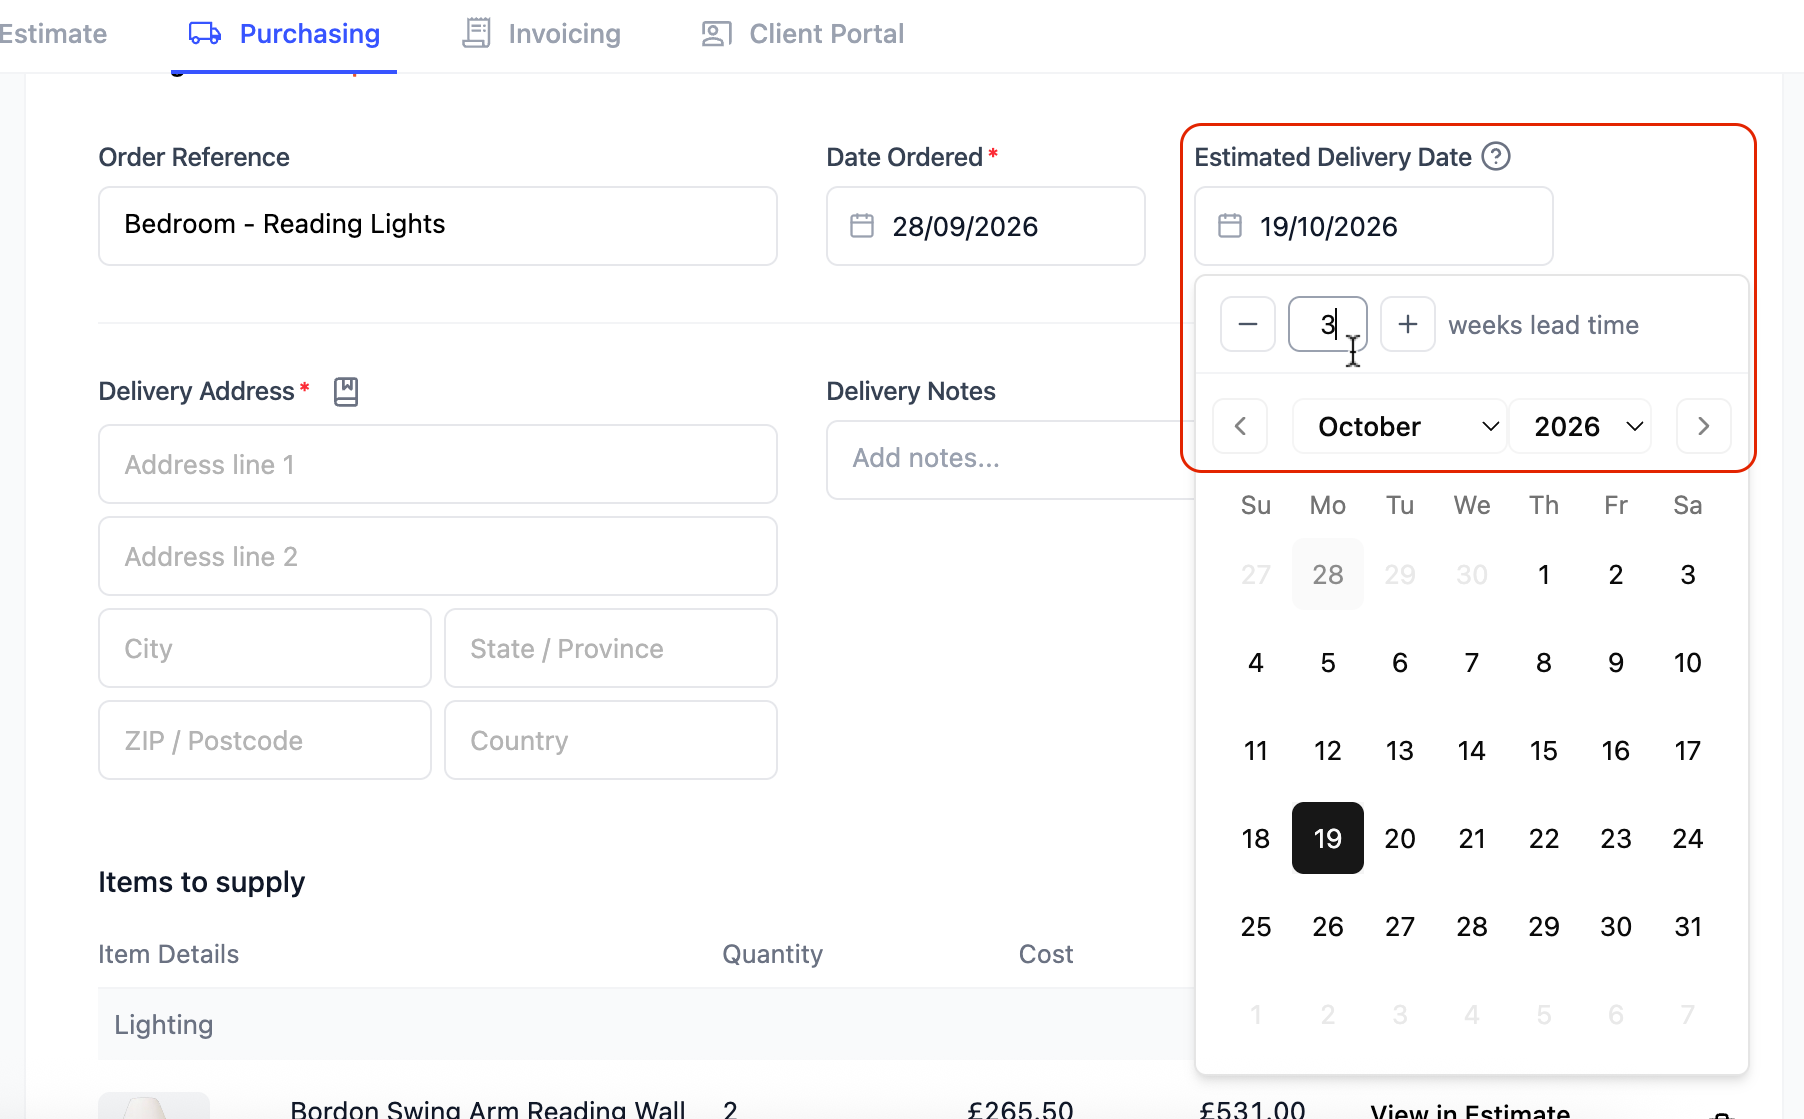
When you generate a purchase order, you can also record an expected lead time for the supplier. This is the number of days it will take for the supplier to deliver the order to the delivery address.
To record an order lead time:
- Set Lead Time - Click on the Estimated Delivery Date field in the purchase order information section. You must have an order date set before you can set a lead time.
- Enter the number of weeks - Either enter the number of weeks it will take for the supplier to complete the order, or choose an exact date from the calendar.
Setting an estimated delivery date means that Inspec can automatically flag the order as overdue should the status of the order not be updated to Delivered by the set date. This will help keep you on top of your purchasing and avoid any delays in your project.
Purchase order statuses
As a purchase order moves through the procurement process, its status updates to reflect where things stand. Some statuses update automatically, while others require manual updating by the designer.
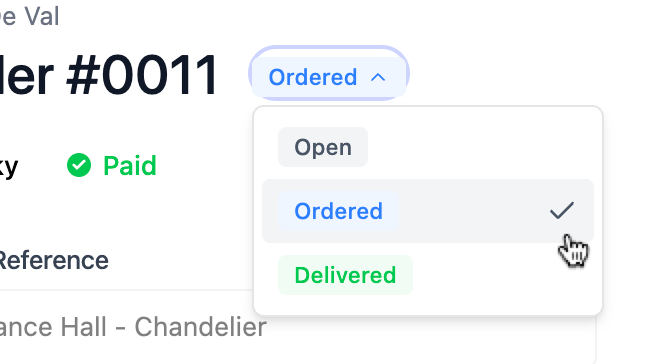
- Open - The purchase order is active and can still be edited.
- Ordered - The purchase order has been placed with the supplier and is now locked for editing.
- Delivered - The order has been delivered to the designated delivery address.
- Cancelled - The order has been refunded entirely and is therefore considered cancelled. This is an automatic status and will only update once items are refunded.
- Archived - The purchase order has been voided. Note this status option is only available in the dropdown once all items to supply have been cleared from the order. Active POs cannot be archived.
Archiving purchase orders
It is possible to archive a purchase order if it is no longer required, or if it was created by mistake. Purchase orders cannot be deleted, since Inspec encourages historical documentation of all orders and financial movements.
To archive your active purchase order:
- Clear the order - Ensure any recorded payments have been refunded/credited. Delete any line items shown in items to supply
- Update the status - Once you have a cleared order, you will see an option in the status dropdown called Archived
- View archived orders - To see any archived orders, scroll to the bottom of the Purchasing Overview page.
- Restore an archived order - You can restore an archived order by clicking on the order in the purchasing overview page, and updating it's status manually back to open
Recording purchase order activity
In this section, you can document any activity against your purchase orders, such as payments, credit notes, quotes, shipping details and relevant attachments.
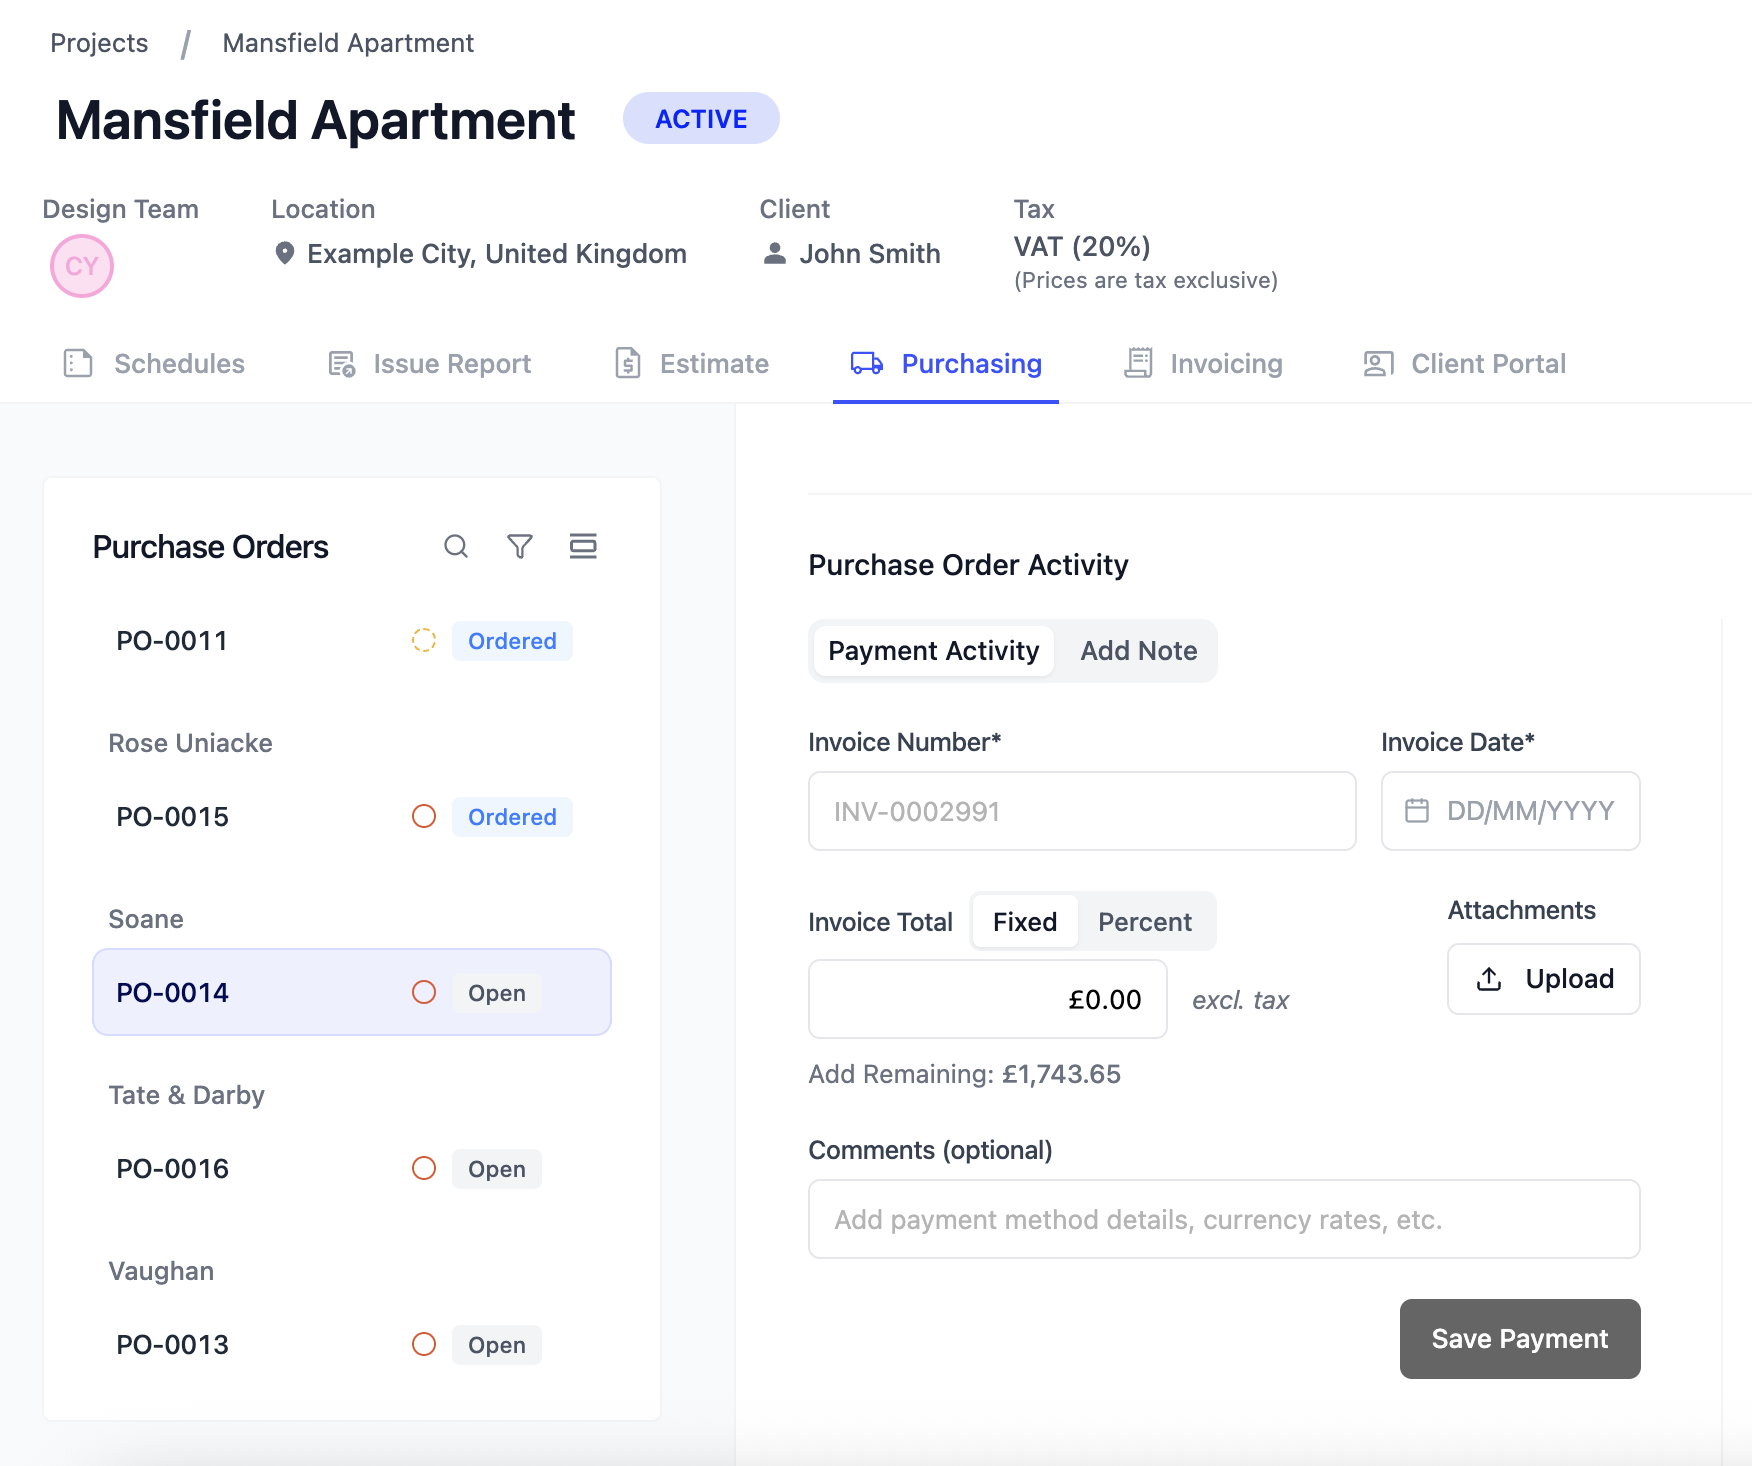
Updating order payment activity
Inspec's procurement feature was designed to help you and your team keep track of all cash flow activity beyond just invoices to your clients. Regularly logging any payment activity against your purchase orders will help you notice any unexpected cost increases, duplications and any errors on your supplier invoices as soon as they come in.
When you receive an invoice or deposit request from your supplier:
- Find the corresponding order - Go to the Purchasing tab in your project and find/open the related order from the purchasing side bar.
- Add payment activity - Scroll to the Purchase Order Activity section at the bottom of the page and click on the payment activity tab.
- Review order subtotal - The order subtotal will be visible as indicated by the red arrow in the image below. Check that this amount matches the subtotal of your supplier's invoice. If it's a match, you can click on "Add remaining" to quick add this amount to your invoice total field.
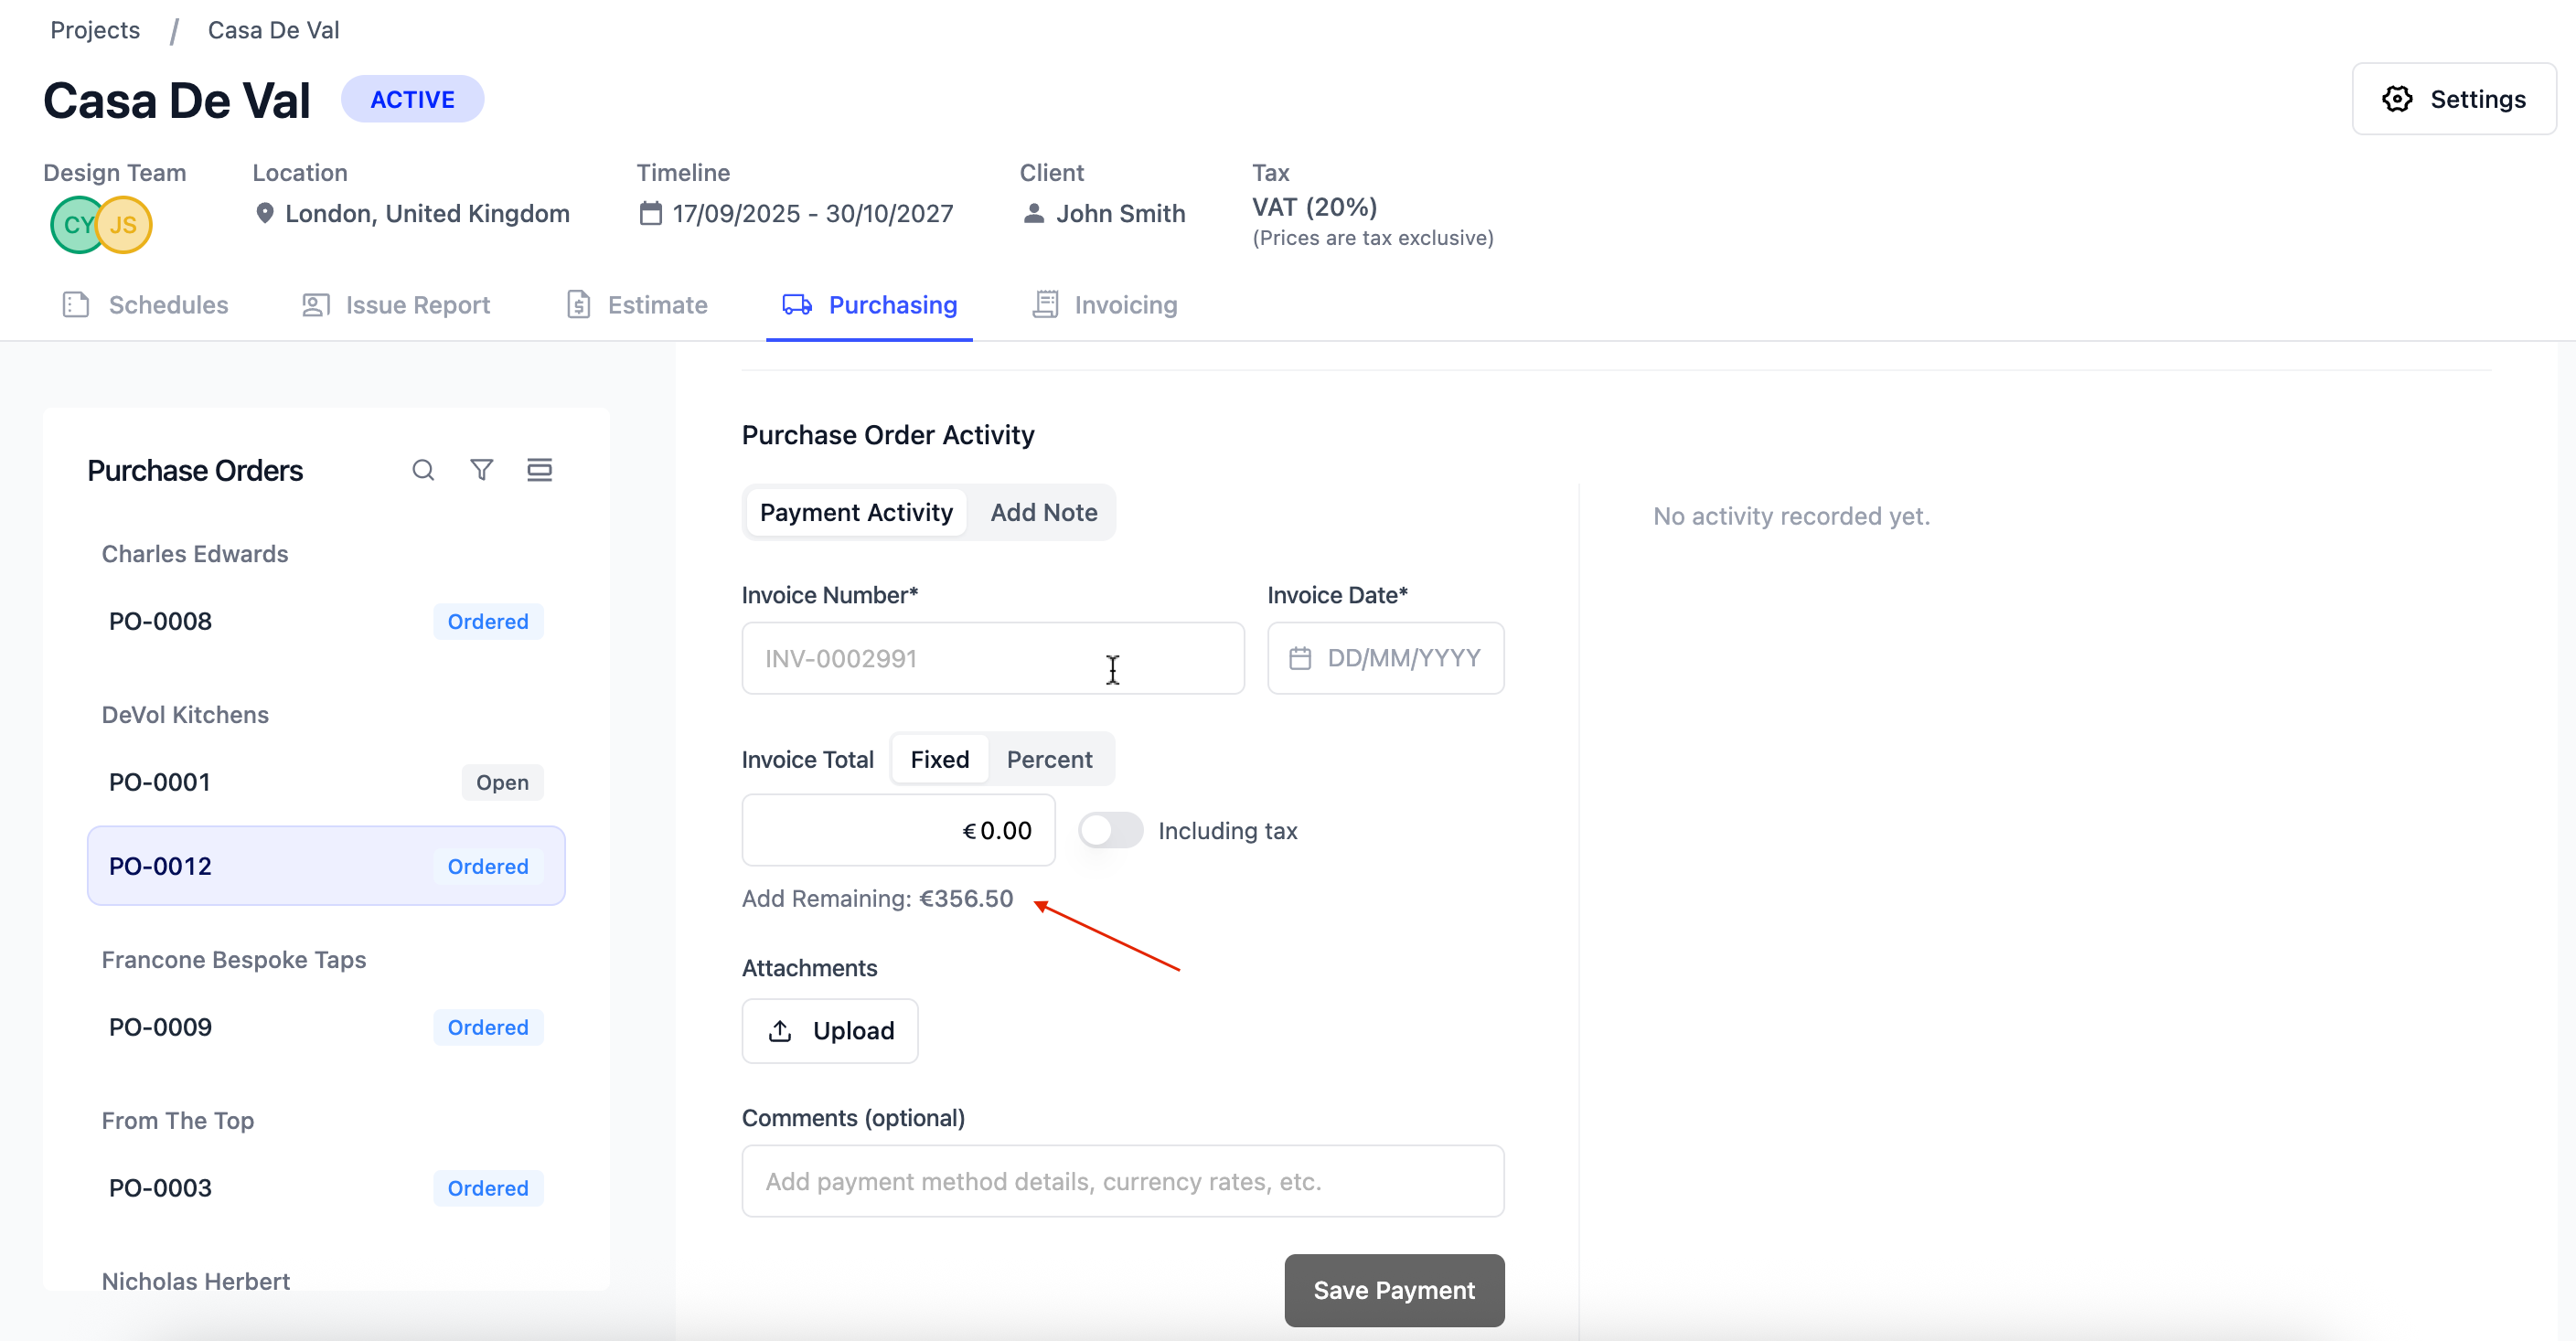
- Record payment - Add the supplier's invoice details, deposit amount or total cost, and upload a copy of the invoice for future reference & reconciliation.
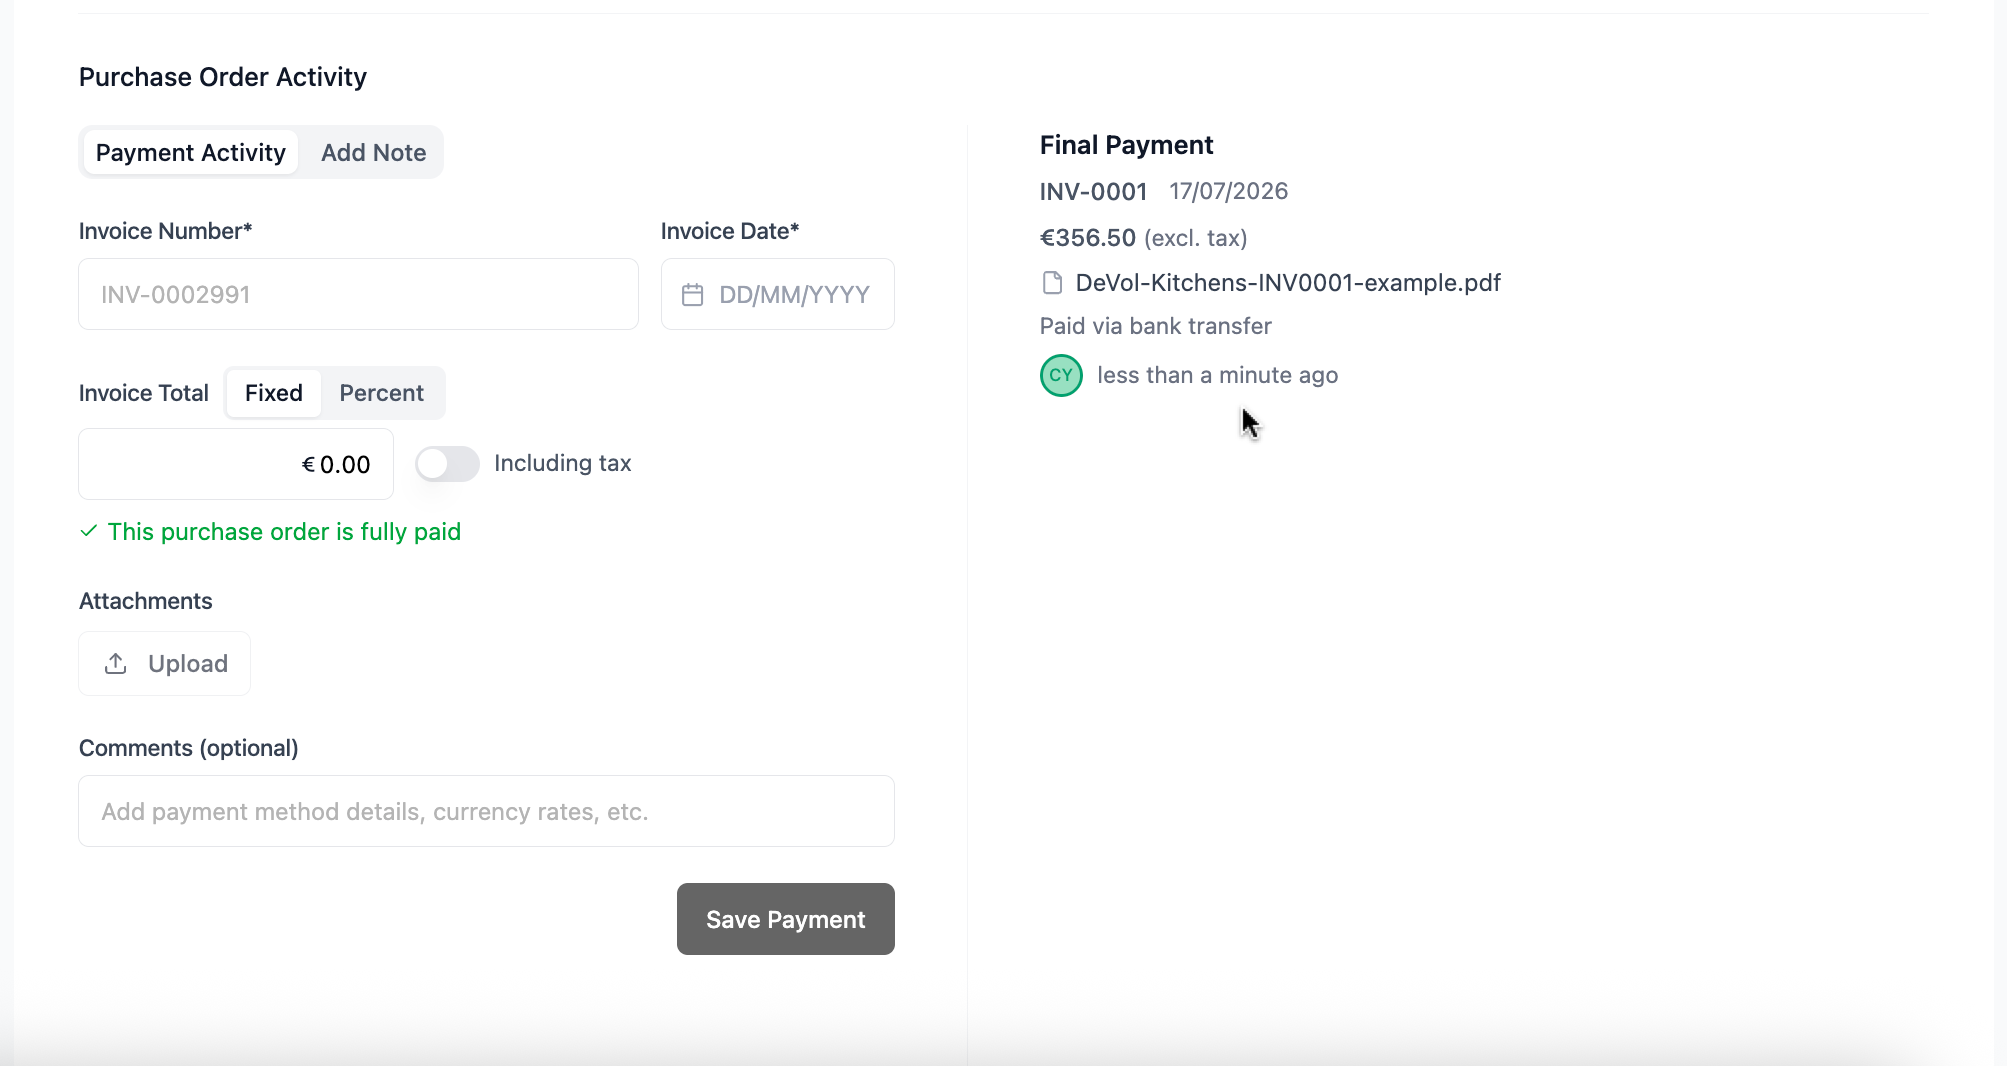
- Save payment - When you've recorded all details, click Save Payment to see this new entry logged on the right side of the screen.
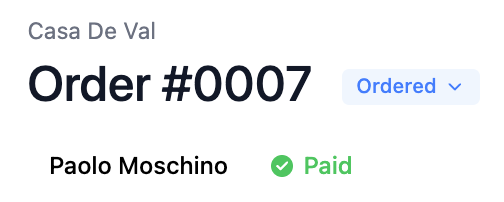
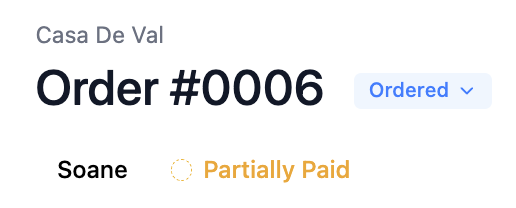
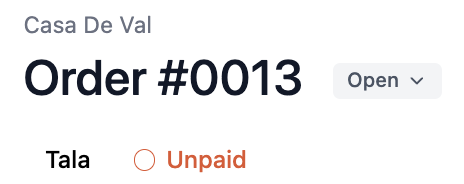
Payment status will be recorded at the top of the order page, beneath the order number by the supplier's name.
Recording partial payments
If your supplier has only requested a deposit or partial amount of the order subtotal, you can record this and Inspec will mark this order as partially paid.
To learn more about recording payment activity, click here.
Processing supplier credit notes
While payments are recorded against a purchase order as a whole, credit notes are processed at the individual line item level. This gives you more flexibility - if only one item in a multi-item order needs to be credited, you can do so without affecting the rest of the order.
Since a single purchase order can be linked to multiple client invoices, processing refunds at line item level also keeps your client estimate accurate and avoids any confusion about which invoice the credit applies to. All refunds and credit notes feed back to the client estimate and update totals automatically.
To process a credit note against an item on a purchase order:
- Click Credit - Click the credit icon to the right of the line item on your purchase order
- Enter Credit Note Details - Record the credit reference number, amount and attach a copy of the credit note for future reference
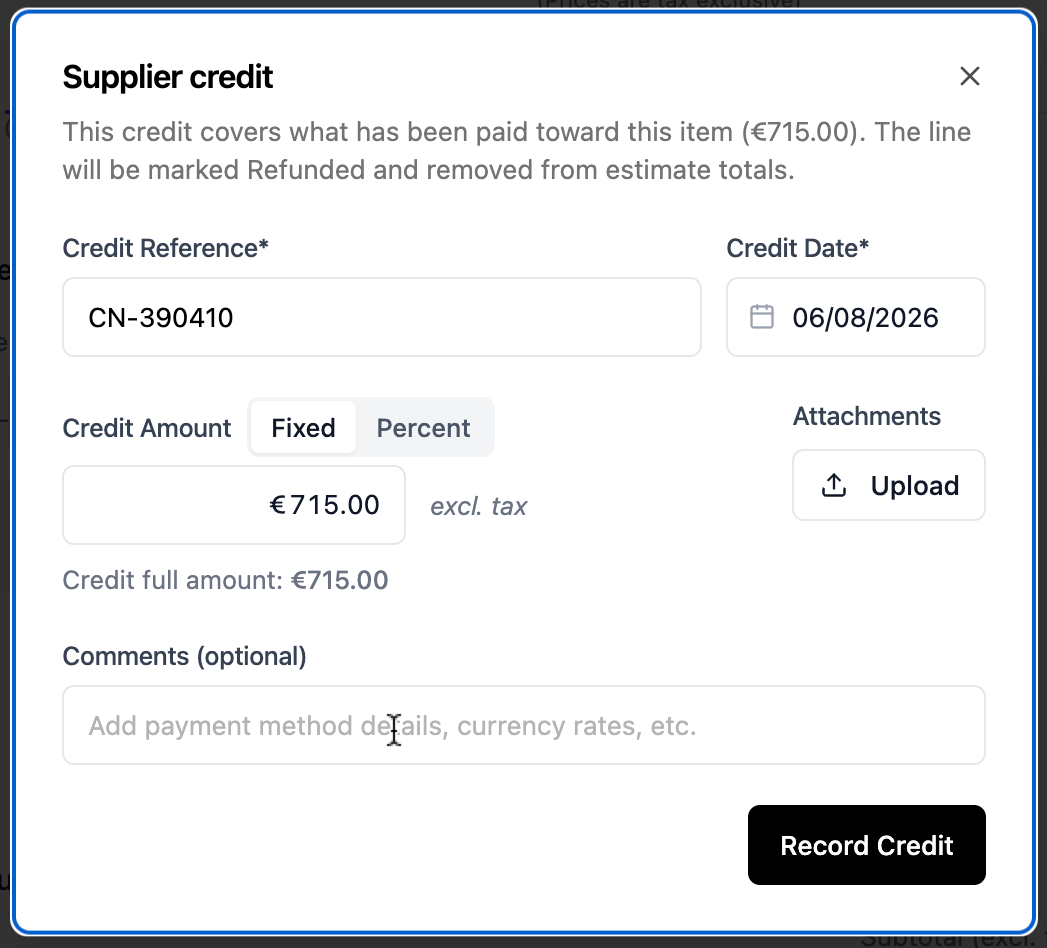
- Record Credit - Once you've entered all the details, click Record Credit. This line item will be automatically greyed out in both the PO and on your client estimate.
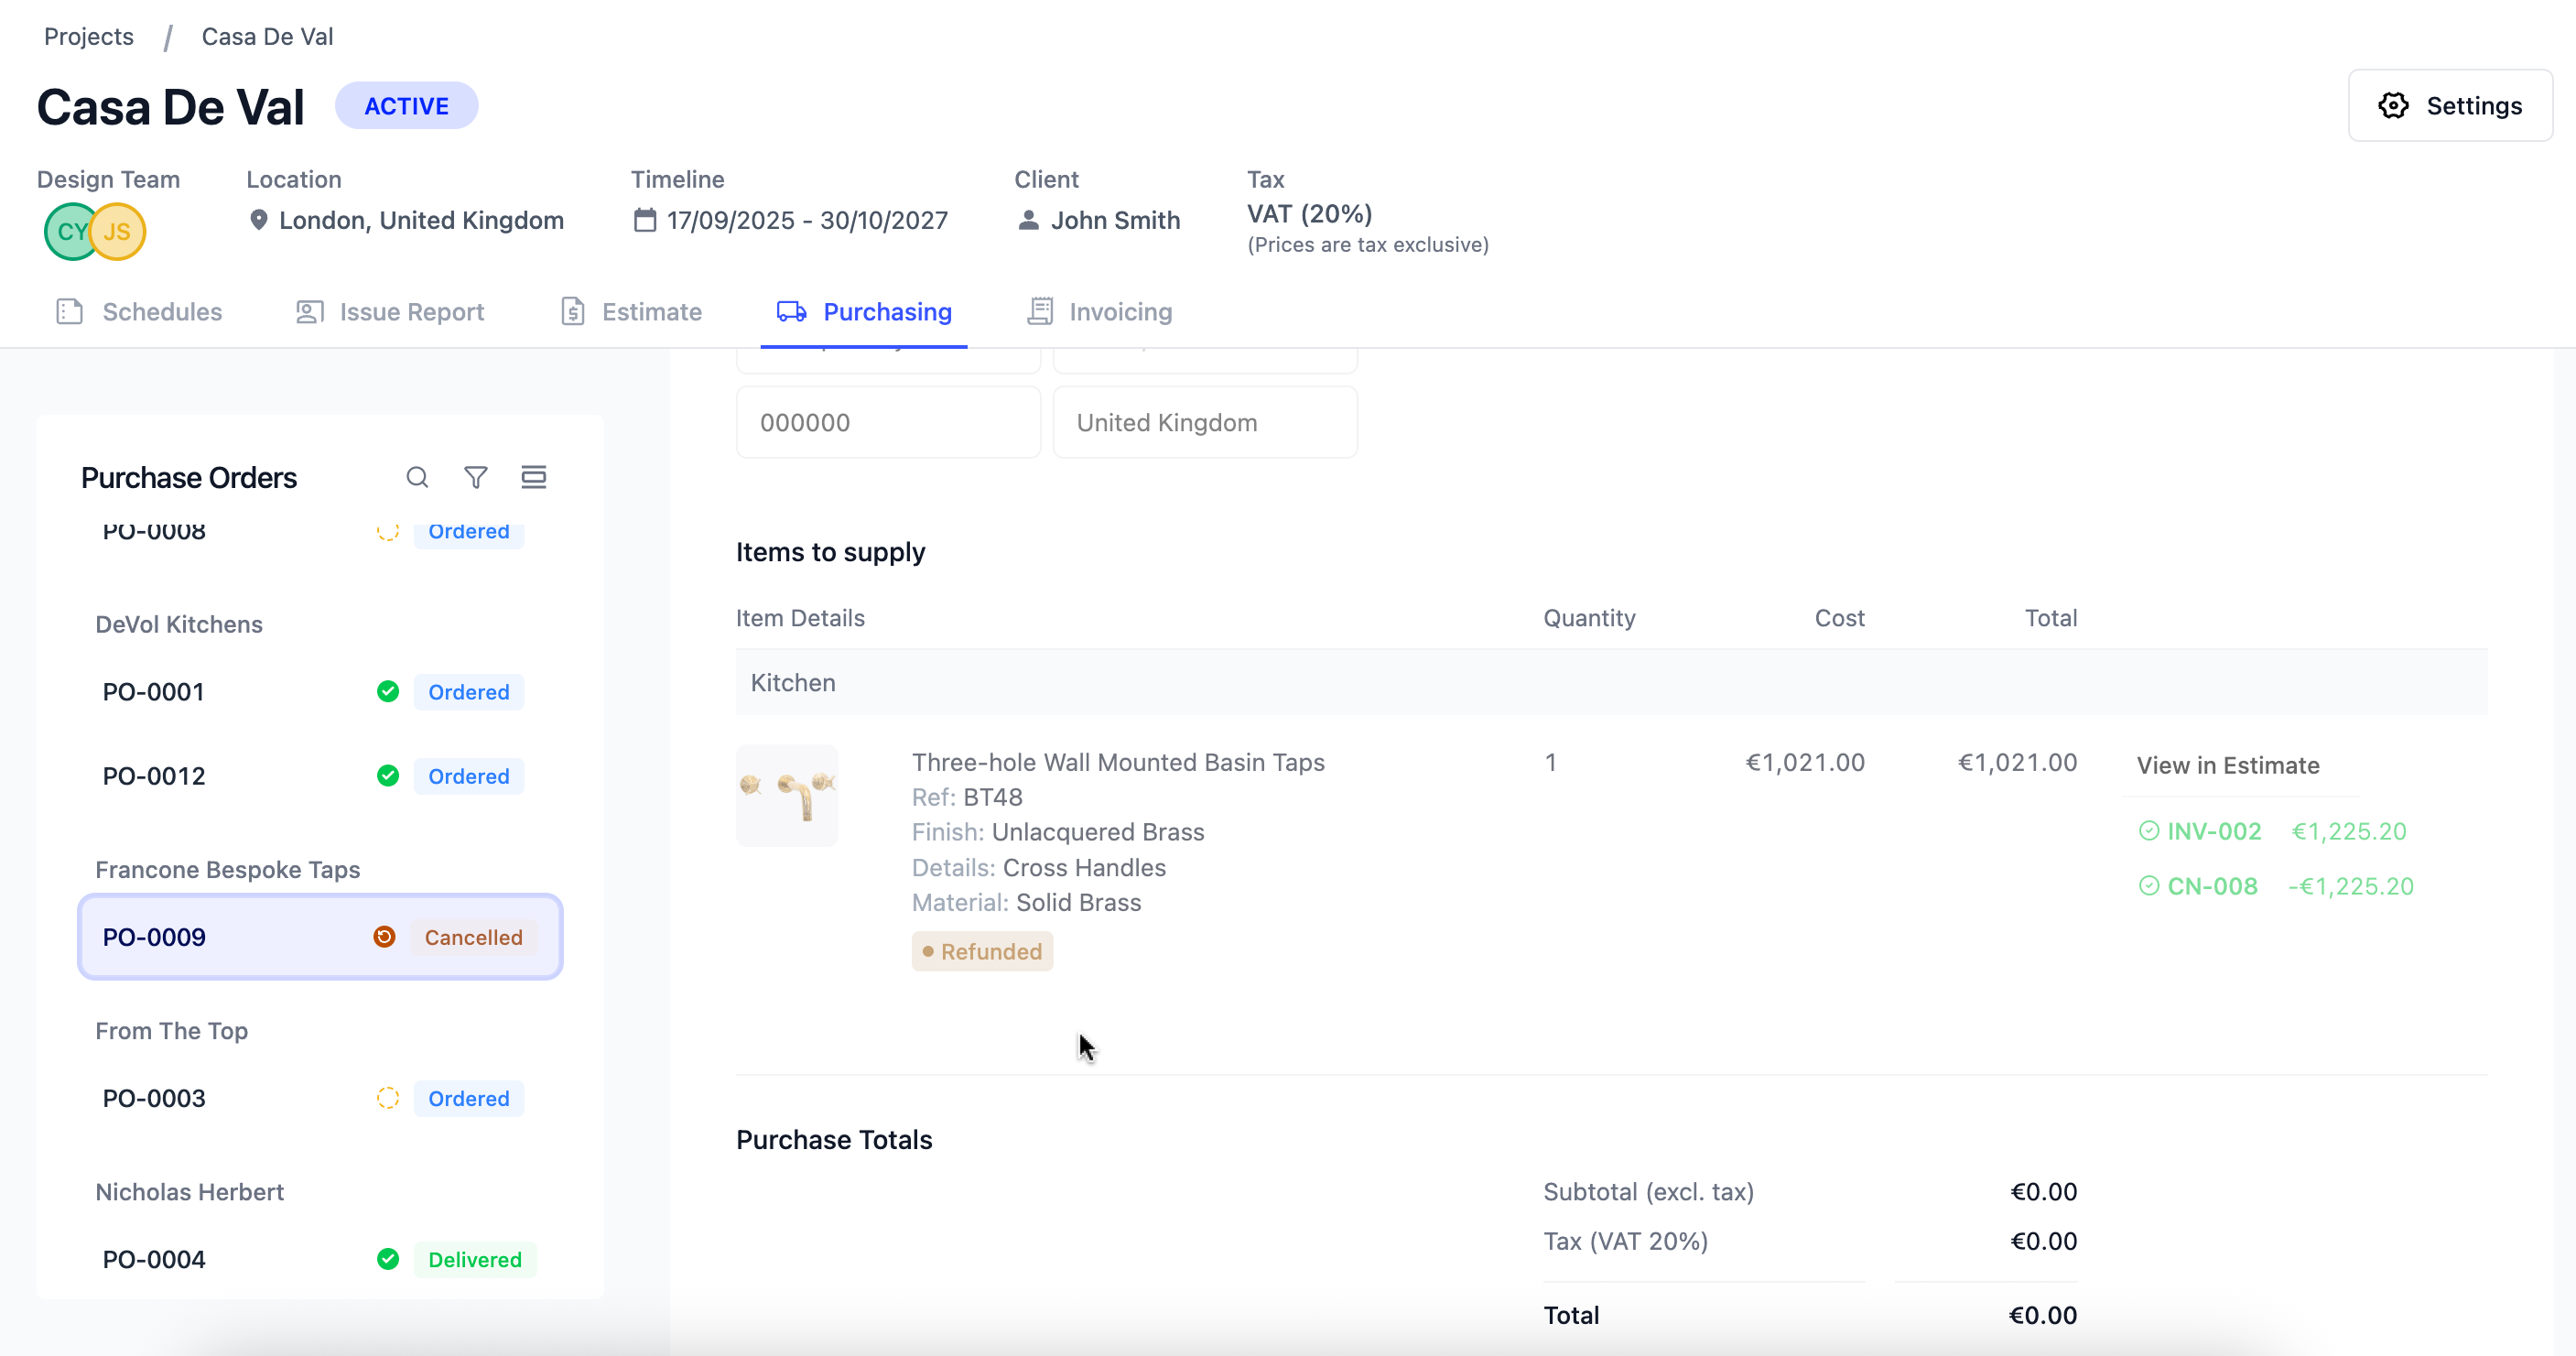
If every item on a purchase order has been refunded, the order status will automatically update to Cancelled. If only some items have been refunded, the order will remain as Ordered until the remaining items are resolved.
To learn more about purchase order statuses, click here.
Note: Refunding Components
When you process a supplier credit for a component line item, the item will be split out from it's original grouping to become a regular line item. This is so that the line can display its own independent status. To learn more about components, click here.
Adding notes to your purchase order
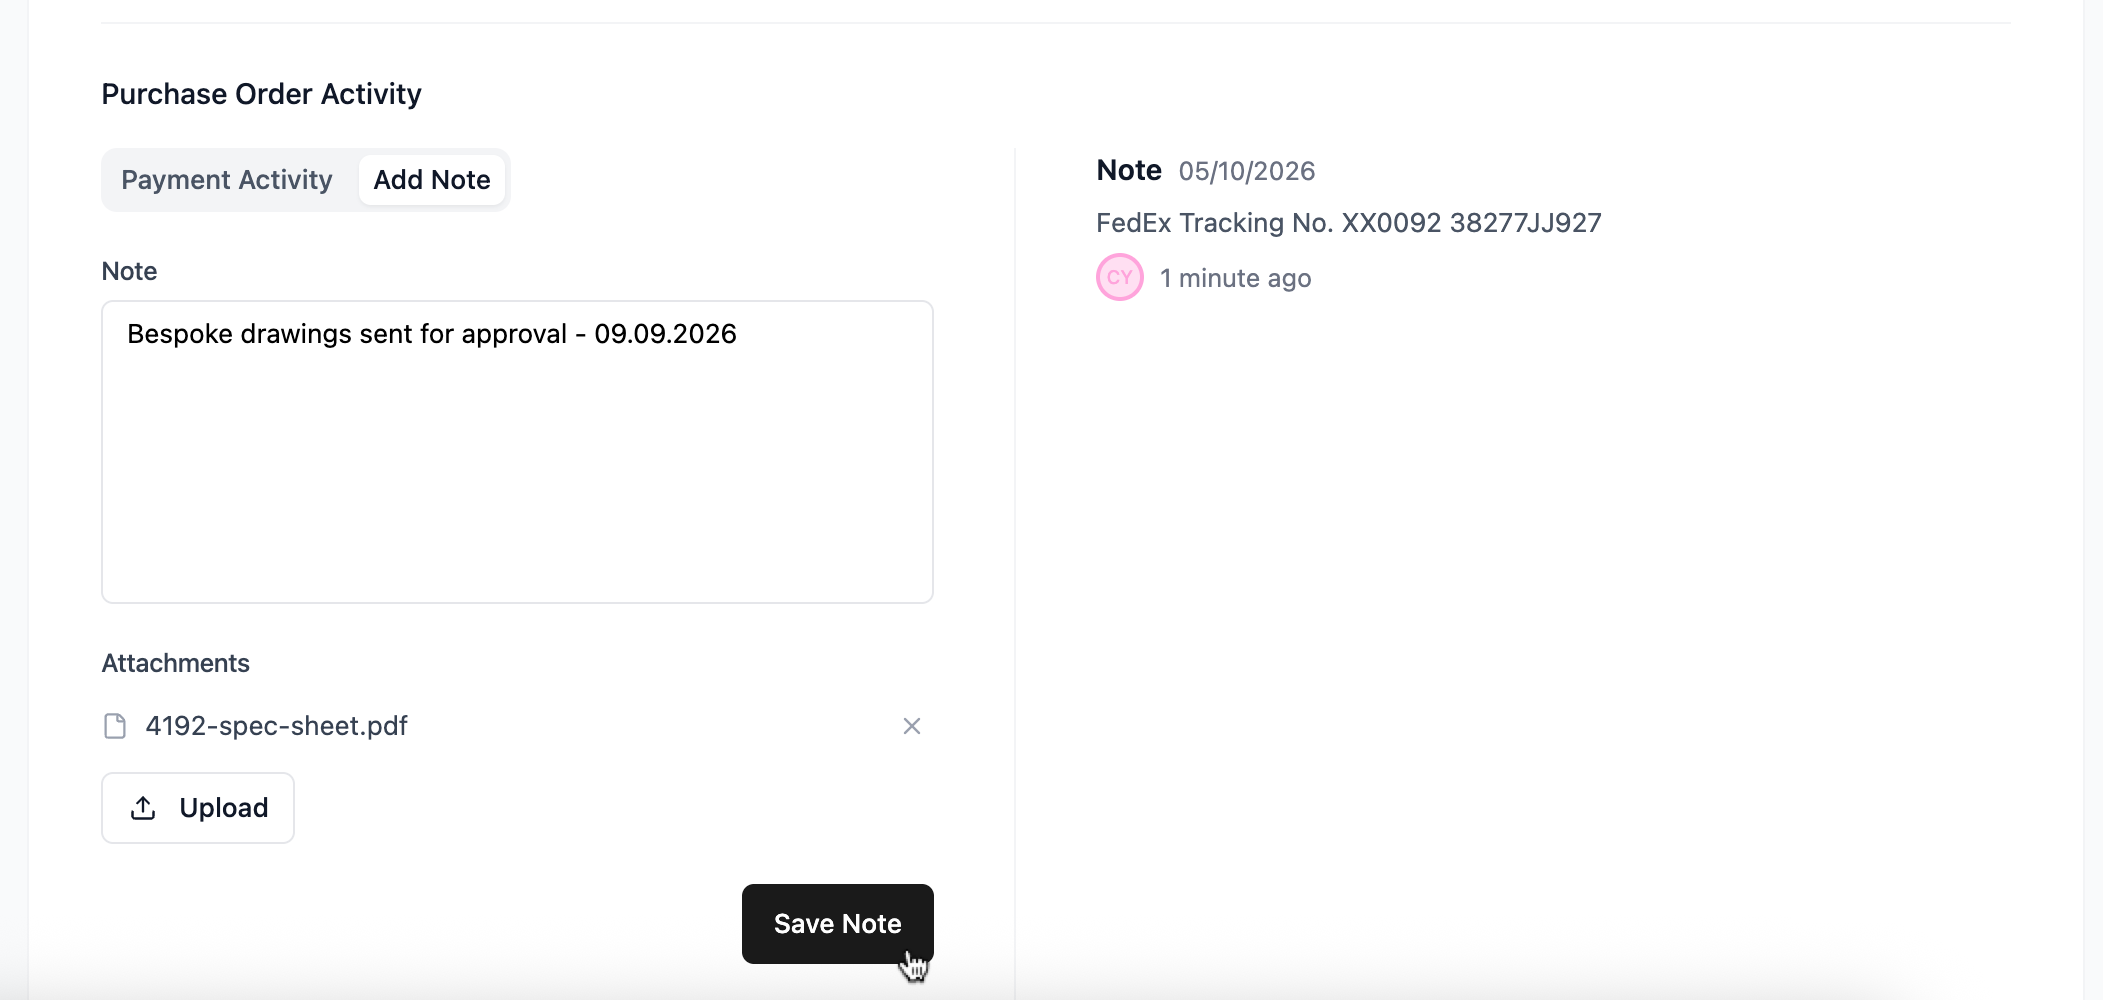
The notes tab in the purchase order activity section a useful place to keep all relevant order information in one spot rather than hunting through emails or external documents later. Notes are only visible to your team and never shared with the supplier.
Use it to record anything relevant to that order, such as shipment tracking numbers, supplier references, approval notes for drawings or documents, or any important communication that needs to be logged against the order. Keeping this information centralised means anyone on your team can pick up where you left off without needing to chase down the details.